Saturday, October 25, 2014

Brother I Like Your "Stache" **The Robin's Nest & Paper House w/ Want2Scrap & Plaid & Xyron**

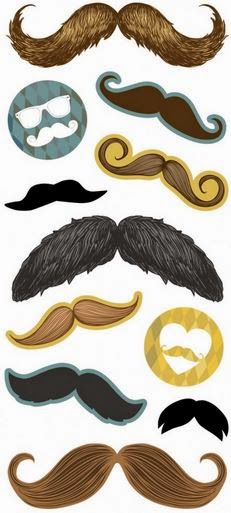
At the end of Morgan's 2nd grade year in, June of 2014, they had a class party.  They asked people to bring in props for fun photo booth pictures, really it was just a mom taking pictures of the kids dressed up, but they had a blast.  I had bought these sticker mustaches to be used at our family pictures, but I forgot to bring them, so what a better use than for silly pictures at school!!  Here is Morgan and Brandon mugging for the camera looking very "Lonely Hearts Club Band" from the Beatles and the fun mustaches!!

 
I used the wonderful papers and Dew Drops from The Robin's Nest, along with Paper House stickers and papers, paint from Plaid,  and Want2Scrap Nestabling and Nestaboard to create this layout.  For more info about The Robin's Nest items please see their blog HERE.


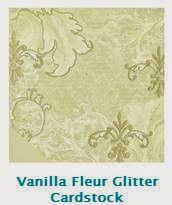
I used many colors as seen below of the Fleur cardstock from The Robin's Nest for this layout.  The backsides of all these Fleur papers have this wonderful stripe that I mostly used for my layers.  I used lots of strips to make layers upon layers over the Sun Yellow Glitter Cardstock.  I used the backside of the Silver Roses cardstock to mat my picture.

http://www.shop.robinsnest-scrap.net/main.sc
http://www.shop.robinsnest-scrap.net/main.schttp://www.shop.robinsnest-scrap.net/main.sc


Using the papers as my base of color, the Mustache 3D and Puffy Stickers from Paper House just added to the wonderful color scheme I already had going on, and also to the fun of the picture!!  I then colored the wonderful title of "Brother" from Want2Scrap in a coordinating yellow paint blend (orange, yellow, brown, and white) from Plaid cutting off the "s" so the sentence "Brother I Like Your 'mustache'" made sense.  I even added a little sticker Mustache from Paper House to the letter "t" for fun.
 
https://www.paperhouseproductions.com/https://www.paperhouseproductions.com/

http://want2scrap.com/store/
http://www.plaidonline.com/mod-podge/brand/home.htmhttp://www.plaidonline.com/mod-podge/brand/home.htm

I also pulled the navy color from the layout using a mist to color the Nestaboard from Want2Scrap adding in pearl paint dots to the edges to 
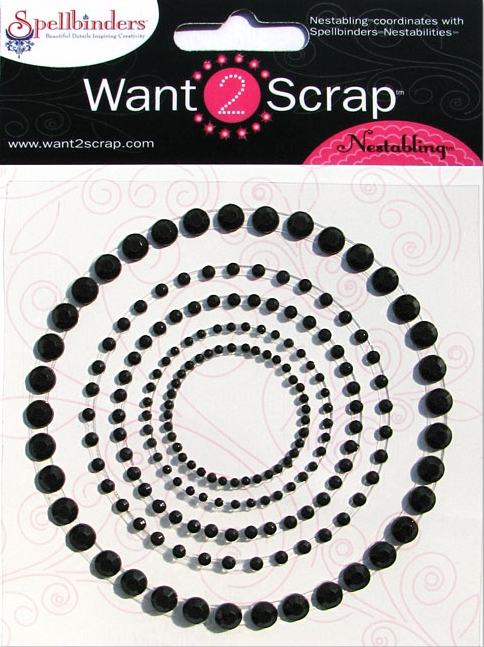
coordinate with the layers of the Black Nestabling from Want2Scrap.  

http://want2scrap.com/store/http://want2scrap.com/store/


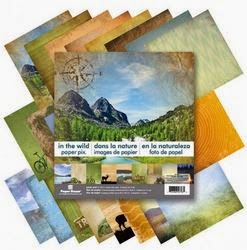
The colors of the paper stack "In the Wild" from Paper House just lent perfectly to this layout.  I used various papers from the paper pad as strips in this layout.  The strips are super easy to layer together with the ease of Xyron adhesives!!  You can also see here that I used the Vanilla Fleur striped side from Robin's Nest to create the journaling strips, the lines made it super easy to write straight!!

https://www.paperhouseproductions.com/


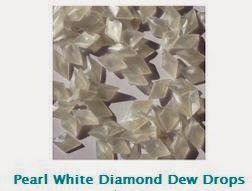
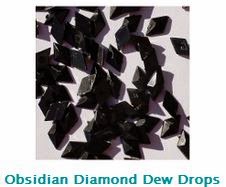
I used the diamond Dew Drops from the Robin's Nest along the top and the bottom of the layout as a border in colors Pearl, Obsidian, and Aquamarine.  Here you can also see more stripes from the Fleur papers.
 
http://www.shop.robinsnest-scrap.net/main.sc
http://www.shop.robinsnest-scrap.net/main.schttp://www.shop.robinsnest-scrap.net/main.sc

I love these fun little moments where my kids just act like goofballs.  It always make me smile when I see my kids having so much fun.

Supplies Used
Cardstock - The Robin's Nest
Glitter paper - The Robin's Nest
Patterned paper - Paper House Productions
Stickers - Paper House Productions
Patterned Cardstock - Authentique
Dew Drops - The Robin's Nest
Chipboard - Want2Scrap
Circle Bling - Want2Scrap
Paint - Plaid & Duncan
Brushes - Plaid
Mist - Heidi Swapp
Ink - Prima
Overlay - Pebble
Adhesive - Xyron
Trimmer - Fiskars
Enjoy!
 http://scraps-of-reflections.blogspot.com/

Thursday, October 23, 2014

Thinking of you **ScrapPlezier & Susan K. Weckesser w/ The Crafters Workshop**

A mommy group friend of mine just lost her mother, so as a gesture I made this card for her for our group to all sign.  I wanted to make this feminine and soft, to show our love for her, like giving her a hug with a card.


!This week is going to be an inspiration-filled, fun-filled festival during our team’s Creatastic Blog Hop.  Join us each day as we share amazing projects created by our Design Team members.   The Crafter’s Workshop Design Team will be sharing projects they create over on their site too.  Both teams will be using Susan K Weckesser Inc products as well as stencils by The Crafter’s Workshop

Now, make sure you visit both blogs, because we are going to have some fun prize packages given away each day on both sites.  You need to leave comments each day for a chance to win!  We also encourage you to stop by and become a fan of Susan K Weckesser Facebook Page and The Crafter’s Workshop Facebook Page


I used lots of layers here, the bottom layer of the card is a mauve colored cardstock that I then took the wonderful Vineyard TCW stencil and outlined the edges of the paper with brown ink creating my own patterned paper.

TCW Vineyard Stencil

I then added in some other colors of cardstock and papers, but then I crated this little frame with the TCW Hand Drawn Frames Stencil.  I used a gold glitter paste to fill in the stencil as a mask, then after it dried I cut it out to size (about the size of an ATC).

TCW Hand Drawn Frames
I then took the the same cardstock as the little gold frame and stamped the wonderful pennant banner stamp from Susan K. Weckesser in brown ink.  I cut out the banner and left it in section of 3 or 4 triangles and then tucked them in and around the card as seen in the picture below.


 http://mysweetearth.blogspot.com/

Most of the wonderful patterned papers and flourishes can be found at ScrapPlezier - come check out the store and the wonderful challenges they host.
http://scrapplezier.blogspot.com/

 Supplies Used
Cardstock - Core'dinations
Patterned Paper - Kaisercraft - ScrapPlezier
Stamp - Susan K. Weckesser
Stencils - The Crafters Workshop
Ink - Prima
Stickers - American crafts & Prima & Kaisercraft - ScrapPlezier
Paste - Bo Bunny
Flowers - Petaloo
Leaves - Prima
Pearl Flourish - Kaisercraft - ScrapPlezier
Twine - May Arts - ScrapPlezier
Adhesive - Scotch
Enjoy!!

Sunday, October 19, 2014

Fall Fun **Birds of a Feather**

In 2012 I found a cute little pumpkin patch near out house.  I dressed the kids up in fun Halloween shirts (Morgan had a skeleton shirt, Brandon a Spider shirt, and Catherine had this cute onsie with a black tutu with orange and black leggings - I loved that outfit!!).  The pumpkin patch had a place set up to take pictures, and I did get a cute one of all the kids smiling and looking sweet at the camera, but my favorite was the one where Morgan is rolling his eyes (either at having to take the picture or at his brother) and Brandon is just goofing around acting silly as all 2 year-olds do.


I used the super fun October Birds of a Feather kit for this layout, jam packed with all kinds of fun Halloween goodies for your projects.   

October 2014 Kit-October Halloween cat black brick echo park thirty-one apothecary frightful brimstone arsenic lace my minds eye reminisce
October Birds of a Feather Kit
October 2014 Extra Patterned Paper-my minds eye pumpkins echo park arsenic lace spooky icons halloween october patterned paper extra
October Birds of a Feather Extra paper Kit


I layered in lots of the overlay titles in with the layers, and also added back in the "bricks" to the brick wall colored in green and orange and to some I added in bits of journaling liek their names, ages, date, place, etc which left the journaling strips open to taking about the fun picture.   

Supplies Used
Patterned Papers -  Echo Park & MME - Oct Birds of a Feather Kit
Cardstock - American Crafts  - Oct Birds of a Feather Kit
Cardstock Stickers - Reminisce -  Oct Birds of a Feather Kit
Overlay - Pebble-  Oct Birds of a Feather Kit

Chipboard - Blue Fern Studios-  Oct Birds of a Feather Kit
Mist - Heidi Swapp
Paint - Plaid
Ink - Prima 
Pen - Faber-Castel
Adhesive - Scotch & Beacon
Trimmer - Fiskars

Enjoy!!

Halloween **Birds of a Feather**

I have a hard time doing Halloween pages, mostly because I am into Halloween colors and ideas leading up to it, but after it I am gearing up for Christmas.  So when Halloween day comes I get my picture of the kids, and then I am over Halloween.  So now I have years worth of pictures that the colors are all wonky and the images are blurred from the kids moving around because they are so excited to go to each of the houses, that I really have not done much with these pictures.  Then I saw Linda's "Little Spook" layout and poof it hit me, why not black and white or sepia for the pictures of the kids?  Make them neutral so the pictures don't fight with the colors of the papers, if they are blurry I thought so who cares it adds to the story of the night, and with 3 pictures and lots of kids and movement I wanted to keep the layout simple.


I really wanted to keep the layout about the pictures and the stories about the pictures, not over power them or add too much to them.  I took a very different route to my layout this time, very traditional and even printing out a lengthy journal story from my computer to fit even more story on the layout.  Add in a large title sticker and those fun little cat stickers from the October Birds of a Feather Kit and poof a cute little Halloween page!!  
October 2014 Kit-October Halloween cat black brick echo park thirty-one apothecary frightful brimstone arsenic lace my minds eye reminisce
October Birds of a Feather Kit
October 2014 Extra Patterned Paper-my minds eye pumpkins echo park arsenic lace spooky icons halloween october patterned paper extra
October Birds of a Kit Extra Papers

Below is the journaling I wrote on the page in larger size but the same font

This was the beginning of Morgan’s stretch of Star Wars costumes.  In 2011 he was General Grevious, 2012 he was Luke Skywalker, and 2013 he was Captain Rex complete with a sound effects blaster.  Mike brought home the Captain Rex mask from deployment, and Morgan fell in love with it, so needless to say we had to get Brandon something just as cool and he got a very fun Spiderman mask the same year. 
Brandon was a spider in 2011, then a tiger in 2012, and then Spiderman; I am starting to see an animal theme here!!   The spider costume was the only thing he would keep on that year, and when he saw the tiger costume nothing else would do.  In 2013 he started to fall in love with superheroes, so Spiderman it was complete with red light wrist web cuffs.
Catherine started out as a cute little cupcake in 2012, but she tore at her costume and only wore it for a whopping 15 minutes as it is just too hot in Houston in Oct.  In 2013 I got her an adorable ladybug costume complete with a little headband, tutu, and wings – she hated it as you can see from the picture of her trying to escape (this was the best shot I could get).  The wings lasted the length of the picture then off they came!!
The first two pictures are in our house in Missouri City, TX.  Our neighborhood was very hit and miss, lots of dark houses and odds candies, complete with candy canes being given out.  In 2013 we had just moved to Pflugerville, and we were just wowed by the explosion of community out to Trick or Treat (picture the movie ET), you could not ask for a better Halloween experience than this!!

Supplies Used
Patterned Papers -  Echo Park & MME - Oct Birds of a Feather Kit
Cardstock - American Crafts  - Oct Birds of a Feather Kit
Cardstock Stickers - Reminisce -  Oct Birds of a Feather Kit
3D sticker - Little B -  Oct Birds of a Feather Kit

Alpha Stickers - American Crafts - Sept Birds of a Feather Kit
Font - Chiller - MS Word
Ink - Prima
Adhesive - Scotch & Beacon
Trimmer - Fiskars 

Enjoy!!

Friday, October 17, 2014

Boo Bags **Birds of a Feather**

I am always looking for a cute bag to put a gift in, and Halloween is no exception.  Need to give away a bottle of wine, fun little gift for the teacher, or for a good friend, make your bag it adds to the gift!!  I had these bags laying around in my pantry from buying a couple bottles of wine, I knew I could use them for something!!


I used the wonderful October Birds of a Feather Kit for these bags.  They are just perfect papers and embellishments for a little boo bag!! 

October 2014 Kit-October Halloween cat black brick echo park thirty-one apothecary frightful brimstone arsenic lace my minds eye reminisce
Oct Birds of a Feather Kit

To see how I colored the diamond mesh at the top of the tag just under the trim, please see my super easy tutorial here!!


Supplies Used
Patterned Papers -  Echo park - Oct Birds of a Feather Kit
Cardstock - American Crafts  - Oct Birds of a Feather Kit
Cardstock Stickers - Reminisce -  Oct Birds of a Feather Kit
3D sticker - Little B -  Oct Birds of a Feather Kit
Rhinestone Mesh - Mon Ami Gabbi -  Oct Birds of a Feather Kit
Trim -  May Arts
Ink - Prima
Pen - Bic
Bag - other
Adhesive - Scotch & Beacon
Trimmer - Fiskars
 Enjoy!!

Thursday, October 16, 2014

Boo Jars **Birds of a Feather**

It seems as though Halloween has turned into into a holiday almost as big as Christmas for decorating and gifts which suits me just fine, I love to make fun gifts!!  So with this thought in mind I am making fun little Halloween gifts for my kids teachers - Boo Jars!!


When I saw the October Birds of a Feather kit and the fun label stickers, I thought JARS!!   I have all of these glass jars that I hate to throw away left from pickles, jam, spreads, mustard, and more.  They are all great sizes and shapes and I thought how easy it would be to do my own candy jars for each of the kids' teachers.

I really wanted to match the colors of the jar labels, from top to bottom with the papers, and working with this Oct BOAF kit made is too easy!  For the first jar I used the red side of the damask paper, lined it with a simple black cardstock, and used a red and black hue stickers that fit the size of the jar on the lid and the side as it was tall and skinny.  Then I used the wonderful diamond mesh and wrapped it around the top and bottom of the paper on the jar.  To see how I color the mesh diamonds please see my tutorial here.


For the second jar I used the purple side of the damask paper and then used stickers with a purple and green hue on them that also fit the size of the jar.  The lid on this jar was larger so the circle sticker fit wonderfully!!  This time I left the diamond mesh plain as a contrast to the gems being on the black cardstock.


For the last jar I could not just wrap  the paper around the jar like the others, so I cut out small rectangles to fit, used a corner rounder to soften the edges of the papers and again added in single plain diamond mesh flower to the top and bottom of each of the 5 sections without the front label sticker.  For the stickers I used a red and black color scheme, and both labels had something to do with cats written or drawn on them for fun!!


I did not include them in the pictures above due to the colors, but I then added in candy corn as the gift to each of the teachers.  Not only do they get a very wickedly special Halloween jar to use on their desk for odds and ends, but they get some fun candy too!!

Supplies Used
Patterned Papers -  Reminisce - Oct Birds of a Feather Kit
Cardstock - American Crafts  - Oct Birds of a Feather Kit
Cardstock Stickers - Reminisce -  Oct Birds of a Feather Kit

Rhinestone Mesh - Mon Ami Gabbi -  Oct Birds of a Feather Kit
Ink - Prima
Pen - Bic
Jar - other
Adhesive - Tombow
Trimmer - Fiskars
 Enjoy!

Share This

Related Posts Plugin for WordPress, Blogger...