Monday, February 29, 2016

"Faith" Shabby Chic Card **Canvas Corp & Tattered Angels & 7 Gypsies & Creative Embellishments & Die~Namites Dies** w/Video

I love to make pretty cards, and this is the next installment of my pretty card trend I am on.  There is going to be more, I just love making these things!!  I just did a card in yellow, maybe green is next!!


I love the idea of a mostly single color card, with just hints of other neutral colors added in there.  I also liked the idea of keeping the theme neutral as well.  So Faith could work for a baby shower, new baby, wedding, wedding shower, anniversary, birthday, get well, sympathy, mother's day; really the list could do on and on.  So for now this card is in my stash ready for my next event to use it at. 

Check out my video tutorial to see how to make this pretty card!! 


I love the textures that chipboard brings out in cards, it just add a little something to it don't ya think?  For this I used the amazing Creative Embellishments Dripping Heart Lace Chipboard, "Faith" word form the Adventure Word Set, and Burlap Stamp.


https://creativeembellishments.com/chipboard
 
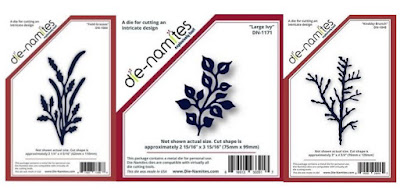
To add to the layers of the card I cut out a set of dies from Die~Namites Dies "Pompom" in ivory cardstock.  It just adds a little something to the card with all the other layers, adds a little bit a beauty!


http://www.die-namites.com/

Wonderful new dies are now available in the store!!  Check them out HERE!  
You know you want some dies now, right? 


I got a great gift of 15% off you next purchase!!  


Just use erin15 and you get 15% of at checkout!!!  

AMAZING!!!


Now on to make so more yummy shabby chic cards!!

Supplies Used
Bling - Recollections
Flowers  - Prima
Ink - Prima
Sticker Maker - Xyron
Glue - Beacon
Enjoy!

Sunday, February 28, 2016

Eyelet Outlet Unboxing Video

Look at all the amazing products I just got from Eyelet Outlet!  Amazing brads, flowers, washi tape, bling, swirls, epoxy stickers, and so much more!!  I even give you some tips about a project I made!!  Grab a cuppa joe and enjoy!!


Come back soon to see all the fun projects I made with these yummy supplies!!


Friday, February 26, 2016

February Winners!!

Thanks for everyone for joining in on the Blog hop that Die~Namites Dies and So Suzy Stamps had, and for leaving such nice comments on my posts and projects!!  So without further ado here are my 2 winners!!

WINNERS


Congrats ladies!!  
Please send me an email to erinkreed(@)gmail.com with your address so I can get your prize out to you!!

Thanks again for all who played along!!
 

Wednesday, February 24, 2016

Creative Embellishments February Unboxing Video

Here is the amazing new products I received from Creative Embellishments for February.  I made some really cool project with these yummy goodies, and more to come!! 


Thanks for checking me out!

Sunday, February 21, 2016

So Suzy Stamps Unboxing Video

I want to show you the amazing Stamps I received from So Suzy for the Blog hop we just had.  Don't forget to go back to the post for Feb 19th and Feb 20th for the hop and comment to win prizes from both So Suzy and Die~Namites, and also from me!!


Thanks for stopping by!!


Saturday, February 20, 2016

Dream Card **Die~Namites & So Suzy Stamps Blog Hop** w/Prize!!

 Welcome to the Die-Namites / So Suzy Stamps Design Team 
Blog Hop!!

We are ecstatic that you're here!! Please hop along yesterday and today (2/19 - 2/20), as we share with you our projects that incorporate beautiful dies with awesome high quality stamps. Each day we'll have new projects featuring talented artist from 2 amazing design teams!

Here is my project and info.  More blog hop info is at the bottom of the post.

I wanted to create an elegant card that would be an all purpose card for birthdays, anniversaries, wedding, etc but pull in the colors of spring.  Here in Texas we are warming up and flowers are starting to come out...spring has sprung!  Let's just hope that we do not have a frost and kill everything off!

 
I really wanted to play with the idea of the soft, so I made these cute little flowers (come back soon for this flower tutorial) and tucked in lace, bling, fluffy yellow rope pulled apart, all layered over the die cut leaves and chipboard. 


I used the amazing Die~Namites dies for the background leaves cut from kraft cardstock.  I used the Knobby Branch and Field Grasses as the the top and bottom.  I then used the Rose Leaves tucked into the left side under the large flower.

http://www.die-namites.com/
 

I also used the So Suzy Stamps in the background with the Bird Swirl stamp and then I stamped the Dream stamp in ivory cardstock and cut it out for the title.   I inked everything in light brown ink.

http://www.sosuzystamps.com/dream/


Supplies Used
Card Base - Canvas Corp
Cardstock - Canvas Corp
Rope - Canvas Corp
Lace -  7 Gypsies
Mist - Tattered Angels
Dies - Die~Namites
Stamps - So Suzy
Brads - Eyelet Outlet
Flowers -  Eyelet OutletBling -  Eyelet Outlet
Chipboard - Creative Embellishments
Ink - Prima
Sticker Maker - Xyron
Adhesive - Beacon


We also have some awesome blog hop candy to give away!! Each design team will be giving away a $25 gift certificate to their team's website.

PRIZES
- $25 Die-Namites Gift Certificate
- $25 So Suzy Stamps Gift Certificate


Here are the Rules:
One comment per person ~ per day ~in all designers blog post
to be in the running for the giveaway.
*This must be include this DieNamites Blog, so no skipping! ;)
You have until February 26 at 11:59 pm ET
*winner will be chosen randomly and announced on March 1, 2016.

One random winner will be chosen for each prize. Chances of winning depends on amount of qualified entries.

To qualify to enter you must follow these few simple rules...

RULES
1. Click on each link to go to each participating BLOG. (complete list of links are posted below)
2. FOLLOW each BLOG & leave a COMMENT on the BLOG HOP post.
3. LIKE Die-Namites Dies & So Suzy Stamps on Facebook.

We hope we're able to inspire you!!

Erin Reed  - YOU ARE HERE


 Prize Alert!
 Who loves happy mail!?!?!
I have a special prize (yummy goodies from my stash from any DT I have been on) to 2 lucky people who comment on this post and follow my blog!!  You get an extra chance (so your name in 2 times) if you follow my YouTube Channel.
That is it, super easy!! 

You have until midnight Feb 24th, 2016 CST to leave a comment and follow my blog. This prize is open to anyone from any country (including the So Suzy DT and Die~Namites DT). Come back on Feb 26th to see the winners!!  If you already follow my YouTube or Blog just mention that in your comment on this post.
Good Luck!! 
 

Friday, February 19, 2016

"I Love U" Mini Banner **Die~Namites & So Suzy Stamps Blog Hop**

 Welcome to the Die-Namites / So Suzy Stamps Design Team 
Blog Hop!!

We are ecstatic that you're here!! Please hop along today and tomorrow (2/19 - 2/20), as we share with you our projects that incorporate beautiful dies with awesome high quality stamps. Each day we'll have new projects featuring talented artist from 2 amazing design teams!

Here is my project and info.  More blog hop info is at the bottom of the post.

I wanted to create a cute mini banner to hang up on my desk for the month of love (February).  In my mind these cute little things do not have to comedown right after Valentine's day, why not celebrate it a bit longer and enjoy the season!!


http://www.die-namites.com/http://www.die-namites.com/

I cut out the rose leaves die on white cardstock, inked the edges and then drew in the lines with black pen for the veins of the leaves.  On the burlap banner I stamped in black dye ink a swirl pattern stamp called Flourish Border from So Suzy Stamps to add a little something to each of the burlap pieces.

http://www.sosuzystamps.com/
 

I cut out the Die~Namites Love Stuck die on white cardstock and then misted it with red mist.  After it dried it traced out the heart shape and glued it to the back of the white cardstock to give it a backing.  I used the same process on the Heart Clip Tree Video Tutorial.  I traced the heart shape and cupid with black ink, and then stamped and cut out the Love Arrow stamp from So Suzy and glued it onto the cupid as if he were shooting the love arrow.

http://www.sosuzystamps.com/


On the back of each section of the banner I placed the Deflecto Sign and Banner Hangars and ran the rope thought the holes and then glued them in place.  To hold up the banner I just placed little tacks on the board and rested the banner into place.  Easy to place where ever I want!!


Little mini banners are cute to hang up in your work space, on a wall , or window ledge.  The possibilities are endless, have fun with it and be creative!!
 

We also have some awesome blog hop candy to give away!! Each design team will be giving away a $25 gift certificate to their team's website.

PRIZES
- $25 Die-Namites Gift Certificate
- $25 So Suzy Stamps Gift Certificate


Here are the Rules:
One comment per person ~ per day ~in all designers blog post
to be in the running for the giveaway.
*This must be include this DieNamites Blog, so no skipping! ;)
You have until February 26 at 11:59 pm ET
*winner will be chosen randomly and announced on March 1, 2016.

One random winner will be chosen for each prize. Chances of winning depends on amount of qualified entries.

To qualify to enter you must follow these few simple rules...

RULES
1. Click on each link to go to each participating BLOG. (complete list of links are posted below)
2. FOLLOW each BLOG & leave a COMMENT on the BLOG HOP post.
3. LIKE Die-Namites Dies & So Suzy Stamps on Facebook.
We hope we're able to inspire you!!

Supplies Used
Paper - Canvas Corp
Burlap Pieces - Canvas Corp
Rope - Canvas Corp
Dies - Die~Namites
Stamps - So Suzy
Ink - Prima
Mist - Tattered Angels
Flower - Maya Road
Pen - Tombow
Banner Hangars - Deflecto
Adhesive - Beacon & Xyron
Enjoy!

Tuesday, February 16, 2016

Mixed Media Layered Frame Card **Canvas Corp & Tattered Angels & Die~Namites Dies & Creative Embellishments**

I sometimes like to just play with fun styles and techniques on my cards, if they do not work then no biggie it is just a card, but if they do then I have a cool card to give to a luck person!


Click below to view the video tutorial, and don't forge to check out my YouTube Channel for other fun projects and subscribe too!!


I played with a ton of techniques here.  Painting the Creative Embellishment chipboard with Tattered Angels High Impact Paint in metallic colors and then layering them.  

https://creativeembellishments.com/chipboard
http://shop.canvascorpbrands.com/
 

Cutting out various Die~Namites dies out of Canvas Corp kraft paper and then painting them with the same paint, cutting them up and layering them under the frames, and also taking the Canvas Corp Rope and pulling it apart create fluffy texture under the frames.  I like to play with the texture of the hard and soft playing them against each other.
http://www.die-namites.com/
Amazing new dies are now available in the store!!  Check them out HERE!  
You know you want some dies now, right? 

I got a great gift of 15% off you next purchase!!  

Just use erin15 and you get 15% of at checkout!!!  

AMAZING!!!
 http://shop.canvascorpbrands.com/


Layer this all over the Canvas Corp Burlap stitched on Ivory Card layered with the French Script and White Lace cardstock paper from Canvas Corp.  This is sure to make it a one of a kind fun and funky mixed card!


Supplies Used
Metal - BoBunny
Bling - Prima
Ink - Prima
Sticker Maker - Xyron
Adhesive - Beacon
Enjoy!

Sunday, February 14, 2016

Quick and Easy Mini Valentine's Cards Tutorial **C'est Magnifique Guest Designer**

I wanted to make some cute little Valentine cards to give my kids teachers that were not just the standard out of the box kiddy Valentines they were passing out to their friends.  In the Feb C'est Magnifique kit there were some pages of little PL sections that were perfect for mini cards.  


They are super simple cards that take only about 10 minutes to make them all and here is the info about how to make your very own!!

Mini Card Tutorial

1) Cut out and fold (or use Canavs Corp Mini Cards) to make cards that are 3"x4"in kraft cardstock.

Canvas Corp Gift Cards (mini cards)
2) I cut a pink section (2".5"x3.75") of Kaisercraft paper out, inked the edges.
3) I then cut out sections of  the Kaisercraft PL paper seen below, cut to 2.25" x 3.5" and inked them.


3) Glue all the sections together.
4) Add stickers to one card for a sentiment.
5) Add faux stitching to the top and bottom of the cards to as in a little something extra! 

Now all your kids teachers (or other friends and family) have a special card for a special day.

Supplies Used
Stickers - C'est Magnifique Feb Kit (Kaisercraft
Ink - Prima
Pen - Tombow
Tape Runner - Xyron
Enjoy!

Friday, February 12, 2016

Dreams Come True Layout **Guest Designer C'est Magnifique Kits** w/ Kaisercraft

Two of my kids were outside this past fall raking up the leaves to jump into, in the process they found a snake, but that is a completely different story.  I could not resist grabbing my camera and playing the mamarazzi for a bit while they were goofing around jumping in the leaves, throwing them at each other, and then at me.  Such wonderful leafy memories.  My son kept hiding from the camera, but my daughter was hamming it up.


I used the superb C'est Magnifique February kit again to create this layout.  The colors were just a perfect match for the feel of the pictures was taking.   I could not have asked for a better match for my pictures!
 

I took a Prima damask stencil and applied a thin coat of light paste from Prima, I did not want a heavy feel to the page, just a hint of something else there.  And of course I misted it with some yummy Tattered Angels mist in Silk.


I added a little Canvas Corp mini clothespin to the top of each picture and then cut out one of the Kaisercraft butterfly stickers and added it to the top for a cute little finish.


To emphasize the quote, I wrapped it in the white trim wrapping it around for a focal point, also helping of set the break in the picture line.  It helps draw your eye in, but then guide it around the page to the other elements.

Supplies Used
Cardstock - Core'dinations

Enjoy!!

Share This

Related Posts Plugin for WordPress, Blogger...