Showing posts with label birds of a feather. Show all posts

Thursday, January 15, 2015

Peace on Earth **Birds of a Feather & Imagaintaion Crafts**

I wanted to make a winter card instead of a Christmas card this year.  This is the one I send out to all my friends and family digitally with our family newsletter.


I used the wonderful Dec Birds of a Feather kit full of winter goodness to make this beautiful card along with Imagination Crafts mediums and stencils.


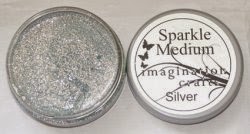
I wanted to add something tot he background to really make it shine and sparkle, but not just more snowflakes.  I used the Grungy Ledger stencil forom Imagination Crafts with the Silver Sparkle Medium and a spatula to create all the wonderful silver sparkle to see.  


http://imaginationcrafts.co.uk/shop/index.php?main_page=index

http://imaginationcrafts.co.uk/shop/index.php?main_page=index

Grungy Ledger


Supplies Used
Cardstock - Bazzill - Dec Birds of a Feather Kit
Pattern Paper - BoBunny & Pink Paislee - Dec Birds of a Feather Kit
Die Cuts - BoBunny  - Dec Birds of a Feather Kit
Foil Stickers - Pink Paislee  - Dec Birds of a Feather Kit
Metal Snowflakes - Maya Road  - Dec Birds of a Feather Kit
Resin Deer - Maya Road - Dec Birds of a Feather Kit
Trim - May Arts - Dec Birds of a Feather Kit
Die Cut Snowflake - Wild Rose Studio  - Dec Birds of a Feather Kit
Snowflake Stickers - Little B  - Dec Birds of a Feather Kit
Glitter - Imagination Crafts
Stencil - Imagination Crafts
Ink - Prima
Adhesive - Tombow & Beacon
Enjoy!!

Thursday, January 1, 2015

Ornament Mini Books **Birds of a Feather & Imagantion Crafts**

I always struggle to find a fun gift for both sets of grandparents each year.  I love to make them mini books of some kind including pictures of each of the kids from that year, a kind of year end review of sorts.  This year it is a chipboard book with a ring clip I found from $.25 at the end of last year. 


I used the wonderful December Birds of a Feather Kit to create this mini book.  Using black and white pictures just made this whole book work with the wonderful cool colors in the kit.

December 2014 Kit-december snow bobunny bo bunny glitter prima maya road ribbon raffia pink paislee


Under each picture I used a foil sticker from the kit, it was just the perfect little added touch for to go with the papers, mist, and picture.


Around the edges of all the pages front and back I applied the wonderful Sparkle Medium from Imagination Crafts in Royal Purple which has this beautiful blend of purple and gold.  I used my finger to just roughly smear it along the book to give each page a finished look. 


http://imaginationcrafts.co.uk/shop/index.php?main_page=index
 
I also added a bit of the Sparkle Medium to the white title "Reed" to help it pop and blend the colors of the project together.
 
I love these wonderful little books, but I always have problems covering them to fit the funky shape they come in. I know I can trace the shape onto paper and cut it out, but then do I cut out 20 of these pages to fit front and back for both books, heck no, not my style!  The December Birds of a Feather Kit had this wonderful spray mist from Prima in this lovely Ice Blue color, and how easy is to spray each side of the chipboard and be done, now just to add in some background shapes to the pictures in squares, circles, or rectangles (super easy to cut)!  Plus the pump grip spray made it even easier to apply to lots of items!


Here you can see the difference from the plain chipboard to the covered one.  You can also see the white paper now turned blue from the spray, of which the chipboard does not look as blue, but the shine and glitter show up wonderfully, just like a glittery ornament ball!!

color bloom


I love to give away these handmade books to the grandparents, and they love getting them.  I already gave these gifts away and both sets of grandparents pawed through them, showing me the basket or shelf they have kept all the books from the past 8 years.

Supplies Used
Chipboard Book - Recollections
Paper - BoBunny - Dec Birds of a Feather Kit

Thursday, December 18, 2014

Christmas Puzzle **Birds of a Feather & Susan K. Weckesser**

For Christmas this year we decided to give a trip for our kids and not gifts, so to reveal this fun present to our kids we had them each open 3 presents (the cards below) with clues of where we were going, so 9 clues total were opened at an early Christmas present opening with my parents.  On each card I wrote a portion of a sentence giving a clue of where we were going.  It reads, "For this Christmas our present to all of you is to spend our time together having fun and lots of cheer.  So bring your magic and your swim suits for we are going to a very special place full of lots of wonder and joy."  


On the back side of the cards were numbers stating which row the card was in (to make it a bit easier) and a letter or two that they had to arrange to spell the words "Great Wolf Lodge".  The screams of excitement were deafening as they figured out where we were going.


I used the wonderful December Birds of a Feather Kit to create this set of puzzle cards.  The cards each measure 4 x 4 inches, so once together it creates a 12 x 12 page.  The colors of the papers and the cute diecuts from the kit were just perfect for this little project!!

December 2014 Kit-december snow bobunny bo bunny glitter prima maya road ribbon raffia pink paislee
December Birds of a Feather Kit
 

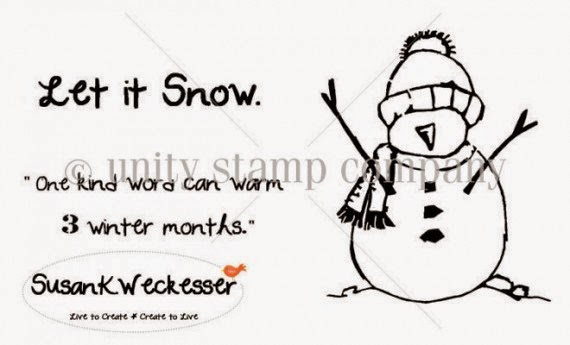
For some of the cards I used the super cute "Let it Snow" stamp set from Susan K. Weckesser.  The snowman and phrase were just a perfect fit for these papers.


http://susankweckesser.com/design_team

So even thought there are not true presents to be opened this year, our trip is worth so many more memories than any toy can give.

Supplies used
Cardstock - Bazzill - Dec Birds of a Feather Kit
Pattern Papers - BoBunny - Dec Birds of a Feather Kit
Diecuts - BoBunny - Dec Birds of a Feather Kit
Stamps - Susan K. Weckesser
Ink-  Ranger
Pen - Faber-Castell

Tuesday, November 18, 2014

Fall into Autumn **Birds of a Feather Kit & Paper House w/Plaid and a tutorial**

Here is a picture of my little pumpkins posing for me at a local pumpkin patch in Oct 2014.  Each kid grabbed a pumpkin to pose with, and after it was all over I noticed that my oldest had grabbed the biggest pumpkin, my middle chose a medium, and my youngest the smallest.  I just love the little pumpkins they grabbed, they were called fairy houses, and Morgan's we just covered with little bumps, making it look at warty.


I used the wonderful November Birds of a feather kit.  It is just perfect for those fall family pictures and went perfectly with the Paper House stickers and papers and Plaid paints and mediums.

 November 2014 Kit-November thanksgiving fall autumn simple stories petaloo doilie prima


Here you can see some of the beautiful stickers from Paper House and also the flower I altered (tutorial below) using Plaid products.  I pulled all the 3D leaf stickers I could find from the Paper House sticker packs and added them around both clusters at the top and bottom of the layout as they all work so well, from "Out in the Country" "Autumn Leaves" "Fall into Autumn" and "Pumpkin Patch". 

https://www.paperhouseproductions.com/https://www.paperhouseproductions.com/

I pulled apart the pumpkin stickers (the top layer) from the "Pumpkin Patch" stickers and layered them around the title sticker "Fall into Autumn" to give it more dimension and to add in more fun pumpkins!!

https://www.paperhouseproductions.com/https://www.paperhouseproductions.com/


Here you can see some of the wonderful papers from Paper House.  I used two different collections "Generations" and "Live by Faith".  For the "Generations" paper pack used two different papers, one is the gilded brass like frame cut out and the green swirl on cream paper.  For info on how I altered the green swirl paper and background brown paper please see tutorial below.


https://www.paperhouseproductions.com/

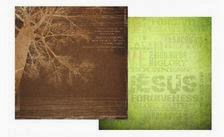
I also used the "Live by Faith" paper stack and used the tree on brown and the back side of green words to help mat the picture.  You can see a bit of all these papers in the picture above.

https://www.paperhouseproductions.com/
 https://www.paperhouseproductions.com/
I also used the green swirl paper for my journal strips that are mounted on the wooden measurement sticks (tutorial below on how I altered these).  


How to Make Foam Paint and 3 Uses for it - a Tutorial
I just love the paint from Plaid.  The Folk Art paint adheres to anything including wood, canvas, and paper.  Using these paints, the matte Mod Podge medium, and shaving cream I created foam paint.  Foam paint is super easy to apply to surfaces as it is light, airy, and spreads well especially for stencils or applying to bumpy surfaces like canvas, and it has some transparency so it does not cover up just add color the surfaces to are adding it to.

Foam Paint Recipe
2 parts shaving cream
Stir together until foamy


Here is the foam paint after I have mixed it, you can see it has a creamy look and it is super easy to apply with the Plaid foam brushes.

Use 1 - Wood
I first applied the paint to the wooden measurement sticks from our Nov Birds of a Feather Kit.  They were a plain pine wood color, and I did not want to cover up the measurement marking on the sticks.  I applied the foam paint and you can see it changed the color of the wood, but you can see all the markings.  I wanted it a bit greener so I used a green chalk ink and daubed it randomly and then added in some lime green glitter glue to make it sparkle.  I used these wooden pieces as the backing fro my journal strips.

rulers


Use 2 - Canvas and material
I used my finger dipped into the foam paint and applied it the the edges, center, and parts of the inside of the flower.  The white flower pick just too white for the layout, the flower popped out and not the focus - the picture. I needed to soften it, so making it blend in better with the layout made sense, so change the color!!  I again added a bit of green chalk ink and some lime green glitter to make it sparkle after I applied the foam paint.

orchid
 

Use 3 - Paper
I wanted to add more dimension to my layout and follow the theme of the Birds of a Feather Nov Kit of time (like in the metal clocks), so I had this stencil of swirls and roman numeral from The Crafter's Workshop and placed it randomly around the layout with just the brown stitched paper and green swirl paper from Paper House (I added the rest of the layers after it dried) and applied the foam paint with the foam brush from Plaid and when it dried I added in a bit of lime glitter glue to make it shine.
Bee on Time
http://www.plaidonline.com/
 

Playing with paints is fun and easy.  Mix colors, add in mediums, and just play you never know what you can come up with that is fun and different!!

Supplies Used
Cardstock - Core'dinations - Nov Birds of a Feather Kit
Pattern Papers - Kaisercraft & Simple Stories - Nov Birds of a Feather Kit
Metal - Tim Holtz -  Nov Birds of a Feather Kit
Cardstock Stickers - Simple Stories & Authentique -  Nov Birds of a Feather Kit
Flower Stick - Mon Ami Gabbi - Nov Birds of a Feather Kit
Lace Sticker - Prima -  Nov Birds of a Feather Kit
Paper Pads - Paper House
3D stickers - Paper House
Paint - Plaid
Medium - Plaid
Brushes - Plaid
Flowers - Petaloo & Prima
Ink - Prima
Twine - Canvas Corp
Glitter - Ranger
Stencil - TCW
Adhesive - Tombow
Trimmer - Fiskars
Enjoy!

Share This

Related Posts Plugin for WordPress, Blogger...