Monday, February 27, 2017

Cub Scout Rank Advancement - Scrapbook Page: Creating with Black and White


My son Morgan has been in Cub Scouts since a Tiger, and he is now about to crossover to being a Boy Scout.  Each year he has done a ceremony to move on to the next rank from Tiger to Wolf, Wolf to Bear, Bear to Webelos, and Webelos to Arrow of Light; and part of the ceremony is getting your face "war painted" to symbolize the next level of achievement.  I took a picture each year of his painted face after the ceremony took place (before he wiped it all off) to capture the moment.  He is now moving on to By Scouts and I thought it would be fin to see all the years of his advancement in a single scrapbook layout to show his journey.


Here is a video tutorial on how to I made this scrapbook page.


I joined in a challenge by a friend Christine Meyer to Craft with Black and White - use it as my background page or as my focal point for the scrapbook layout.  She is offering a $20 gift certificate to scrapbook.com for leaving a comment on my video and also on her video below.


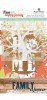
Here are some up close pictures of the layout using clay for embellishments, Rinea foil or a little sparkle, and some fun Canvas Corp papers!

 
I had fun with framing the pictures by cutting out "frame" and layering them on the page, one I kept straight on the other I tiled to an angle.


Using a label maker to give the title below each picture helped pull together the feel of the typecast paper int eh background.


I used the navy frame border as my journaling for the layout, fun way to add in a journal using using the elements already on the page!

Thanks for stopping by and checking out my page!!


Supplies Used
Interested in the supplies I used in this project?  Most are listed below and some are affiliate links, which generates a me little commission (at not extra cost to you at all) when you click on the link and make a purchase.  Affiliate and product disclosure can be found here


Sunday, February 26, 2017

"Family" Mini Scrapbook Album **Paper House**

Hi everyone, Erin Reed here today.  I got these fun templates from a friend who was getting rid of them (company does not even exist anymore) and I thought they would be perfect for the base of a book!!!  So I used the Paper House One Big Happy Family collection to create the pages attached to the plastic templates and some pictures of my family from this past summer to make a Family 8x8 Scrapbook Album with 4 pages in it.


 Here is a video tutorial on how I made this album.


Each page is about one of my kids and also there is a family page.  I off set the color blocked pages with a neutral page where I used the Paper House Acetate birds with a single graphic in the middle.  This helps break up all the "busy" in the book.


I turned all the photos into black ans white because they were really fighting with the colors of the collection.  I really wanted to use this collection for these pictures, because it worked so well.  So a quick and easy tip is to make all the pictures black and white or sepia to solve that problem!!


I added little bits of stickers, gems, or cut up tags to fill in the sections that the template left for me to play with.  This made it really easy to assemble my design for the pages, just find something that fits, says the right things, and stick it down!!  This made the book go really fast!


I left the front and back covers with the word family, because that is what the book is all about!


Making these little mini albums is so easy when you have an amazing collection to work with!

Supplies Used
Interested in the supplies I used in this project?  Most are listed below and some are affiliate links, which generates a me little commission (at not extra cost to you at all) when you click on the link and make a purchase.  Affiliate and product disclosure can be found here.


Thursday, February 23, 2017

2 Ways to Use Patterend Cards to Make Them Homemade

I go these pretty cards from a friend who did not know what to do with them, so I  had some fun and thought of a couple of ways to turn these pretty pattered cards into something homemade.  They are so pretty but you want to something handmade, here are a couple of ideas of ways to use you patterned cards and envelopes but turn them into your own design.

1) Use a banner
Cutting a strip of a solid cardstock to break up the pattern of the card for you to stamp on but allows the beauty of the pattern of the card to shine as well.


I used the Home Sweet Home stamp set with the Sea Surface Ink and the Raven detail ink for this card.  The sea ink match the colors of the card so well, it brought in that touch of unity to the card.  
Here is a video on how to make this card.


2) Decorate the Envelope
If the card just seem to hard or you love it just the way it is, decorate the envelope to make the card handmade.


I used the Happy Mail stamp set paired with the Grow with Me stamp set to make this envelope extra special along with the Rouge ink and a red pen to match.  A few little doodles and paired the stamps makes this a unique and special card.  Here is a video on how to make this handmade envelope.


So now you know 2 fun ways to use patterned cards with your stamps to make them extra special!

Supplies Used
Interested in the supplies I used in this project?  Most are listed below and some are affiliate links, which generates a me little commission (at not extra cost to you at all) when you click on the link and make a purchase.  Affiliate and product disclosure can be found here


Tuesday, February 21, 2017

Dragonfly Garden **Makin's Clay & Beacon**

I wanted to create something for St. Patrick's Day, and the idea was to crate something like a Celtic knot, well that was much harder than I thought.  I played round the with the original idea I had in mind, to take clay and use the clay extruder to make tubes and swirl them around into shapes, and it ended into looking like a vine garden, so I added some some flowers and a dragonfly and boom I have a mixed media dragonfly garden!


I made a video tutorial on how to make this fun little dragonfly garden, check it out!


I used Makin's Clay to create all the swirls on the block.  It is an air dry clay, so it makes it very easy to create on a object that you cannot bake!! Set it in the shape you want it to be and let it dry overnight.  Boom you are done!


Add some mica powder to the clay to make everything sparkle and shimmer for an ethereal dragonfly garden, and to top it all off add in some pretty metal flowers and some gems.


Just because a project does not go the way to wish it to go does not mean you should give on it, you may just create a dragonfly garden for yourself!

Supplies Used
Clay - Makin's Clay
Clay Tools - Makin's Clay
Metal Embellishments  -  Momenta & Prima
Mica - Ranger & Imagination Crafts
Wood Block - Bottle Cap Inc
Paint - Tattered Angels
Glass
Gems
Glue - Beacon Adhesives
Supplies Used
Interested in the supplies I used in this project?  Most are listed below and some are affiliate links, which generates a me little commission (at not extra cost to you at all) when you click on the link and make a purchase.  Affiliate and product disclosure can be found here.


Monday, February 20, 2017

Creativation 2017 Mini Memory Album

I was challenged to create a mini album that was not a square or rectangle, had at least 3 pages, and had something to do with women.  So I have gotten back from Creativation 2017 and had all these fun little bits and bobs of products and make and takes from the show and thought I would make a mini book all about my memories, tags, business cards, and products I got from the show!


I made this fro a group called Crazy Lab, and it is a 4 part series where part 1 is collecting all my supplies, so I gathered all the fun little things from the convention that I brought home.


Part 2 was to prep the book pages and make the front cover.


Part 3 is where I completed the book pages and bound the book.

Each page is a memory of my time at the convention, people I met, companies I worked for, event that I went to, a booth I visited, a funny story about waiting in line, and so much more!!  It really is a little snapshot of my time at the convention!  Here are a few pages from the book.


I had so much fun meeting new people, meeting, friends that I had only met on line, and getting to be apart of an event that I had been dying to go to for years!!!

For the other artists doing the challenge check it out here - Crazy Lab

Come back next week for part 4 where I create a little container to store the book in!

Supplies Used
Interested in the supplies I used in this project?  Most are listed below and some are affiliate links, which generates a me little commission (at not extra cost to you at all) when you click on the link and make a purchase.  Affiliate and product disclosure can be found here.


Share This

Related Posts Plugin for WordPress, Blogger...