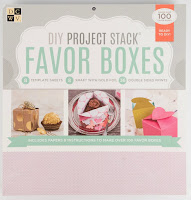
My nephew's 7th birthday party this year was a baseball theme, so instead of just a flat card to give him, I thought why not 3D card that could also be used as a centerpiece and then he could place it in his room!!
Here is a How to Video do you can create you own box!!
Hello everyone, Erin Reed here! Welcome to our third day with this wonderful product promotion with Stick It and our Die~Namites Dies!
I wanted to create a beautiful card for my MIL for her birthday next month. I went a different route and went for a flat square card, you do not open it up, but instead it acts like a post card. Using the Die~Namites Dies and Stick It together is perfect, they work so well together!! Stick It are the perfect adhesive sheets for die cuts and
electronic cutting machines, they are created by Ken Oliver and they are
available in two different sizes, 8"x12-1/4" and 8"6-1/8"for different sized dies. You can even double side them to you can glue glitter to the front!!
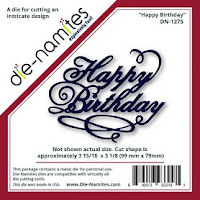
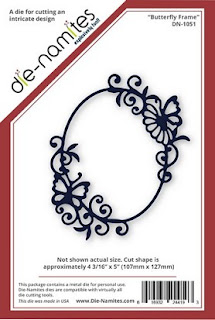
I cut out 2 Die~Namites Dies in "Happy Birthday" and "Heart Doily" to use with the Stick It sheets.
I only applied the Stick It adhesive to the back of the doily to glue it to the card, but I applied the Stick It to the front and back of the "Happy Birthday" so I could add glitter!!
First I cut apart a bit of the doily so you can see more when the paper on top is applied, just just makes the circle bigger.
I then applied the "Happy Birthday" to the mat and pulled off the top layer to expose the adhesive and add the glitter.
I did not have the perfect color of glitter for this project, so I mixed all thee colors until I got the color I wanted, a pretty peachy gold!!
Here is a video of how to apply the Stick It and the glitter from Stick It!!
A friend took some pictures of the kids and I in the spring of 2014. While moving from one spot to another to get a different background for the pictures my little girl Catherine started to get cranky and did not want to walk (she was 18 months at time), so I picked her up and lifted her above my head to get her to smile and be happy again. In that moment we got this cute shot of the two of us. I did this to her all the time when she as little to get her out of her funks, and it is so fun to see this everyday activity of our captured in such a beautiful way!!
Here is a video of how I create this layout.
I got to play with the amazing stencils and dies from My Favorite Things paired up with the wonderful Xyron products. These two are a perfect match and all the dies you cut our work so wonderfully with the Xyron Creative Station to turn them into stickers for such easy application for intricate cut out shapes!! Go check out their blog to see all their other yummy supplies, I want them all!!!
I used the "Polka Dot" Stencil, "Large Fancy Flourish", "Stichable Heart STAX", and "Words of Gratitude" dies from My Favorite Things. They all added this amazing delicate touch to the page to help match the feeling of the pictures of my daughter and myself.
For all the larger sheets of paper and layers I Used the Xyron Mega Runner to glue everything together, but for all the die cut shapes, embellishments including twine, cardboard, tissuestock, thin flowers, burlap, bows, chipboard, and cut out papers I used the Xyron Creative Station with the 5" and 9" Permanent Refills.
I used the Gypsy Moments Collection for this layout. Its elegance and beauty were perfect for this project, adding that feel of tenderness of the moment. I also paired the collection with other 7 Gypsy, Canvas Home Basics, and Tattered Angels products to bring it all together.
Here are some up close pictures of the finished layout. Can you find my mistake?
If you have not found my mistake yet? Let me give you some info first. When I scrap it is small moments throughout a few days, mostly when my kids let me sit down and scrap. I had the background page done for a whole day before I started to add the embellishments, and when I finally worked on it I did it upside down. All the french script is upside down, oops!! I really meant for the background page to be a 180 from what it is. I did not even notice it until I started to edit the pictures for my blog post, and then ti was too late. So there goes the old addage of there are not mistakes in scrapbooking, and really it still looks great!!
I am always in awe over the amazing projects that this magazine has, and it does not not hurt that I have ton in there as well!! Over 275 pages stuffed full of ideas, inspiration, sketches, and tutorials for cards, layouts, tags, and off the page projects as well and the best part is it is FREE!! Below is one of the projects I made for this issue, along with many others!!
Here is direct access to this wonderful magazine!!
Here is the list of the project I have in this issue.
Cute Little Man Layout - Pg 22
All Awesome Boy Layout - Pg 68
Beat the Heat Layout - Pg 144
Enjoy Card - Pg 184
Purple Tag - Pg 188
Elegant Tissue Box - Pg 204
Live Love Lake Layout - Pg 226
I wanted to create an elegant card for my mother's Birthday in august, I know thinking ahead, but at least it is done!! I Also have my daughter's and MIL birthday all within 3 days of each other so I have to think ahead. My mother loves beautiful elegant things, so this is right up her ally!!
I used the amazing Die~Namites Dies and Sketch as the jumping point for my card, and then adding is the wonderful supplies from ScrapPlezier and May Arts Ribbons to finish it all off.
Last summer I went to Colorado and I took my boys to the
lake to go fishing. It was so peaceful and calming; tranquility comes to
mind and that is the feel I went for in my layout. This layout is a selfie of me in front of this amazing lake.