Wednesday, October 28, 2015

Inspiration is Key - Mixed Media **Die~Namites & Xyron & Big Red Stamps & CCB**

While at a scrap retreat about 3 weeks ago some lovely lady brought these fun gunky keys from Michaels to give out.  As soon as I saw it I knew I had to create an altered mixed media piece with it.  I brought the key home and dug into my box of alterable items (boxes, frames, canvases, etc) and came across this frame that my neighbor gave me, which I thought it looks funky as colors go, but I like the depth and feel of the frame.  I took the glass out of the frame and started to play!!


I love to get my hands grungy and dig into the world of mixed media.  There is no right or wrong to this, you just keep adding layers and layers of textures, bits, bobs, and colors and you end up with a really cool neat piece of art.  Most of the items in the box are found items from my garage, left over bits of embellishment packages, flowers, charms, etc.  There is no limit to what you can use in these projects.  Below is a step by step tutorial on how I made this piece.


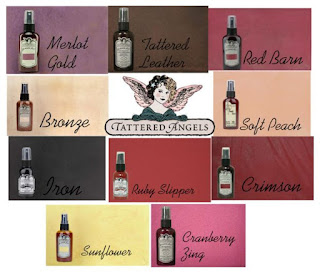
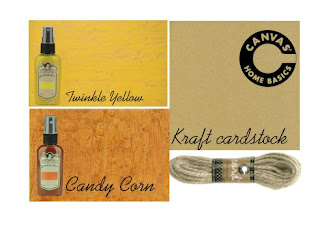
Here are some of the amazing products I used on this project.

https://www.xyron.com/en-US/
https://www.deepredstamps.com/
Large Fauna

Comment on this post and you can win a chance for $45 at Deep Red Stamps!!


Please comment by Nov 9th at midnight for a chance to win!!  Come back on the 10th to see if you won!!

http://www.die-namites.com/http://www.die-namites.com/


 http://shop.canvascorpbrands.com/
http://shop.canvascorpbrands.com/

Here are some up close shots of the sides and interior of the project.


Don't be afraid to step in and get messy!!

Supplies Used
Frame - Michaels
Key - Michaels
Found Items
Mediums - 13 Arts & Prima
Beads/Glass - Prima
Ink - Prima
Flowers - Petaloo
Heat Gun - Uchida 

Enjoy!!

Friday, October 23, 2015

Halloween Candy Bottles **CCB & Deflecto**

I love to give a little gift to my kids teachers for the holidays, it could be a card, box, or something a bit different.  This time I had a bunch of bottles that I used up around the same time (hot sauce, vinegar, etc) and thought "I can up-cycle these into something cute".  From that came these cute little candy bottles for my kids teachers for Halloween.


Candy Bottle Directions

1) My only deciding factor in the bottles I choose was did it have a screw cap and could a pieces of candy corn be put into the top.  This gave me 4 bottles to use, perfect for the number of teachers I had to give to!

2) I started out soaking the bottles with vinegar and water to get all the reside and smell of the previous foods that were in there and to help peel off the labels from the outside of the bottles.I then left them to dry for a couple of days with the lids off.

3) I then cut sheets of paper to cover the bottom of the bottle, before it curved up, so just the straight edge in 3 different Haunt it Collection from Canvas Home Basics  - Haunt It: Orange and Black Stitched Diamond on Kraft, Haunt It: Cats, Hats, and Bats on Kraft, and Orange and Ivory Chevron.  I inked all the edges of the in black ink and glued them to the bottles with Beacon 3 in 1 glue.

http://shop.canvascorpbrands.com/


4) I then cut up labels for the front of the bottles from the CCB Haunt It: Tags on Kraft, inked the edges, and glue them to the front of the bottles.  I picked the tags that would fit the size of the bottles, but they are all super cute!!

http://shop.canvascorpbrands.com/


5) I wrapped the tops of the bottles in CCB hemp rope in black, orange, and grey (pulling the strands apart so they would not be as thick when wrapping them).  I added a little wet erase tag from Deflecto as they could rewrite the "to" and "from" and reuse the gift if they wanted.  I just added the tag in as I wrapped the rope around the bottle about half way down the neck.  I again use Beacon 3 in 1 glue to hold the rope to the bottle.


http://shop.canvascorpbrands.com/

http://www.deflecto.com/products/pc/Sign-Tags-w-Wet-Erase-Marker-184p1049.htm#.VikNuSu1Nyo


6) One of the caps to the bottles was a bright blue and it really did not go with the colors of the papers or the candy.  Do I just painted it with the Tattered Angels DIY paint in Ebony.  It covered it up beautifully an you cannot even tell it was blue anymore!!

http://shop.canvascorpbrands.com/


7) Fill your bottles with Halloween candy of your choice, I picked Candy Corn as it just screams Halloween more then other candies!!  Now just to give them to the teachers!!  Trick or Treat!!


Supplies Used
Bottles
Tags - Deflecto
Ink - Prima
Adhesive - Beacon 
Enjoy!!

Thursday, October 22, 2015

Deco Mini Pumpkins **CCB & Die~Namites**

I love those cute little pumpkins and gourds that come out in the fall.  They are in all colors and shapes such as orange, white, stripes, green, yellow, round, squat, and much much more.  I love to put them out by my front door, around my house, and on my dining room table - then I thought why not decorate them up a little and make them really shine!!


I wanted to keep the feel of the pumpkin, so I kept with the colors and the grungy rustic feel of fall with raffia, hemp rope, and paper flowers.  I used the amazing Canvas Home Brands papers and rope, Tattered Angels Mists, and Die~Namites Dies to create these fun little guys!!

http://shop.canvascorpbrands.com/

http://www.die-namites.com/


You know you want some dies now, right? 
I got a great gift of 15% off you next purchase!!  
Just use erin15 and you get 15% of at checkout!!!  
AMAZING!!!

Here is a detailed tutorial on how to make these fun little pumpkins!!


Here is some close ups on each pumpkin.


Happy Fall!!

Supplies Used
Pumpkins - Various Kinds
Paper - Canvas Home Brands
Rope - Canvas Home Brands
Mists - Tattered Angels
Flowers - Prima
Dies - Die~Namites
Glue -Beacon
 Enjoy!!

Wednesday, October 21, 2015

Sparkle **Paper House & PageMaps & Tattered Angels & Xyron**

My husband had a formal military dinner to attend, and to me that is just a fun night to dress up and look pretty!! I decided to go out and get my hair done (which I never do), do some glam makeup (which I never wear), paint my nails, and wear high heels (which I never wear). Since I was all glammed up I decided to take my phone outside and get some selfies, pretty much so I could make a layout about me!!


The Gatsby collection was just perfect for my glamorous pictures. I kept with the black, white, and gold colors because the Pagemaps sketch had a lot going on already, I did not want the page to take away from the point of the layout, the pictures.  Below is the October Pagemaps sketch that I used, check out all the all the amazing October Sketches!!
 
http://www.pagemaps.com/images/2015/oct15pagemaps.htm
 
I used the beautiful Gatsby Collection from Paper House, full of rich yellow, gold, black, and white it is pure decadence on paper.  I then added in a few embellishments and puffy stickers from the Paper House Noir and Gatsby Collections.
 
http://www.paperhouseproductions.com/
 Here are some up close shots of this elegant layout.


I felt so goofy outside taking pictures of myself, but I was all dressed up and we do tend to forget to take pictures of ourselves, well at least I do. 

Supplies Used
Cardstock - Bazzill
Patterned Paper - Paper House
Stickers - Paper House
Ephemera - Paper House
Metals - Prima
Flower - Prima
Pearls - Prima
Mist/Paint - Tattered Angels
Adhesive - Xyron

Enjoy!

Friday, October 16, 2015

Die~Namites Oct Blog Hop!


Come hop along with Die~Namites to win!!

Hello and welcome, we could not be more excited to share our first Designer Team Blog Hop with you! The Blog Hop will be the third Friday of every month and each of us will be sharing a fun tip or technique. We love to hear what others are doing and how they are saving time and getting the best use from their die cuts. So here we go, start the hop with us and  two random persons will win a $10 dollars DieNamites Gift Cards to buy in our store.


FUN TIP - don't be afraid to cut up your die cut pieces if they seem to large like I did with the ivy pieces, make the dies fit to suit your needs!!


http://www.die-namites.com/http://www.die-namites.com/

I used the Large Ivy and Fall Breeze to the flower clusters in both the kraft and chocolate cardstock.


Be sure to hop around and comment on each design team members blogs, also visited our Facebook Page here, two random person will be chosen from the comments and likes to win the gifts certificates. What fun and there is lots to see and learn. Be sure to comment here too, the next stop on the hop is the fabulous Susanne. You have until Tuesday October 20 at 12:00 AM to comment. Here is the line up:

Susanne
Martha Lucia
Henryka
Mitsyana
Freetany
Erin - HERE


Supplies Used
Frame - Deflecto
Paper - Canvas Home Brands
Burlap - Canvas Home Brands
Cardboard - Canvas Home Brands
Rope - Canvas Home Brands
Dies - Die~Namites
Mists/Paint - Tattered Angels
Gesso - Faber-Castel
Flowers - Prima/Maya Road
Pearls - Prima
Alpha Stickers - American Crafts
Chipboard
Adhesive - Xyron


Share This

Related Posts Plugin for WordPress, Blogger...