Erin Reed Makes Amazon Storefront Shop at: AZ |
 Xyron Mega Runner Refil Shop at: SB |
 Close to My Heart Blue Skies Cardstock Shop at: CTMH |
 Xyron Mega Runner Shop at: SB |
 Fiskars Scissors 8" Shop at: AZ |
 Neenah 8.5x11 Card Paper Shop at: SB | AZ |
 Epson Remanufactured Ink Shop at: AZ |
 Epson Printer Shop at: AZ |
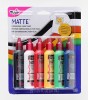
 Arteza Gel Pens Shop at: O |
 Arteza Giant Craft Mat Shop at: O |
 SB.com Neenah 4.25 x 5.5 paper Shop at: SB |
 Yayday Paper Company Shop at: O |
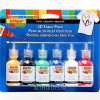
 Resin FLowers Shop at: AZ |

Blog Hop Participants
Video Hop Participants:
Instagram Participants:
Full List of Participants:
@creativecraftycards
@crown_focus@parabn17
@rosedawsondesigns_cards
@shelleythecraftylawyer
@typedinpink
@wonderingmindfield
@ladystacyzantzant
@quill_ish
@craftivation
@creativetimewithme
@handcraftedbyjoy
@neha_tulsyan
@dishaajain12
@luv2papercraft
@Msschuering
@Panda8ngelCreations
@scherolyn_cardcreator
@starmoondesignstudio
@Taniaahmed
@handmadebykavya @YourPaperStylist
@joherbert
@justinehovey
@alisonheikkila
@betz_golden
@breannloveland
@cards.by.becca
@chark99
@craftykate616
@craftylemur
@desperately_seeking_gina
@erica_cacacraft
@erinreedmakes
@haleympettit
@handmadebytasha13
@ingridblackburn
@inkyandstampy
@jess.mcafee
@jillcameroncreations
@kali9designs
@kassysparlour
@kraftpaperstamps
@mansimakes
@marciadehnnix
@mekomadeit
@melscardcorner
@menehunecreations
@mwoerner
@myinner.creative
@notableink
@OnePaperStreet
@paperheartscissors
@pia_k_larsen
@puffinsn
@sandyallnock
@sevenscrafts
@tarheelsoulmom
@Acarddayswork
@amritapettus
@BromeroCards
@carrierhoades
@craftawaywithme
@evacostigan
@Ginakdesigns
@stampartpapel
@dianegiarrusso
@kariavan
@macimbalo
@thejoyfulsoulcreates
@Itsacardknocklife
@jennifermcguireink
@Julianamichaels
@Karen_kards
@latishayoast
@laurafadora
@lisaharrolle
@mona.toth
@PerkyPennyPaperArts
@Redefinedkreative
@The_Crafty_Redhead
@Veezalis
@c.ann.h
@prettylittlebutton