Showing posts with label kaisercraft. Show all posts

Saturday, May 28, 2016

Smartie & Nerd Candy Jar Teacher Gifts **Beacon & ScrapPlezier** w/Video Tutorial

I love to give my kids teachers something special at the end o the year, and when I was teaching the most thoughtful and lasting gifts I received were the handmade ones.  I still member a little decorated tin of candy, a handmade blanket, handmade card, and a handmade necklace.  Some were very simple (the card) and some more elaborate, but the idea that a student or parent took the time to make it for me said a TON!!  I got the normal gift cards, but have no memory of who gave those to me, but all those handmade gifts I can still remember the names and years I taught them after 7 years of staying at home.  So each year I strive to make little gifts for my kids teachers to show them how much they have meant to me as my kids teacher.


This year we made candy jars for the teaches with Nerds and Smarties in them.  The note reads, "Thanks for being a NERD with me, and teaching me to me a SMARTIE".  A fun little pun of the names of the candies in the jar.

Here is a video on how we made the jars, my little girl helped!!


Don't forget about your teachers at the end of the year, they work so hard for your kids and even the smallest gesture mean the world to them.

Supplies Used
Jars
Candies
Papers/Tags - Kasiercraft - Offshore Collection
Ink - Prima
Ribbon - May Arts Ribbon
Circle Cutter - Kreaxions
Cutting Mat - Creative Memories
Pen - Marvy
Glue - Beacon

Enjoy!!

Sunday, February 14, 2016

Quick and Easy Mini Valentine's Cards Tutorial **C'est Magnifique Guest Designer**

I wanted to make some cute little Valentine cards to give my kids teachers that were not just the standard out of the box kiddy Valentines they were passing out to their friends.  In the Feb C'est Magnifique kit there were some pages of little PL sections that were perfect for mini cards.  


They are super simple cards that take only about 10 minutes to make them all and here is the info about how to make your very own!!

Mini Card Tutorial

1) Cut out and fold (or use Canavs Corp Mini Cards) to make cards that are 3"x4"in kraft cardstock.

Canvas Corp Gift Cards (mini cards)
2) I cut a pink section (2".5"x3.75") of Kaisercraft paper out, inked the edges.
3) I then cut out sections of  the Kaisercraft PL paper seen below, cut to 2.25" x 3.5" and inked them.


3) Glue all the sections together.
4) Add stickers to one card for a sentiment.
5) Add faux stitching to the top and bottom of the cards to as in a little something extra! 

Now all your kids teachers (or other friends and family) have a special card for a special day.

Supplies Used
Stickers - C'est Magnifique Feb Kit (Kaisercraft
Ink - Prima
Pen - Tombow
Tape Runner - Xyron
Enjoy!

Friday, February 12, 2016

Dreams Come True Layout **Guest Designer C'est Magnifique Kits** w/ Kaisercraft

Two of my kids were outside this past fall raking up the leaves to jump into, in the process they found a snake, but that is a completely different story.  I could not resist grabbing my camera and playing the mamarazzi for a bit while they were goofing around jumping in the leaves, throwing them at each other, and then at me.  Such wonderful leafy memories.  My son kept hiding from the camera, but my daughter was hamming it up.


I used the superb C'est Magnifique February kit again to create this layout.  The colors were just a perfect match for the feel of the pictures was taking.   I could not have asked for a better match for my pictures!
 

I took a Prima damask stencil and applied a thin coat of light paste from Prima, I did not want a heavy feel to the page, just a hint of something else there.  And of course I misted it with some yummy Tattered Angels mist in Silk.


I added a little Canvas Corp mini clothespin to the top of each picture and then cut out one of the Kaisercraft butterfly stickers and added it to the top for a cute little finish.


To emphasize the quote, I wrapped it in the white trim wrapping it around for a focal point, also helping of set the break in the picture line.  It helps draw your eye in, but then guide it around the page to the other elements.

Supplies Used
Cardstock - Core'dinations

Enjoy!!

Friday, July 10, 2015

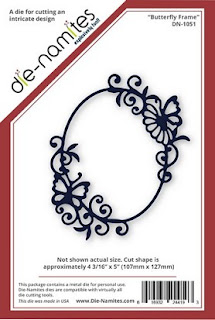
Remember **Die~Namites & ScrapPlezier**

I wanted to create an elegant card for my mother's Birthday in august, I know thinking ahead, but at least it is done!!  I Also have my daughter's and MIL birthday all within 3 days of each other so I have to think ahead.  My mother loves beautiful elegant things, so this is right up her ally!!


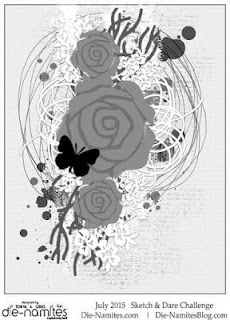
I used the amazing Die~Namites Dies and Sketch as the jumping point for my card, and then adding is the wonderful supplies from ScrapPlezier and May Arts Ribbons to finish it all off.

http://www.die-namites.com/Butterfly-Frame_p_58.html#

I used the Butterfly Frame from Die~Namites Dies as the background of my card using the amazing July Sketch on the Die~Namites Dies blog.  Head on over to join the currently challenge and win some dies!!

http://www.die-namitesblog.com/

 
Don't forget to head over to ScrapPlezier to see their latest challenges and inspiration and get some yummy supplies while you are at it!!

http://www.scrapplezier.nl/webshop/

Here are some up close pictures and different angels of the card.


Supplies Used
 Enjoy!!

Saturday, May 16, 2015

Sweet **Tombow & ScrapPlezier**

My little girl let me put cute pigtails in her hair for a birthday party and while we were at the party I took some pictures of her playing.  These wonderful pictures came out of that impromptu photo shoot with my phone.


I really wanted to capture the sweetness and girlishness of my daughter with this layout.  She is such a girly girl loving to wear her dresses, pretty shoes, and just being a girl!!  I used some of the wonderful supplies from ScrapPlezier (papers, flowers, diecuts, trims, doily, stencil, and mists).  ScrapPlezier is always having some wonderful challenges doing on, come check them out!!


http://scrapplezier.blogspot.com/

I wanted to really try for the shabby chic look with torn section on the paper, so this is how I achieved this look.

Shabby Chic Torn Background Paper Tutorial

1) Tear out some paper of your choice, I choose papers that looked similar to my background paper, but different enough so they stand out.  Make sure their are white edges to your torn section all around it.


2) Apply a good liquid glue to the back of the torn paper.  I used Tombow Aqua Mono Liquid Glue, it allowed me to lay the torn paper onto my background paper and adhere completely as if it is apart of the background and not just stuck on top of it. 

http://tombowusa.com/

3) Layout torn paper onto background paper and press and rub until it lays flat with no air bubbles.  Let it dry completely.


4) After the parts have all dried you can then apply a chalk ink (I used a light brown) and you can add more distressing to the background.  For this layout I applied glitter and beads.


5) The effect is that the paper is torn from the top revealing what is under, but really you just laid it on top!!


To glue all the layers pf papers together I used the wonderful Tombow Glue Tape Stamp Runner, to pop up some of the embellishments I used the Tombow Power Adhesive Tabs, and to hold all the larger embellishments in place I used the Tombow Multi Mono Liquid Glue.

http://tombowusa.com/http://tombowusa.com/http://tombowusa.com/


Tombow had a challenge to use flowers on a project, well I had fun this I used the background paper that had flowers and then added even more flowers as embellishments to the layout.  I just love flowers!!!

Supplies Used
Papers - Kasiercraft
Photoframe - Kasiercraft
Flowers - Prima
Resin- Prima
Buttons - Prima
Heart Doily - ScrapPlezier
Mists - Tattered Angels
Lace - Prima
Pearls - Prima
Ink - Prima
Chipboard - Dutsy Attic
Twine - Canvas Home Basics
Diecut - ScrapPlezier
Glitter/Beads - Prima
Medium - Prima
Stencil - Prima
Wood - BoBunny
Crochet Doily - Recollections
Adhesive - Tombow
Enjoy!!

Wednesday, April 22, 2015

Quick Cards **ScrapPlezier**


I wanted to create some quick and easy cards to have on hand in case I needed one quick.  For instance a last minute birthday party, thank you, for the kids teachers, etc that I may not have had a chance to make a specific card for that event I have some generic cards on hand ready to go.  


Directions for the Cards
  1. I made 8 card total (4 masculine and 4 feminine) using 1 sheet of cardstock and 2 half sheets of patterned double sided paper. 
  2. I cut the cardstock in section 3 x6 inches and folded them in half so the cards are 3 x 3 inches square. 
  3. I then cut the patterned paper (Kasiercraft Utopia and Lorie Valley Collections) into 3.75 inch squares, and then used the back side to make 2 inch squares of the Utopia paper and 2.75 x 1.5 inch rectangles for the Lorie Valley paper.
  4. I inked all the edges of the papers and glued them down as seen in the picture.
  5. I used various colors of mist to color the diecut shapes (“sweet”, “thank you”, gears, camera, and frame) from ScrapPlezier in silver, gold, red, white, purple and pink.  I did this first to allow them to dry while I did the cutting and inking of the cards, then I used my heat gun to finish them off so I could glue them down.
  6. I then added them to the center of the little cards
These quick cards only took me 15 minutes!!!

http://scrapplezier.blogspot.com/


Supplies Used
Paper - Kaisercraft
Diecuts - ScrapPlezier
Mists - Tattered Angels
Adhesive - Xyron

Enjoy!


Wednesday, November 19, 2014

Christmas Tags Part 1 **Susan K. Weckesser & ScrapPlezier**

My mother was looking at my scrap table when she was in town during Halloween and asked if I could make her some pretty Christmas gift tags (To and From tags) to put on her presents she was giving away this holiday season.  Here is the first set of tags I made for her.


For this set of tags I used the wonderful supplies from ScrapPlezier and stamps from Susan K. Weckesser.  I have this wonderful stamp set from Susan K. Weckesser that is all about snow, and it has 3 stamps in it, so I used each stamp on each one of the tags.

http://susankweckesser.com/welcome


I also used the wonderful washi tape, pearls, papers, and twine from ScrapPlezier to complete these very special tags.  Don't forget to check out ScrapPlezier for their latest challenge!!

http://scrapplezier.blogspot.com/
Supplies Used
Cardstock - Bazzil - ScrapPlezier
Patterned Paper - Kasisercraft - ScrapPlezier
Pearls - Kasiercraft - ScrapPlezier
Washi tape - ScrapPlezier
Alpha Stickers - Kasiercraft - ScrapPlezier
String - May Arts - ScrapPlezier
Stamps - Susan K. Weckesser
Chipboard - Bo Bunny & Memory Maze
Epoxy Sticker - Paper House
Ink - Prima & Tsukineko
Ribbon - Other
Enjoy!!
http://scraps-of-reflections.blogspot.com/

Saturday, November 8, 2014

Christmas **The Robin's Nest & ScrapPlezier w/Tombow**

Every Christmas for the past 8 years we have gone to the breakfast with Santa with my parents.  These pictures are form the last two years.  Catherine was 4 months old in 2012, and for most of the breakfast she slept, even in Santa's arms. Then came 2013 and Catherine was 15 months old, she would not stop screaming and crying, so we now have the typical crying baby photo with Santa.  Both years the boys loved going to see Santa, they had plenty of time to tell him everything they wanted and eat as much as they wanted too!  I personally love this tradition we have started as it gives us plenty of time to take pictures, it is nice and relaxed, there are not tons of people, and I love the pictures it get from it.


I used the wonderful products from The Robin's Nest and ScrapPlezier to crate this layout.  For more details about the Robin's Nest products please go visit their blog.


To mat all the pictures, and also as the background to the entire layout I used the wonderful Black and white Holly Glitter cardstock from The Robin's Nest.  The back side of the Holly paper is this wonderful muted red dot pattern on it, and it fit the pictures so wonderfully, I used the same paper for the journaling strips.  Around the edges of the mat on the pictures I added in the holly from the Christmas Rub-ons from The Robin's Nest.  I then added in a strip of  the Flame Glitter Swirl Cardstock behind the pictures running the length of the layout, those gold glitter stars rock!!

http://www.shop.robinsnest-scrap.net/Christmas-Collection_c38.htmhttp://www.shop.robinsnest-scrap.net/Christmas-Collection_c38.htm


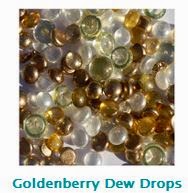
I used the gold and black Dew Drops from Robin's Nest to anchor the small picture, and the corners of some of the papers on the layout.  The add just the perfect touch to any project.!!  Here you can see the journaling strips that I used with the back side of the Holly Glitter Paper.

http://www.shop.robinsnest-scrap.net/Christmas-Collection_c38.htm

I used the Black Glitter Cardstock and used a swirl die cut to make the black swirls behind the small picture to match the effect of the pair of pictures below, even adding in the holly leaves, berries, and the twine.

http://www.shop.robinsnest-scrap.net/Christmas-Collection_c38.htmhttp://www.shop.robinsnest-scrap.net/Christmas-Collection_c38.htm


Tucked behind the swirls, berry vines, and flowers I cut out the dark red tree and bright red glitter tree from the Christmas Tress Glitter Cardstock.  I thought they matched the feel of the paper behind it and added a lovely layer to the page.  The back side of this paper is black, and I used it as the backing to the entire layout.
http://www.shop.robinsnest-scrap.net/Christmas-Collection_c38.htm

Don't forget to to check out ScrapPlezier for great challenges and wonderful items found on this page including the Kaisercraft papers and stickers.

http://www.scrapplezier.nl/webshop/

I just love Christmas.  It is just full of tradition and wonder, and to see my kids light up with just to thought of seeing Santa puts a smile on my face.

Supplies used
Cardstock - The Robin's Nest
Glitter Paper - The Robin's Nest
Patterned Paper - Kaisercraft - ScrapPlezier
Dew Drops - The Robin's Nest
Glitter Chipboard - The Robin's Nest
Twine - The Robin's Nest
Mini Alpha Stickers - Kaisercraft - ScrapPlezier
Black Die cut large Swirl - ScrapPlezier
Flowers - Petaloo
Vine - Petaloo
Die Cut - Heartfelt Creations
Ink - Prima
Paint - Plaid
Leaves - Prima
Adhesive - Tombow
Trimmer & Scissors - Fiskars
Enjoy!
http://scraps-of-reflections.blogspot.com/

Share This

Related Posts Plugin for WordPress, Blogger...