Showing posts with label basic grey. Show all posts

Monday, January 18, 2016

"Love of Crafting" Desk Organzier Box **Deflecto & Xyron w/ Basic Grey**

I am in need of storage for my crafty supplies and tools.  Up to this point I have been using cups, jars, tins, and vases to store my various supplies.  They look great but are too small, too wide, too tall, not sturdy, and they are all over taking up to much of a footprint.  Lastly, I did not do anything to them to make them "me".  Now I have a single organizer on my desk (from 3 down to 1), it has 8 separate storage units, and I altered it to make something pretty to look at on my desk!!


Here is a video about I made this super cute little desk organizer for my scrap table!


I used the beautiful "dear HEART" Collection from Basic Grey for this organizer.  Seems odd that I may have used a "love" themed paper pack, but then I thought the love theme does not have to just be about a person, it would be about something I love to do, and crafting is right up there at the top of the list.  So my box is all about my love for crafting!!!

6x6 Paper Pad, Journaling Stickers, Element Stickers, Journaling Card Sheet

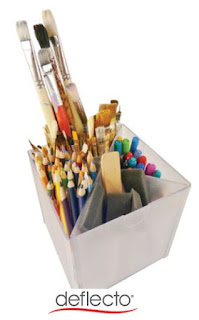
This is one box of the Deflecto Stackable Cube Organizer "X" Divider.  I used two of these units side by side attached wit the provided clip to hold them together.  You could add ad many of these unit together as you want, just keep clipping them, you can can them a large box, or more of a liner unit, completely up to you!!
http://www.deflecto.com/products/pc/Craft-Storage-c174.htm

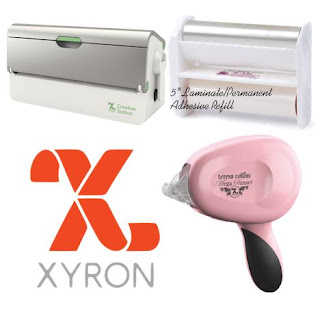
I used the Xyron Mega Runner  to hold all the papers together, but then I used the Creative Station with the 5" Laminate and Permanent Adhesive on the back to make each section stronger, water proof (well really mist in my case), tear resistant, and prevent it from peeling apart. 
https://www.xyron.com/en-US/
Here are some up close shots of the organizer with and without supplies in them.  The bonus to this unit is I get bored with the designs of the papers I used, I can also pull them off redo it and make a brand new look for myself!  I could even make different looks for each season, Valentine's is already done now!!


I all about organizing this month - how about you?!?

Supplies Used
Box - Deflecto
Papers - Basic Grey
Stickers - Basic Grey
Adhesive - Xyron
Laminator - Xyron
Paper Trimmer - Fiskars
Scissors - Fiskars
Enjoy!!

Wednesday, March 26, 2014

my kids ***Just Imagine & Birds of a Feather Kit***

I took this picture right before my we went on our family vacation last summer - turned out to be more of a house hunting trip as 5 months later we had moved to where we vacationed.  I dressed all three kids in the same outfit, a yellow shirt from Canada from Grandma Elaine with orange shorts.  Probably one of the only times I will dress them so alike, so I had to take a picture of it - and low and behold they all smiled and were looking at the camera (Morgan 7, Brandon 3, Catherine 10 months).  A great start to our vacation.


Here I used Kreations punch 923 with insert A to created a border punch from Just Imagine Crafts.  I used it along the top and the bottom of the layout and backed the grey paper behind it so it shows a pop of color under the punch.


I also used the punch along the top side of the brown paper just above the picture for even more texture and dimension.  This punch is so versatile and fits any gender - not to girly or boyish, just a great geometric shape.
Here I played with the stencil from the March kit from Birds of a Feather Kit Co.  I traced the lines of the stencil with a black marker and used it for a journal tag.  I also used the acrylic parts from the kit that I had used alcohol ink on in my technique Tuesday seen below and added cardstock behind it and added a wood piece on top.

I love this little acrylic photo elements from Basic Grey in our March kit, they are just too cute!!  Sometimes I want to change the color or look of items, it just does not "fit" with the page or project I am working on.  Acrylic does not take color like paper or chipboard, so mists and most inks will not work on them, they just rub off, so this is where alcohol inks come into play.

Acrylic and Alcohol Ink Technique

1) Supplies - BG acrylic items, alcohol ink in color of your choice (I choose brown), small piece of felt.


2) Place a couple of drops - do not add to much a little goes a long way- on the acrylic.


3) Use your felt to smear it around, you can dab it, wipe it, just don't over do it or you will wipe it all off.


4) You can repeat steps 2 and 3 with another color for a complex look, or leave it a single color.
 

5) Enjoy your new color of acrylic!!


Supplies Used:
Cardstock - Birds of a Feather Kit - Bazzill
Patterned paper - Birds of a Feather Kit- Basic Grey and Bazzill
Wood - Birds of a Feather Kit - Freckled Fawn
Stencil - Birds of a Feather Kit - TCW
Acrylic - Birds of a Feather Kit - Basic Grey
Stickers (grey) - Birds of a Feather Kit - Basic Grey
Punch - Kreations
Ink/paint - Ranger
Pen - Faber Castell
Alpha letters (brown) - Thickers
 
Enjoy!!

Friday, December 6, 2013

Merry Christmas **Susan K. Weckesser & Flamingo Scraps**

Last December my friend took these wonderful pictures of my boys (plus some of me, my mom, and my daughter) when they were a week away from being 3 and 7 years old.  I just fell in love with the head shots of both boys, but could never find the inspiration to create a layout with them, until now!!


Putting pictures in Polaroid frames is huge right now, so I could not resist playing around with the idea and with the Maya Road frames.  My pictures were not the correct size, so I added a paper border inside and then added their names below.  I also wanted to try out my new Martha Stewart circle punch (it made the doilies behind the pictures).  I then added in my own layers and clusters for lots of dimension and fun.  You can also see Heidi Swapp's file folder tucked in the layers!!


Here you can see some of the May Arts twine looped around to make a fun flourish behind the Prima flowers.  I then added in a fun Tim Holtz charm, which is all stacked up on top of Maya Road chipboard, Basic Grey 25th and Pine die cuts and paper, and some wonderful Susan K. Weckesser Stamps used with various colors of red and brown Ranger Distress Inks.  

I used the following sets of stamps from Susan K. Weckesser all layered on top of each other for lots of dimension:
http://www.susankweckesser.com/welcome


Here you can see some I stamped on the Maya Road Chipboard with one of the Susan K. Weckesser Stamps after painting it with Clearsnap Smooch Paint.   You can see Cosmo Cricket wood stars, Prima lace,  and some of my paint splatters and circle marks I made with Tattered Angels and Heidi Swapp Mists (here is a link to the tutorial on how I make them).

Supplies can be found at Flamingo Scraps - head on over to see them, lots of great sales to be had!!

Supplies used


Share This

Related Posts Plugin for WordPress, Blogger...