Showing posts with label designer crafts connection. Show all posts

Thursday, June 21, 2018

How to Personalize Scout Camp Trunk Using Vinyl

My son is heading out to summer scout camp and one of the things he needs is a trunk to pack all his supplies into.  Now the crafty mom in my knows he needs to label this trunk so he knows which is his at a glance.  The label needs to be able to stay put, not rub off, withstand high and low temperatures, and last for a few years.  Bring on the vinyl letters from Styletech Craft !!


Here is a video on how to cut and use Styletech Craft Vinyl.


I cut the vinyl letters from the glitter (blue and teal) and opal holographic (white) vinyl to write the name Morgan Reed using a Cricut for the top and bottom of his scout storage trunk.


This vinyl is so easy to cut with a Cricut, just set it and cut.  Hardest part is coming up with an idea and design to cut with the wonderful Styletech Craft vinyl!


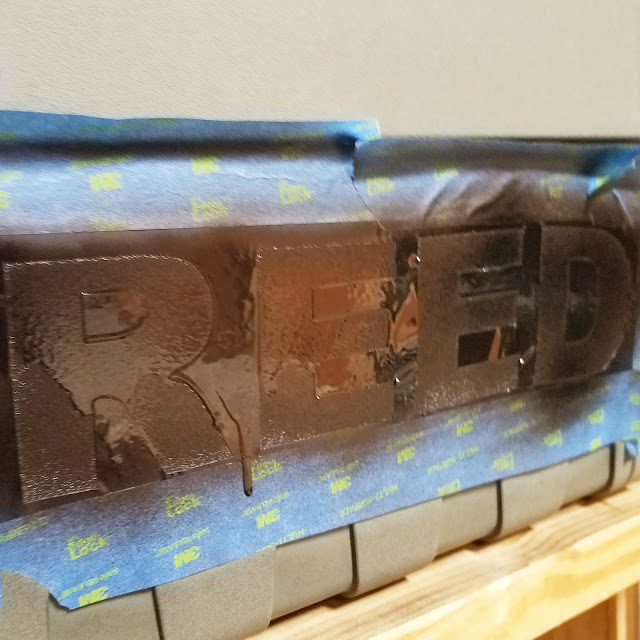
I actually did 3 projects with this amazing vinyl.  My husband saw that I was cutting the  Styletech Craft Vinyl so he used the left over part of after I pulled out the letter to use as a stencil.


He then used spray paint to make his own labeled trunk!


I also played around with the vinyl on my tumbler and cut out a monogrammed letter E for Erin.  Super easy way to personalize my drinking glass!


Check out the video on how easy this tumbler was to make!


 Styletech Craft  vinyl is so easy to work with and the ideas of what you can use it with are endless!!


Check out the other ideas for using Styletech Craft with the designers at Designers Craft Connection!!  Check out the other projects with the links below!


Supplies Used
Interested in the supplies I used in this project?  Most are listed below and some are affiliate links, which generates a me little commission (at not extra cost to you at all) when you click on the link and make a purchase.  Affiliate and product disclosure can be found here.


Shareasale
Shareasale
Shop at:
O
Tailwind
Tailwind
Shop at:
O
Black Craft Mat
Black Craft Mat
Shop at:
AZ
Tape Technologies Inc Vinyl - Glitter
Shop at:
AZ
Tape Technologies Inc Vinyl - Opal
Shop at:
AZ
Cricut Explore Air 2
Shop at:
AZ
Cricut Tools
Cricut Tools
Shop at:
AZ
Plano Storage Trunk
Plano Storage Trunk
Shop at:
AZ
Tumbler
Tumbler
Shop at:
AZ


Thursday, October 19, 2017

How to make Christmas Themed Resin Planner Clips

I love to make little embellishments, and resin and planner clips just seem like a match made in heaven!!  So I pulled out some fun little molds that would work for a holiday theme, plus I made a few of my own molds in the shape of a snowflake!!


Here is a video on how to make your own molds plus also create your own custom resin pieces with dyes and powders.


I first start with making my own mold for snowflakes.  I pushed a metal charm into the Amazing Casting Products Mold Putty and made a few of these.


I then started to pour various pours of Amazing Clear Cast Resin dyed with the liquid dye in Blue and Powder in Pewter and Gold to make some fun shapes.   I also used a clay mold to get a few other shapes.


This skate is one of my favorites as it had the gold at the bottom, but then I changed to colors of the resin with the dye to get the blue on top.  So fun!!


I also love this effect, I dusted the mold with the Gold powder and then poured the blue dyed resin into the mold and mixed it up with the stir stick.  It looks amazing from front where the gold dust was placed.


Now look at the back,  love this side even better!!  Not sure what I am going to do with this gem, but I am saving it for something!!


For most of the resin pieces I turned them into planner clips by gluing them to paperclips.  Look how fun they all are!


The rest of the clips I made are showed in the video, I made over 15!!


Amazing Casting Products is having an amazing sale, head on over now to get your mold and resins, they are so easy to use!!


Check out all the other designers projects in the Designer Crafts Connection, they are spectacular!!


Supplies Used
Interested in the supplies I used in this project?  Most are listed below and some are affiliate links, which generates a me little commission (at not extra cost to you at all) when you click on the link and make a purchase.  Affiliate and product disclosure can be found here.

Fiskars Scissors
Fiskars Scissors
Shop at:
AZ
Helmar Craft Glue
Helmar Craft Glue
Shop at:
AZ
Makin's Clay Push Mold
Shop at:
AZ
Amazing Casting Resin
Shop at:
AZ
Amazing Casting Mold Putty
Shop at:
AZ
Alumilite Colorant Dye
Shop at:
AZ
Alumilite Alumidust
Alumilite Alumidust
Shop at:
AZ
Paper Clips
Paper Clips
Shop at:
AZ


Thursday, September 21, 2017

Fall Pumpkin Decor with Pastel Colors and Felt

I love to decorate pumpkins during the fall.  This year I felt like doing something a little different and go do with the traditional colors or feel of autumn or Halloween, I went with glam and princess!!


Here is a video on how to make these fun princess pumpkins.


I love the look of the Kunin Felt of the pumpkins, and not to mention the felt is made form recycled plastic bottles!!!  The felt looks soft and dreamy as flowers and leaves and they could not be easier to make since they work amazingly with wafer thin dies.  I love the colors of the felt, I chose the Kunin Premiumfelt in Lagoon, and then in the Classic Felt I used the colors of Baby Pink, Minty, Olive, and Lemon Frost.


Adding a bit of bling and twine just made these pumpkins amazing!!


The best part is I made these pumpkins using Dollar Tree foam and plastic pumpkins, a little but of paint and some fun embellishments and they are completely transformed into a fun Halloween decor item, or amazing Princess party decor!!


Check out all the other designers in the blog hop for Kunin Felt and the Designer Crafts Connection, there are some amazing projects!!   Plus if you leave comments on each of the designers blog post you get a chance to win $75 worth of Kunin Felt!!

http://designercraftsconnection.blogspot.com/


Supplies Used
Interested in the supplies I used in this project?  Most are listed below and some are affiliate links, which generates a me little commission (at not extra cost to you at all) when you click on the link and make a purchase.  Affiliate and product disclosure can be found here.

Prima Pearl Swirl
Prima Pearl Swirl
Shop at:
AZ
Helmar 450 Quick Dry Adhesive
Shop at:
AZ
Fiskars 5 Inch Titanium Micro-Tip Easy Action Scissors
Shop at:
AZ
Cuttlebug
Cuttlebug
Shop at:
AZ
Cuttlebug Plate C
Cuttlebug Plate C
Shop at:
SB | AZ
Tattered Angels DIY & Decor Paint
Shop at:
AZ | O
Black Ink
Black Ink
Shop at:
SB
Jute trim
Jute trim
Shop at:
AZ
Kunin Felt
Kunin Felt
Shop at:
AZ
Pumpkins
Pumpkins
Shop at:
DT
ScraPerfect No Clog Cap
Shop at:
AZ | O
CCB Rope
CCB Rope
Shop at:
AZ
ScraPerfect Best Glue Ever
Shop at:
AZ | O
ScraPerfect Embellie Gellie
Shop at:
AZ | O
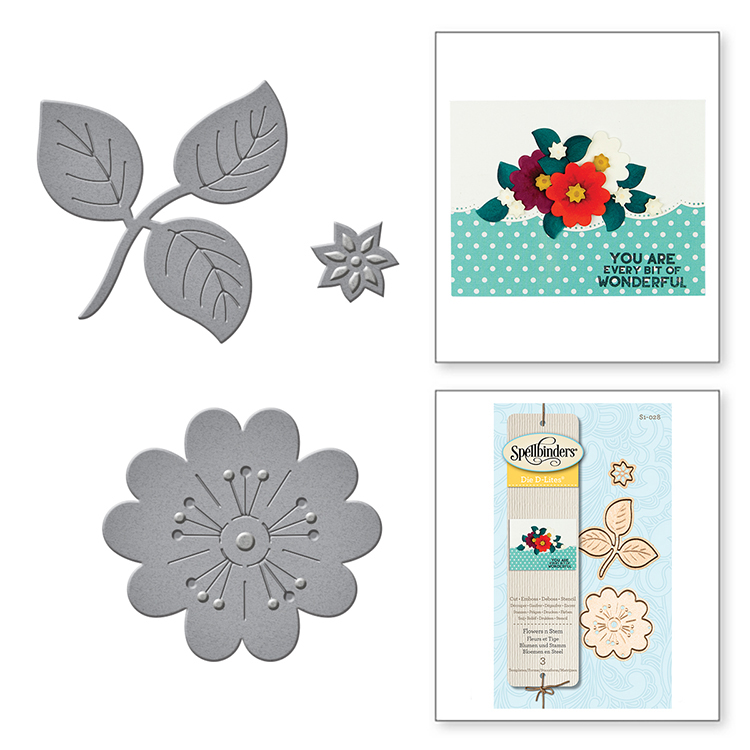
Leaf Die
Leaf Die
Shop at:
SB
Spiral Flower Die
Spiral Flower Die
Shop at:
AZ

Share This

Related Posts Plugin for WordPress, Blogger...