Showing posts with label candy jar. Show all posts

Saturday, December 28, 2019

Felt Gnome Upcycled Etched Candy Jar Toppers

Gnomes are all the rage, and they are super easy to make with a jar, some felt, and glue!!  Check out below for how to make them!

This post also contains affiliate links and I will be compensated if you make a purchase after clicking on my links.  Various companies provided me with some product to create this project.  The opinions I share are solely my own.


Check out the super short video below to see how to make these fun winter gnomes!


To start with I save my glass jars.  These are a trio of jars that had barbecue sauce in them, so I just washed them really well and pulled the labels off.


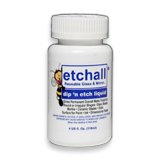
I then etched one the jars to give it a frosted look with the Etchall Dip and etch liquid.  I love the look of a frosty jar, and it makes it even more wintry too!!


I just love the look of the frosted glass with candies in them!  You do not even need to frost the entire way down, because the gnome toppers cover up the top.


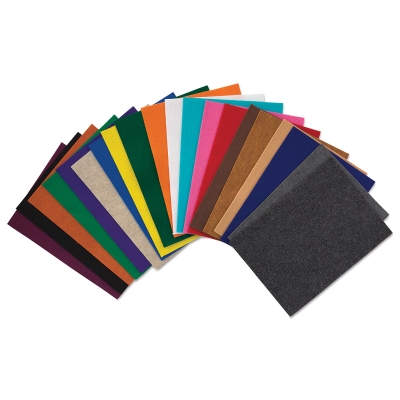
Then it is just about placing the felt gnomes on the top.  I started with a 9 x 9 inch square of felt and added glue along the top and edge to make a cone (see video to learn how to do it).  The added a little triangle cut piece of faux white fur for the beard and a wooden bead for the nose.


If you make your cone tighter it makes the gnome sit higher up on the jar as the cone is smaller, if you make the cone larger then it goes further down the jar.  I love that all three of my gnomes have different heights, and I also put in different candies in each jar!


What color will you make your gnomes?


What to see some other fun gnome ideas, check this one out at Favecrafts!!!


Interested in the supplies I used in this project? Most are listed below and some are affiliate links, which generates a me little commission (at not extra cost to you at all) when you click on the link and make a purchase. 


Arbonne
Arbonne
Shop at:
O
Amazon Storefront
Amazon Storefront
Shop at:
AZ
Fiskars Scissors 8
Fiskars Scissors 8"
Shop at:
AZ
Kunin Felt Classic
Kunin Felt Classic
Shop at:
AZ | O
Kunin Felt Premiun
Kunin Felt Premiun
Shop at:
O
Etchall Dip n Etch
Etchall Dip n Etch
Shop at:
AZ | O
Supertite Glue
Supertite Glue
Shop at:
O
Supertite All Purpose Univseral Glue
Supertite All Purpose Universal Glue
Shop at:
O
White Faux Fur
White Faux Fur
Shop at:
AZ
Wood beads
Wood beads
Shop at:
AZ


Wednesday, March 18, 2015

Easter Candy Jar **Die-Namites Dies & ScrapPlezier**

We are doing a secret sister gift exchange for a Mommy group I belong to; give a fun surprise to a fellow mom each week for a month to brighten her day.  I found out her favorite chocolate (peanut butter Easter eggs), so created a fun little candy jar made from a re-purposed BBQ jar (I always keep my glass jars for fun little projects like these).


I used the wonderful Spring Eggs die cut from Die-Namites Dies,  it is just perfect for those Easter cards, decorations, or gifts.  

http://www.die-namites.com/Spring-Eggs_p_159.html


I used the die 3 times in my Cuttlebug with the A, B, and C plates, 1 in the peach color cardstock, 1 in the hot pink, and 1 in cream for the front of the jar.  I used the cut out sections to fill in the parts of the egg to make it looked more decorated.  I also used a dark brown cardstock and cut it out in the egg shape to back each egg, so there appears to be 4 colors per egg.  I wrapped the entire container in Kaisercraft Pennyroyale collection papers, they have such wonderful patterns that matched the idea of the eggs, and I just matched the cardstock to them.

*******************************************************************
  
THIS MONTH'S DARE IS TO USE A CUT OUT!
  1. Use at least one Die~Namites Die in your creation.
  2. Use the SKETCH! It can be interpreted (loosely or exactly) as a card, layout or altered piece!
  3. Incorporate the DARE into your creation.
  4. Mention the Die~Namites Die you used in your blog post.
  5. Link back to the Die~Namites Die.
  6. You have until the last day of the month to post your creation on your blog and link up to this post.  **PLEASE add a link to your direct post, not your entire blog.*
Each participant will receive one entry into our random drawing
for each entry into the challenge.

 A random winner will be chosen from eligible participants for a
$25 Gift Certificate to Die~Namites Dies.
 ******************************************************************* 

I used the wonderful Die-Namites March Sketch and Dare as my inspiration for the design of the center of the jar.  The Dare is to use a cut out, so I placed some of the cut out sections back inside the die cut eggs.


I used one run of the die cut in the peach and cut out just one egg and filled it in with the cream extra bits so it would fit on the top of the jar.  I used some self adhesive pearls to add a fun little touch, and then wrapped everything with some twine around the lid and the eggs in the middle.


All the wonderful pattered papers, cardstock, twine, pearls, Cuttlebug plates, and inks can be found at the amazing ScrapPlezier store - plus don't forget the great challenges they have!!


http://scrapplezier.blogspot.com/


Supplies Used
Cardstock - Bazzill - ScrapPlezier
Patterned Paper - Kaisercraft - ScrapPlezier
Jute - ScrapPlezier
Cuttlebug Accessories -  ScrapPlezier
Pearls - Kaisercraft -  ScrapPlezier
Ink- Ranger -  ScrapPlezier
Dies - Die-Namites
Adhesive - Xyron

 Enjoy!!

Share This

Related Posts Plugin for WordPress, Blogger...