Thursday, June 12, 2014

Dreams & Wishes **Susan K. Weckesser** BLOG HOP


http://mysweetearth.blogspot.com/2014/06/susan-k-weckesser-and-unity-blog-hop.html

You do not want to miss out on the super cute projects created by designers from both teams. You can view them all by clicking on the links and/or thumbnails at the bottom. Make sure you visit all the blogs as we have some fabulous prize packages to give away. Hop through and visit all blogs (and leave some loving comments) then come back to the original post on Susan K Weckesser blog & the original post on the Unity Blog - tell us which stamp set you would most enjoy and which projects really caught your interest. We will pick two winners from comments left on this blog post at Susan K Weckesser and two winners from those commenting on the Unity Stamp Company blog.

http://mysweetearth.blogspot.com/2014/06/susan-k-weckesser-and-unity-blog-hop.html
 
I wanted to create a card for just a generic occasion to have on hand for when I need it.  It could be a birthday, a thank you, a just thinking of you, or anything really. Now I have on hand a card I can give out when I don't have time to make one or I forgot (which happens).


This uses on the brand new stamp collection "What;s up gnomey?" from Susan K. Weckesser.  It is full of gnomes, flowers, seeds, and flowers.  It is such a fun little set and there are so many uses for it.  I also used the wonderful papers from Susan K. Weckesser, they are so full of color and work perfectly with her stamps.  Here I used the front and back of  "Live, Love, Create".

http://www.susankweckesser.com/welcome


Leave a comment and follow my blog for a chance to win a great PRIZE - a Susan K Weckesser Stamp Set!!  International and DT welcome to enter!!


Come back on Monday June 16th, 2014 and I will post my winner!!

Supplies used
Patterned Paper - Susan K. Weckesser
Cardstock - Core'dinations
Stamps - Susan K. Weckesser
Ink - Ranger
Glitter - Ranger
Pen - Faber-Castell
Adhesive - Scotch

http://scraps-of-reflections.blogspot.com/

Friday, June 6, 2014

Thank You **Susan K. Weckesser & Just Imagine**

The end of the school year has come and I want to thank the oldest son's teacher for all she has done for him this year.  Nothing says "thank you" more than something made from the heart.


I took Susan K. Weckesser's wonderful paper line "Beautiful Daydreams" and cut out a section of it in the bottom left corner.  I then took similar shapes of the flowers and butterflies and but them out to pop them uo on top of the existing ones in the paper.  Lastly, I used stickles in corresponding colors to accent the flowers, butterfly, thank you emblem, and stems.

http://www.susankweckesser.com/welcome


To create the emblem for the thank you stamp I used the Just Imagine Circle Cutter on 3 different colors of paper, enlarging the size of the circle by a small amount each time to create a multi-layered look.  I also used Kreaxions punch 311 with the A insert from Just Imagine along the banner and then filled in the punched section of stickles.

http://www.justimaginecrafts.com/catalog/http://www.justimaginecrafts.com/catalog/


Don't forget to thank a teacher today!!

Supplies used
Patterned Paper - Susan K. Weckesser
Cardstock - Core'dinations
Punch - Just Imagine
Glitter - Ranger
Stamp - Recollections
Ink - Ranger
Adhesive - Scotch

Enjoy!!
http://scraps-of-reflections.blogspot.com/

Monday, June 2, 2014

Robin's Nest Projects

http://chatteringrobins.blogspot.com/

 Below are the projects I have selected for my application for the design team.

Layout
Pretty Happy Girl

Back in January I was playing around with my daughter taking pictures at the park near our house.  She looked so cute in her little goodie sweater, so sweet and happy.  I played with the color a bit on the pictures and a mostly black and white looked perfect!!


I used a monochromatic feel of teal and green and with black and white.  
  1. Distress the background layers and ink.
  2. Add in layers of texture with molding paste and stencils then add in mists in splatters, drips, sprays, and blobs.  I did the textures in two phases so I could layer on top of each other, some with the washi tape from the kit under the paste and some over it after it dried.  
  3. I then added in strips of the papers, flowers, circle cutouts from papers, stickers, and sequins - all papers are distressed and inked.  I rolled some of the paper back around the edges to add in stickers and more washi tape behind the rolls.
  4. Add in your pictures with the edges scraped away for more texture.


Here you can see up close how I layered up the papers and embellishments.  I even distressed the edge of the pictures and added in some ink to the distress portion of the picture.

Card
Happy
I love to use flowers and girly things on my cards and projects, but sometimes I want something more masculine, especially if it's for my husband.  I find that a great substitute for flowers are gears, and there are so many varieties out there in chipboard, acrylic, stamps, stickers, and punches.  So here is a card I made for his birthday this year.

I am loving paint splatter right now, I seem to be using them in just about every project, but they really add to the dimension and depth to your paper for very little effort and cost.  I then on top of the splatters used some stamps around the edges and borders of the card for more dimension and texture.  I kept to earth tone colors for a rustic look, I felt that it just added to the masculine feel.


I was not happy with any of the alpha letters I had on hand, they were not the correct size, wrong color, wrong font, etc.  So I took something that I like the size and font and altered the color.  These were foam "Thickers" in grey.  I pressed my distress ink by Ranger in a dark brown on top to give it a darker look and distress the letters a bit.


Play with your stamps and inks.   You can get such wonderful results by layering and just letting your project go where it needs to go.
Altered Art - Canvas
Rooted

I just had professional pictures taken of my kids in February.  At these ages (Morgan 8, Brandon 4, and Catherine 18 months) you never know what you are going to get.  I told the photographer to just take anything and everything.  I am not a huge fan of "look at me and smile" pictures, I much rather just capture the feeling of the moment.  This picture was taken at the end of the session, they were all grumpy and tired and to pep them up I gave them all a sucker and asked them to sit on the stairs.  This beauty unfolded.  For those that do not know my children, it image captures the essence of who they all are at this moment in their lives.

I used a 8x10 inch canvas as the base of my project.  I have never done a canvas before, but I approached it as though it was a layout just in a different size.  
  1. I started out by painting the canvas with acrylic paints in tones, of green, blue, yellow, brown, and beige.  Painting a layer letting it dry then painting another layer, not full coats but enough to see the colors.  
  2. I then added texture by using stencils and molding paste and using spray mists and more paint.  Lots of drying time for the base.  Mostly concentrating on the edges as those re the only parts showing.
  3. I then added in lots of strips of papers that are distressed and inked and some punched with an edge punch.
  4. Next came the flowers between the layers and more blotches of paint and sprays of mists as I added in more layers.  
  5. Then added was the chipboard painted in brown, trim, the picture, and some stickers.

Don't forget to check out the Robin's Nest Blog and Website!!

Thanks for view my application!!  I hope you enjoyed my work.
http://scraps-of-reflections.blogspot.com/

Wednesday, May 28, 2014

Thank You **Paper House & Off the Rails Scrapbooking**


The end of the school year is coming up on us and I love to give a handmade card to my kids teachers.  Here is one of cards I am making for this end of school year for my son's pre-school teacher. 


Here I used the wonderful 12x12 Garden Paper Stack and cut out 3 squares, 1 large (4x4) and 2 small (2.5 x 2.5).  I inked the edges and added in faux stiching with a black pen and added them to my 6x6 card already matted with cardboard and orange cardstock.

http://www.paperhouseproductions.com/shop.html/

http://www.paperhouseproductions.com/shop.html/

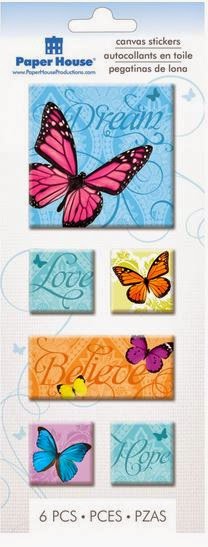
I then took the gorgeous canvas stickers and placed them around the card for a geometric look and added int he words thank you hugging close to the large pink floral canvas sticker.  You can also see a peak of the glittered paper from the Garden papers here, so pretty!!


http://www.paperhouseproductions.com/http://www.paperhouseproductions.com/

Join me over at Off the Rails Scrapbooking for a fun challenge of "Up, Up and Away" and use anything that flies on your project to enter.  Lots of fun goodies to be had!!

Don't forget to say a huge thanks to ALL the teachers as we are coming up on the end of the school year - they deserve it!!

Supplies Used
Patterned Paper - Paper House
Canvas Stickers - Paper House

Cardstock - DCWV
Cardboard - DCWV
Alpha Stickers - Momenta
Pen - Faber-Castell
Ink - Prima
Mists - Heidi Swapp
Enjoy!!

Monday, May 26, 2014

love **Birds of a Feather & Just Imagine**

We had some pictures taken when Catherine turned one.  During the photo shoot we inevitably had some tears, poor little cranky baby girl.  My journaling states, "Most of the time you are the sweetest little girl, but when you get tired 'miss cranky pants' comes out.  You still look super cute in your barely there pigtails and even through your cranky moments I love you so much."


Here I used the May Tweet Sketch as my inspiration for the fun layout with the May Birds of a Feather Kit.  

 2014 may boaf sketch

Lots of fun with layers and embellishments!!


I used the super easy circle cutter from Just Imagine to create both circles in white and punch 920 with the A insert to punch the paper strips.


Patterned Paper - Simple Stories & American Crafts - Birds of a Feather May Kit
Instaframes - Simple Stories - Birds of a Feather May Kit
Enamel Stickers -  Simple Stories - Birds of a Feather May Kit
Library Cards w/pocket - Maya Road -  Birds of a Feather May Kit
Alpha Stickers - American Crafts - Birds of a Feather May Kit
Cardstock - American Crafts - Birds of a Feather May Kit
Trim - Cheep Trims -  Birds of a Feather May Kit

Flowers - Prima -  Birds of a Feather May Kit
Embellishments - Hampton Art & Jillibean Soup - Birds of a Feather May Kit
Punch - Kreaxions - Just Imagine
Ink -Prima


Enjoy!!

fun times **Birds of a Feather & Just Imagine**

Easter of 2014 we spent at my parent's house and we had our annual egg hunt at the Club.   There were 3 different areas for hunts based on age, and my kids were in two of them.  They all had such a haul of eggs that we will have candy for the next year!!


I made this layout with the super cute and bright May kit from Birds of a Feather.  I did tons of layering with strips of paper, ribbon, and lots of bits and bobs of embellishments from the kit.


I used a variety of punches (905, 907, and 920) from Just Imagine using the A border punch insert.  Some I punched on both sides of the paper strip, some I randomly punched, and some I just punched one side.


Hope you enjoy my atypical Easter layout!!

Supplies used:
Patterned Paper - Simple Stories & American Crafts - Birds of a Feather May Kit
Instaframes - Simple Stories - Birds of a Feather May Kit
Library Cards w/pocket - Maya Road -  Birds of a Feather May Kit
Alpha Stickers - American Crafts - Birds of a Feather May Kit
Cardstock - American Crafts - Birds of a Feather May Kit
Trim - Cheep Trims -  Birds of a Feather May Kit

Flowers - Prima -  Birds of a Feather May Kit
Embellishments - Hampton Art & Jillibean Soup - Birds of a Feather May Kit
Punch - Kreaxions - Just Imagine
Mist - Heidi Swapp
Twine - American Crafts
Ink -Prima
Stamp - Prima


Enjoy!!
                                                                                                                             

Sunday, May 25, 2014

Paper House/Xyron Blog Hop Winner

Thanks for participating in the co-hop and commenting!!

My winner is Sue D


Congrats!!!  

Please e-mail me at erinkreed@gmail.com and send me your address for your prize!!


Share This

Related Posts Plugin for WordPress, Blogger...