Tuesday, September 29, 2015

Cute "Punny" Cards **Xyron & Paper Smooches**

I always need cards for last minute things; birthdays, thank you, get well, etc and I don't always have time right before the event to make one.  I love to make some random cards ready in my desk for such occasions.  


Here is a video of how I created one of these cards.


I wanted the Paper Smooches "Squeaky Clean" Stamps to stand out so I really kept a simple background of solid cardstock papers.  The irony of the cards is the flicked spray mists, the illusion that the clean is really not clean.   Adding on all the small parts of ribbons and papers are also super easy with Xyron adhesives.

http://www.papersmoochesstamps.com/
I just clove the puns on these cards, the vacuum with the sentiment of "that sucks" is sure to make a get well card seem a bit brighter!


I giggle at "I was swept off my feet" with a broom, duster, and dust bunny.  Even my husband laughed at that one.


I have already given this one away as a birthday card to my FIL, he just turned 71, pretty impressed!!


I love the light-hearted feel of these cards, it just makes you smile.

Supplies Used
Cardstock - Bazzil
Stamps - Paper Smooches
Ink - Prima
Ribbon - Bazzil
Gems - Bazzil
Mist - Tattered Angels
Adhesive - Xyron
Trimmer/Scissors - Fiskars


Monday, September 28, 2015

boo card **Die~Namites & CCB**

I love the colors of Halloween; the orange and black are so striking together.  For this card I went for an elegant spooky look, not sure that is really a things, but I love he feel the card gives.  


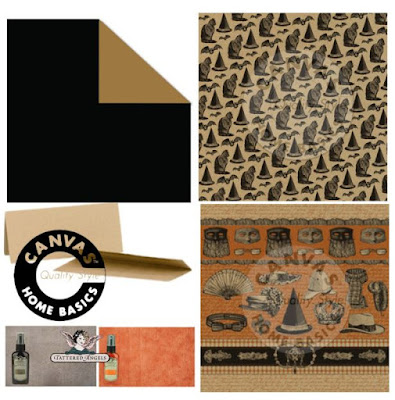
I used the tall skinny card from CCB as my base, and spray and flicked Tattered Angels Pumpkin Spice and Black Magic Glimmer Mist on the card for texture.  I cut out a decorative section from the black strip on the Haunt It paper and layered it over the die cut ivy pieces from the black cardstock (I used both the kraft and black sides).  Cut out a couple of bats of different sizes, add some black swirls, and stick the "BOO" at the bottom.  Done!!

http://shop.canvascorpbrands.com/pages/canvas-home-basics

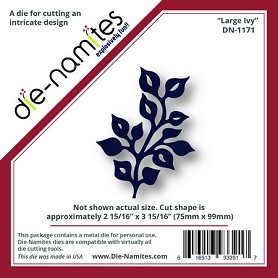
I just Die~Namites dies.  They are so versatile for so many projects.   I used the Large Ivy cut out 3 times, 2 in black and one in kraft.  I cut the kraft ivy apart to use above and below the emblem in the middle.  I always ink everything to give it that finishing touch, and black just seemed fitting for this card.

http://www.die-namites.com/Large-Ivy_p_180.html

You know you want some dies now, right? 
I got a great gift of 15% off you next purchase!!  
Just use erin15 and you get 15% of at checkout!!!  
AMAZING!!!

Halloween is time to let your dark side out.  Have fun and get a spooky!!

Supplies Used
Card - CCB
Patterned Paper - CCB
Cardstock - CCB
Dies - Die ~ Namites Dies
Mist - Tattered Angels
Pearls - Prima
Ink - Prima
Metal - Other
Adhesive - Xyron

Monday, September 21, 2015

Sweet Birthday Girl **Paper House**

For the actual day of my daughter's 3rd birthday we went out for lunch and than picked up cupcakes for dessert.  She could not for daddy to get home to eat her cupcake, so I let her have it early in the backyard.  I did insist on her wearing her party princess hat that I made, which she loved!!  There is nothing like eating a pink princess cupcake in your pink outfit with a pink, princess party hat!!  There can never be too much pink!!!


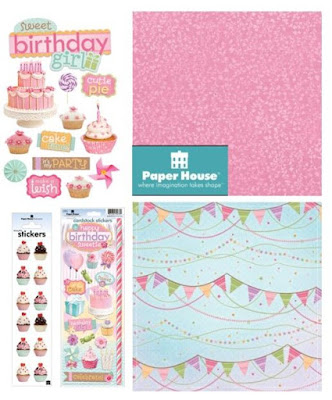
I loved the birthday girl papers from Paper House.  They were just perfect for my little girl and her birthday cupcake!!  Below are the supplies I used to make this fun layout.

http://www.paperhouseproductions.com/

Directions for creating the Layout
1) Cut the top of the birthday banner paper (5" x 11.5") and glue to white cardstock, trim edges and glue to Pink Floral paper as seen.
2) Ink edges of all papers in pink ink before gluing down.
3) Mist with a couple of different pink mists on the base papers, I used Party Pink and Silk Glimmer Mist by Tattered Angels.
4) Stick long stripped sticker along the edge between the white and banner papers.
5) Cut various sized rings from pink and purple cardstock and layer under where pictures will go.
6) Glue down 3 pictures (middle is raised with pop dots).  Pictures can be of various sizes for interest.
7) Add in stickers and gem swirls around the pictures as seen.
8) Cut out 5 strips of light purple cardstock in various lengths (2.5"-3"), ink edges, write your journaling on them, and use pop dots to stick to left side of pictures.
9) Cut a strip of Birthday Banner paper (3"x1") and glue to bottom of layout with some small rings, stickers, and swirls.
10) Add in little gems around layout for added fun and texture, like birthday confetti!!


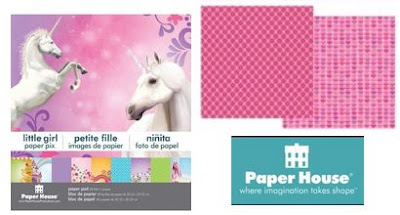
Here is a close up of the birthday hat I made her using Paper House Paper with Pink paper from the Little Girl paper Pad.  I then added in little gems, flowers, a tulle train, and the princess sticker title.


http://www.paperhouseproductions.com/


Supplies Used - Layout
Cardstock - Core'dinations
Pattered Paper - Paper House
Stickers - Paper House
Gems - Kaisercraft
Crystal Swirls - Prima
Ink - Prima
Dies - Spellbinders
Mists - Tattered Angels
Die machine - Cuttlebug
Scissors/Cutter - Fiskars
Adhesive - Xyron

Supplies Used - Party Hat
Purple Party Hat Base
Pattered Paper - Paper House
Trims/Ribbon - May Arts
Gems - Prima
Alpha Stickers - Momenta
Adhesive - Xyron
Stapler - Xyron

Wednesday, September 16, 2015

Create September Issue LIVE!!!

The September issue of Create y Scrapbook Generation is now live!!  There are tons of wonderful layouts, cards, tags, off the page projects, and it is just chock full for inspiration.  Best of all it is free!! 

Here are a couple of the projects I have that are in the magazine this month!!


Check it out for yourself for free now!!

Projects in Magazine
Cherish LO - Pg 20
Family Vacation LO - pgs 64 & 65
Happy as a Lark LO - pg 102
Love Card - pg 109
Boo Tag - Pg 122
Plant Pots - pg 126
Photo Frame - pg 135
Fall into Autumn LO - pg 144
Fall Fun LO - pg 153
Enjoy!!

Tuesday, September 15, 2015

Sisters **CCB & Xyron w/ Craftwell**

I have 2 little girls, but they have never met.  Kristen became and angel in 2009 at 4 months old, and her sister Catherine just turned 3 last month.  They are so similar from their smiles, eyes, temperment, really Catherine reminds me of Kristen everyday.  Catherine will never know her sister in the flesh, but she has to only look with in herself to really know her, and I know Kristen is watching over her.


When I saw this Printer's Tray I knew I needed to do a project with both my girls.  I never can have pictures of them together, so instead this seemed like a fun way to have them together.  I split up the sections so they each had 6, and for Catherine I kept all her pictures under a year of age to help match the limited pictures I had of Kristen.  Can you tell who is who?  I kept to a pink theme, so if the picture did not have pink in it, I just printed it in black and white.  Some pictures I could just crop from 4x6 or 2x3 wallet sizes I already had on hand, but some I had to crop and resize on my computer and print special from home.

Here is a video showing how I put this cute little printers tray together.


I created this cute little tray with products from Canvas Home Basics, Tattered Angels, 7 Gypsies, Craftwell, and Xyron.  Below are the specific products used.

http://shop.canvascorpbrands.com/pages/canvas-home-basics

http://shop.canvascorpbrands.com/pages/tattered-angels

http://shop.canvascorpbrands.com/pages/7gypsies-collections

http://www.craftwellusa.com/

https://www.xyron.com/en-US/
Here are some up close pictures of the tray. 


I added some special things or words that mean something to me about my daughters like the the angel button, "remember" word, the hearts, my poem, keys (to my heart), and more.  Not all embellishment are there just to look cute, they can hold a special meaning to the person who created them.  For that is what scrapbooking/memory keeping is all about remembering your loved ones!!
 
Supplies Used
Swirls/Gems  - Prima & Kaisercraft
Alpha Stickers - Momenta
Ink - Prima
Flowers - Stash
Button - Stash
Adhesive - Xyron & Beacon
Enjoy!!

Monday, September 14, 2015

Decorative Planters **CCB & Die~Namites Dies**

I love to take things that are around my house and re-purpose them into something new. Why not turn an aluminum can into something cute, a plant holder or vase?!?


Here is a how to video showing how to make these fun little planters.


I used the amazing Tattered Angels Decor and DIY Paint to cover the cans.  The paint gave such great coverage and easy of application, and just check out those colors....AMAZING!!!  I paired the TA paints with the Canvas Home Brands "The Watering Can: Printed Tags - Herbs", kraft paper, and Grey Hemp Rope .  I could not resist in using Parsley, Sage, Rosemary, and Thyme; for those that are in the know!

To help bring a little fun flair to the cans I used the beautiful "Heart Doily" from Die~Namites Dies.  It caputred the feel of the September inspiration just perfectly!!

http://www.die-namites.com/Heart-Doily_p_138.html

During this month, we have a photo inspiration. Please make anything using die cuts from Die~Namites and let it be the STAR of your design. You can use these combined with colors, shapes, patrons, pattern papers, stamps, paints, stencils, etc. The sky is the limit!


This monthly challenge will run until September 29, 2015 (8:55pm Eastern Time) and there will be a SPOTLIGHT feature of our Top 3 Favorites on October 15. Any style and all levels are welcome! Among the Top 3 favorites, there will be a random draw for a lucky and talented winner who will then receive the top prize. In order to qualify for the top prize, your project has to be NEW, that means not linked back to a previously made project. You are welcome to combine other challenges, but please limit your total number of challenges to no more than 5. 


Our Top Winner (randomly selected from the Top 3 Favorites) will receive a $25 voucher!
  AWESOME, right?!


Supplies Used
Die - Die~Namites Dies

Paint - Tattered Angels
Rope - Canvas Home Basics
Tags - Canvas Home Basics
Cardstock - Canvas Home Basics

Adhesive - Xyron & Beacon
Aluminum Cans
Can Opener

Saturday, September 12, 2015

Back 2 School Frame **Deflecto & Paper House & Xyron**

This is the first year my boys are in school at the same time, and they could not be more excited about it!!  I created an altered frame with the amazing super cool frame and some Paper House supplies.


This amazing frame is from Deflecto Beveled Edge 5x7 Frame.  It is a beautiful acrylic frame that sandwiches the picture between the frames.  You can go simple with it and just place a picture in between the plastic, or have some fun like I did and add layers with the picture then add stickers and more items on top of the front plastic sheet.

http://www.deflecto.com/products/pc/Beveled-Edge-Frame-br-5-x7-177p1046.htm#.VfSKgJc31_Q

Here are some up close shot of this wonderful frame and my cute boys!!


Supplies Used
Frame - Deflecto
Papers - Paper House
Stickers - Paper House
Ephemera - Paper House
Paint - Tattered Angels
Adhesive - Xyron
Enjoy!!

Friday, September 11, 2015

Magnetic DIY Dress Up Doll Kit **Deflecto**

We went o visit my MIL last weekend and my daughter was playing with this wooden toy.  It was a bear that you could change out the head, body, and feet to dress it up they way you wanted.  I have seen other toys like this, even apps that you dress up a doll and such.  My daughter loves them.  That is when the light bulb hit, why can't I make one?  Use a stamp on a magnetic sheet and cut out the dress parts for my daughter to play with, perfect!!


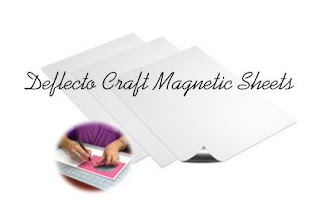
I have the amazing Craft Magnetic Sheets from Deflecto.  They are so easy to cut with sicissors, and have this amazing white front, that was super easy to stamp on.

How to Make your Own Magnetic Dress Up Doll Activity 

1) Cut a rectangle from the Deflecto Magnetic Craft Sheet (with my paper trimmer it was a breeze).  Mine was 7.5" x 5.5".  The magnetic sheets come as 8" x15".

http://www.deflecto.com/products/pc/Craft-Magnetic-Sheet-185p1034.htm#.VfL7dJefV_Q
2) Stamp 1 of each doll stamp (mine were from Prima) with StazOn ink in black (so it will not smear) and mount it to a thick chipboard for stability, mine had a golden front to it already.

3) Cut out a magnetic sheet section for the bottom to hold the extra "clothes".  Mine was 5.5" x  2.5" and mount it below the stamped doll images (you could also just make you sheet longer (9.5" x 5.5"), but did not think of that until after).   I used Beacon 3 in 1 glue to mount them to the board.
4) Stamp extra of the dolls shoes, skirt, tops, heads, etc (you do not have to stamp the entire body, just sections with the left over magnetic sheets.
5) Color in the clothes.  Change it up for variety.  I let me daugther help me pick out the colors.  I used Copics, Bic Mark-its, and Spectrum Nior markers so they would not smear (sharpies smear).


6) Cut out the doll section (head, skert, shoes, tops) with your scissors.  The picutre above shoes the back sides of the cut outs.  
7) You can also see I took some small flowers and glued the extra magnetic pieces left from cutting out the dress parts and gluing them to the back to make pretty flowers she can add to the dolls.


8) My daughter wanted to add in pretty sparkles to the flowers and the shoes, so we pulled out some little pearl and rhinestone stickers and she had some fun!

You can dress these dolls up in any way you want.  I only made a couple of each dress part, but if she looses the parts, then we just stamp, color, and cut out some more for her!!  Super easy to make replacement parts!!


I love to make things for my kids from my crafty supplies, even better then they get involved in the process.  It was her idea to make the green hair and why there is so much pink and purple on everything!!


Supplies Used
Stamp - Prima
Markers - Copic & Bic & Spectrum Noir
Adhesive - Beacon
Pearls/jewels - BoBunny
Flowers - Prima
Enjoy!!


Share This

Related Posts Plugin for WordPress, Blogger...