Thursday, November 8, 2012

happiness is Love **Momenta and FD**

A couple of weeks ago at my mothers house my oldest son Morgan decided to lay down beside Catherine on her changing pad (it was on the floor) and asked for me to take a picture.  It was just too cute that i had to grab Brandon and get him in on the act.  I took about 15 shots just hoping that one would turn out, and viola the sweetest picture came out.

I decided to use the picture as a black and white since they were all wearing completely different colors of clothes and I also wanted to picture to work well on my layout of muted colors.


I played around a bit with my Faber-Castell Gelatos and crackle distress paint and look at the wonderful results I got.  I used to it to color my artisan elements and also to create the pink border and circle of pink on the background page.  I just applied the pigment to the paper, sprayed with water, and then blended it in with my finger.  Below is a tutorial for how I distress colored my frame corners like the one pictured below.

Add caption
Distressing with Gelatos
1) Supplies - surface to distress (chipboard, sticker, resin, artisan elements, etc)  I used artisan elements
                     gelatos in your choice of color
                     distress crackle paint

2) Paint your surface with crackle paint - let air dry, if you use a heating tool it will not crackle as much and make your paint bubble.  I used tattered rose as my color.

3) Cover the surface after the paint has dried with your choice of gelato colors, 2 to 3 is good.  Rub the pigments into your surface, trying to enhance the cracks giving it an aged look.  I used guava and metallic melon.


4) Play with the colors and how much pigment you apply until you achieve your desired look.

Layout made for Frosted Designs - had on over and play along!!

Momenta Products Used:
ST-4826 - black alpha letters
ST-4788 - black numbers

Enjoy!!

Erin Reed

Tuesday, November 6, 2012

Cute and Bright "Thank You" Cards **Momenta and Flamingo Scraps**

I always like to keep some thank you cards on hand for and every day thank you to someone. I find it better than just buying a stacking of thank you cards from the store, it means more if it is made from the heart. 
 
With that in mind I do not want to spend 2 hours making one card for one person, I want to spend my time wisely and make a batch at a time, using similar products, but with the same feel. I can change out flowers, embellishments, stickers, paper, and colors but make then faster if I use a similar layout.
For these cards I used the same paper and flowers, but different metal embellishments to change it up a bit, or lack of embellishments


Products Used are from Flamingo Scraps and Momenta
Momenta Metal Flowers - ST-5723, ST-5722, ST-5725, ST-5719
Momenta Patterned paper - PA-1991
Momenta Cardstock - PA-2390
Bazzil rubons
Prima Flowers
Ranger Distress Ink
Ranger Adhesive

Enjoy!!
Erin Reed

Wednesday, October 31, 2012

Halloween Cards **Momenta**

I wanted to make some cute fun cards for the kids teachers, our nanny, and grandparents for Halloween this year.  I found this really cute paper in the all season paper pack of Halloween ghosts, gravestones, and pumpkins.  It has so much character to it already that I figured I could just trim it up a bit into sections of about 4 x 5 inches, mat those section in black and they would make really cute cards!!


Using the Momenta paper above I made the following 5 cards, all I added was white and black cardstock and random Halloween stickers from my stash.


These top two cards were the easiest.  All I did was cut the bottom of the paper off to 5 inches wide and 3.75 inches tall, matted it in black and then glued it to a white pre-folded card.  The graphics on the paper were cute enough to stand alone.


These next two cards were cut from the bottom after the first two card were cut off, I cut these to the same dimension as the first two cards.  This left the cute little owl and ghost poking out of the bottom of the paper, so I added a large sticker from my stash to both, matted in black and glued to a white pre-folded card.


This last card is smaller than the rest, because the remainder of the purple paper is smaller.  I cut it to be around 3x4 inches and then just matted in black and added left over white cardstock to the back of the black mat for a writing space, so it is not an open card it is more of a postcard.  I cut the section that had the moon, added a couple of cute stickers from my stash, and viola! 

Cute cards do not have to be super complex or stressfull if you start with cute paper!!

Momenta Products used:


Enjoy!!

Erin Reed

Tuesday, October 30, 2012

Flamingo Scrap DT

I am happy to announce that I am apart of the design team over at Flamingo Scraps!!  I can't wait to get started and to join the flock!!


Erin Reed

Friday, October 19, 2012

Swim team **FD**

My son Morgan was on swim team this past summer of 2012.  He loved it.  He was in the 6 and under category so he only swam the 25 free and the 100 free relay.  He really improved so much this year and he loved playing with the other kids.


I created this page for Frosted Designs and their Sports/Dance challenge - so hop and over and play along!  I went for a non-traditional idea for a sports page, but it works!  I did not want to use the die-cut circle page in the usual way, in the center of the page, so i cut it and off centered it using the right side as my picture area, and the left for my title and journaling.


For the title I layered the chipboard letter on top of strips of paper matted in white, and on top of the large flower for a more dramatic effect.  I off centered the letter on the strips and also the alignment of the strips to each other to keep the feel of the page.


Under the photos I added a strip of white paper and then a rub-on of teal lace.  Over that i added a fun swirly effect of bakers twine and finished it off with a cute butterfly chipboard sticker.

Enjoy!!

Erin Reed

Thursday, October 11, 2012

Quick Thank You Baby Cards **Momenta and FD** with tutorial

As some of you may know, and why I have not been on-line much in the last little while, I had my baby girl!!  Her name is Catherine Anna and she was born Aug 20, 2012.  She is doing great, and her big brothers love her.  So due to popular demand here are some of her pictures.

2 days old

Morgan and Brandon with Cat at 2 days old

Daddy and Catherine


Last Family Pic before deployment - 2 weeks old


Last day with Daddy


6 weeks old

I want to give a huge thank you to everyone who has helped in any way - from presents, e-mails, food, being with us, support, and love.......THANK YOU!!

So now on to business, with so many lovely gifts, cards, and other fun things that have come our way I am trying to get back into my scrappy ways....and let me tell you, it is hard!  Between the deployment of my husband and the new baby on top of the boys, my time is down to nothing, but I am getting my scrappy urges back and with tons of great pictures I can't wait!  So I started off with something simple, CARDS.

I had a bunch of thank you cards to give out, so I made life simple and created a card sketch to create all my cards from.  I did not have to use the same papers or stickers/embellishments, but the idea was the same.


Tutorial/Tricks to make a lot of cards fast for little $$

From this sketch I created 8 different cards.  This is a simple and easy way to get a lot of cards done in a short amount of time.  

1)  Find a simple sketch, or create one.
2) Use a paper pack to have multiple papers to choose from.  I used a baby kit from Momenta to create all of these.
3) Don't feel like you have to use the exact same papers for all the cards, change it up for some fun!  I used 3 different background papers and 2 different strips for my cards.
4) Use pre-scored cards with envelops from a store like Michaels (usually 25 to a pack for like $3), then just glue your background to the front of the card.
5) Mass produce by cutting all of the same size papers at one time, don't create one card then move onto the next, make it assembly style.  Do the same for inking, stamping, and gluing.
6) Use one stamp for the sentiment instead of stickers to help save on cost.
7) Pick out 1 large sticker that fits the theme for each card, they do not have to be the same.


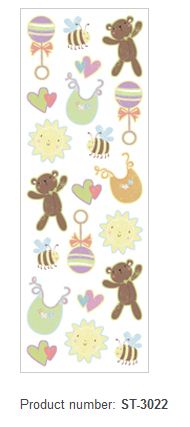
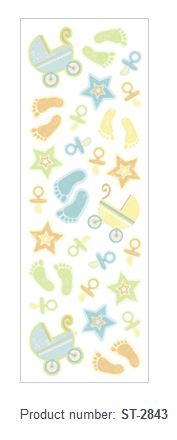
 Momenta Products Used


Enjoy!!

Erin Reed

Share This

Related Posts Plugin for WordPress, Blogger...