Tuesday, October 30, 2012

Flamingo Scrap DT

I am happy to announce that I am apart of the design team over at Flamingo Scraps!!  I can't wait to get started and to join the flock!!


Erin Reed

Friday, October 19, 2012

Swim team **FD**

My son Morgan was on swim team this past summer of 2012.  He loved it.  He was in the 6 and under category so he only swam the 25 free and the 100 free relay.  He really improved so much this year and he loved playing with the other kids.


I created this page for Frosted Designs and their Sports/Dance challenge - so hop and over and play along!  I went for a non-traditional idea for a sports page, but it works!  I did not want to use the die-cut circle page in the usual way, in the center of the page, so i cut it and off centered it using the right side as my picture area, and the left for my title and journaling.


For the title I layered the chipboard letter on top of strips of paper matted in white, and on top of the large flower for a more dramatic effect.  I off centered the letter on the strips and also the alignment of the strips to each other to keep the feel of the page.


Under the photos I added a strip of white paper and then a rub-on of teal lace.  Over that i added a fun swirly effect of bakers twine and finished it off with a cute butterfly chipboard sticker.

Enjoy!!

Erin Reed

Thursday, October 11, 2012

Quick Thank You Baby Cards **Momenta and FD** with tutorial

As some of you may know, and why I have not been on-line much in the last little while, I had my baby girl!!  Her name is Catherine Anna and she was born Aug 20, 2012.  She is doing great, and her big brothers love her.  So due to popular demand here are some of her pictures.

2 days old

Morgan and Brandon with Cat at 2 days old

Daddy and Catherine


Last Family Pic before deployment - 2 weeks old


Last day with Daddy


6 weeks old

I want to give a huge thank you to everyone who has helped in any way - from presents, e-mails, food, being with us, support, and love.......THANK YOU!!

So now on to business, with so many lovely gifts, cards, and other fun things that have come our way I am trying to get back into my scrappy ways....and let me tell you, it is hard!  Between the deployment of my husband and the new baby on top of the boys, my time is down to nothing, but I am getting my scrappy urges back and with tons of great pictures I can't wait!  So I started off with something simple, CARDS.

I had a bunch of thank you cards to give out, so I made life simple and created a card sketch to create all my cards from.  I did not have to use the same papers or stickers/embellishments, but the idea was the same.


Tutorial/Tricks to make a lot of cards fast for little $$

From this sketch I created 8 different cards.  This is a simple and easy way to get a lot of cards done in a short amount of time.  

1)  Find a simple sketch, or create one.
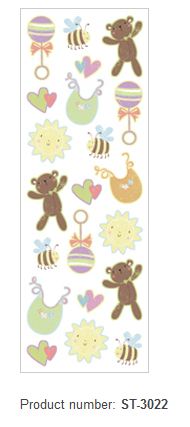
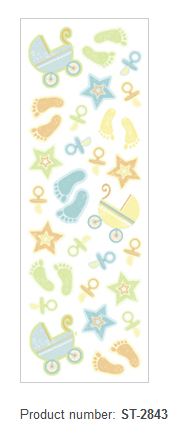
2) Use a paper pack to have multiple papers to choose from.  I used a baby kit from Momenta to create all of these.
3) Don't feel like you have to use the exact same papers for all the cards, change it up for some fun!  I used 3 different background papers and 2 different strips for my cards.
4) Use pre-scored cards with envelops from a store like Michaels (usually 25 to a pack for like $3), then just glue your background to the front of the card.
5) Mass produce by cutting all of the same size papers at one time, don't create one card then move onto the next, make it assembly style.  Do the same for inking, stamping, and gluing.
6) Use one stamp for the sentiment instead of stickers to help save on cost.
7) Pick out 1 large sticker that fits the theme for each card, they do not have to be the same.


 Momenta Products Used


Enjoy!!

Erin Reed

Friday, October 5, 2012

Love **FD**

My husband and I went to a military awards ceremony back in March of 2012.  He received a really big award that night and we got a chance to dress up!  I was 17 weeks pregnant in this picture.


I created this layout for Frosted Designs for their doilies challenge - use a doily!  So i hope you hop on over and play along!

I treated my doily with red spray shimmer paint to give it a fun feel, I also cut it in half and separated it to give the layout more height so it did not look as horizontal.  I really wanted to be careful not to cover up to "LOVE" part of the paper, or the banner in the top left corner, so the majority of the design of the layout was left to the center of the page.  I wanted to create some depth to the layout, so layers in the center was my best option!

Enjoy!

Erin Reed

Tuesday, September 25, 2012

Morgan Kinder **Momenta**

Kindergarten was an interesting year for my son Morgan.  There were lots of downs, but in the end it turned out good.  This is his class picture from his kinder year (2011-2012).


I used almost completely Momenta products on this layout. I wanted to make this fun and in the spirit of the colors and feel that kinder has, the kids are so full of life so i wanted the layout to show the same feel.  I used lots of colors, shapes, fonts, and sizes to capture the feel of kinder.

I used these wonderful products from Momenta:


 (I used the colored pack)

Thanks for looking!!

Erin Reed

Friday, September 7, 2012

Family 2012 **FD and Momenta**

My sister in law got married in June of 2012 and as we were waiting around after the ceremony was over taking all the family pictures I had another family member take this picture with my phone.  We were all dressed up and ready so why not?  Both the boys were ring bearers and my husband as an usher.  I was 32 weeks pregnant with our second little girl.


I did quite a few different techniques on this page.  First was to create the back purple color behind the doilies and in front of the black background.  I could not find the color I wanted, white was to harsh and I already had a black background.  I took the black soot and concord distress inks and blended the color onto white cardstock.  I then sprayed it with water to blend it further.  One of the many uses of distress inks!!


I also used the wonder brass stencils from Momenta to create the wonderful black swirls you see all over the page.  I used the stencil and black acrylic paint (think paint) and applied it over the stencil on top of the paper, carfully pulled the stencil up, and viola - wonderful swirls!!


Enjoy!!

Erin Reed

Share This

Related Posts Plugin for WordPress, Blogger...