Monday, June 29, 2015

All Awesome Boy **Paper House & Xyron with Simple Stories** w. Video


What is more fun than seeing your oldest boy having fun with a brand new slip n’slide?  It’s time to get out the camera and take some pictures of this fun happening right in my front yard.   


The Simple Stories So Rad Collection is just perfect for those boy moments, like these fun pictures of my son playing in the water.

Xyron to the rescue to stick everything together, all those little bits of diecuts are just perfect for the Xyron 1.5" and 3"Sticker Makers!


Paper House stickers go with everything, and here is just another example of some great Cork and 3D stickers that work wonders for any layout, especially boy ones!!


Here is a how to video of how I made this wonderfully fun and boyish layout followed by some close up pictures.


Supplies Used
Patterned Papers - Simple Stories
Cardstock - Simple Stories
Ephemera - Simple Stories
Cardstock Stickers - Simple Stories
3D Stickers - Paper House
Cork - Paper House
Stains - Ranger
Gesso - Prima
Ink - Prima
Chipboard - Memory Maze
Brads - We R Memory Keepers
Pen - Tombow
Adhesive - Xyron
 Enjoy!!
 

Sunday, June 28, 2015

Beat the Heat **ScrapPlezier & May Arts Ribbon**

There is nothing better than watching your child playing in the water, except when he always squirts you with water guns...this is my son Brandon.  It never fails he finds the closest water gun and poses for the camera (and then squirts me just after or even during) for the past 3 years, basically since he could hold and squirt a gun.  So here is to my boisterous, fun, loud, loving Brandon and his love for squirt guns!!
 

I really wanted to capture the fun feeling these pictures give me when looking at them, or more should I say the feeling of being squirted with water.  I used stencils and mists in various ways to give the feeling of squirting water in this layout.
 

https://www.mayarts.com/ribbons/


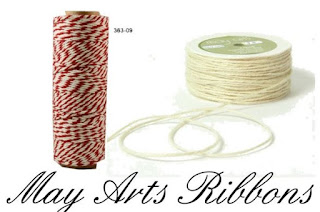
I played around with twines in the layout.  I loved the look of wrapped twine around paper, and adding in staples to the ends just adds to the masculine feeling of this layout.  I used the wonderful 2mm baker's twine in red from May Arts Ribbon to achieve this look.  I also create fun stapled swirls with the Twisted Burlap in Ivory from May Arts Ribbon with a tutorial below!!

Twisted Burlap Stapled Swirls
 
 1) Supplies - Twisted Burlap Ivory (May Arts Ribbon) abound 3 inches, Stapler


2)  Roll twine around in a spiral shape and hold with your fingers.


3) Staple spiral in at least 3 locations to hold it together like a flat coin.


4) Enjoy your fun new embellishment.  You can make these as big or as small as you want in a variety of different twines.


I tucked these fun little spirals under my pictures in 3 locations (since odd numbers of embellishments always look better) to ass a fun feeling to the layout.


Supplies Used
Cardstock - Bazzil & Core'dinations
Patterned paper - DCWV
Twine - May Arts Ribbon
Staples
Chipboard - Memory Maze
Paint & Mists - Tattered Angels
Pen - Tombow
Stencil - Imagination Designs
Gems  - Kaisercraft
Ink - Prima
Adhesive - Xyron
Enjoy!!

Wednesday, June 24, 2015

Cute Little Man **Canvas Corp Brands & Die~Namites Dies & Paper House & Xyron** w. video

My little man Brandon was given a juice box when he was 10 months old, he really did not care about the juice he like the straw better.  Mugging for the camera even then he made all the funny faces with he straw in his mouth.  Such a funny cute little baby of mine.


Here is a video of how I made this fun, grungy, silly baby boy page!


I used the wonderful new Baby Boy Collection from Canvas Home Basics with pair wonderfully with their Ivory, Kraft, and Navy blue cardstock.  Add in the Flute tiles, fringe, and ropes in similar colors and you cannot go wrong!!

http://shop.canvascorpbrands.com/

 Here are the Tattered Angels mists, papers, and paints that I used complement the Baby Boy Collection.

http://shop.canvascorpbrands.com/
I had to add in some fun little bits and bobs from 7 Gypsies to add to the feel of the layout, so some paper tapes and metals to the rescue!  How could I resist the little baby carriage charm?!?

http://shop.canvascorpbrands.com/

To add some more textures and shimmer to the layout I added in some Paper House stickers and Rub-on Transfers.  They add just the perfect touch!!

https://www.paperhouseproductions.com/
 
This super cute little "Lovely Footprints" die from Die~Namites dies fits wonderfully with the theme of the layout, cut it up and it adds the perfect touch!!  And to hold it all together the amazing Xyron adhesives!!  For a more detailed video about how to make "sticky stencils" please see my video HERE.

http://www.die-namites.com/Lovely-Footprints_p_270.html#

https://www.xyron.com/en-US/

Here are some close up pictures of the layout some all the wonderful layers and textures.


My son in this picture is now 5 years old, it is never to late to go back and add pictures to baby books.  At the time these pictures did not stand out to me, but has his personality grew I look back at moments like these and realize how much these little snippets of his goofiness were really previews of my little man waiting to come out!!

Supplies Used
Cardstock - Canvas Home Basics
Patterned Paper - Canvas Home Basics
Flute Tiles (cardboard) -  Canvas Home Basics
Fringe - Canvas Home Basics
Rope/Twine -  Canvas Home Basics
Mists/Paints - Tattered Angels
Mistable Paper -  Tattered Angels
Paper Tape - 7 Gypsies
Metals - 7 Gypsies
Stickers - Paper House
Rub-ons - Paper House
Word Sticker - Momenta
Diecuts - Die~Namites Dies
Ink - Prima
Pen - Tombow
Adhesive - Xyron
Cutter - Cuttlebug
Paper Trimmer - Fiskars
 Enjoy!

Friday, June 19, 2015

Father's Day/Masculine Cards **Paper House & Die~Namites Dies & Xyron w/DCWV**

I wanted to create some fun but simple Father's day cards with the wonderful supplies from Paper House, Die~Namites Dies and the NEW Project Stack Stencils from DCWV and the Xyron tools to hold it all together.  I ended creating 4 cards with the same technique with 2 Father's Day cards and 2 masculine cards that I ended up giving to my son's baseball coaches as "thank you" cards.


I used the Paper House "Dad Tags" 12 x 12 paper cutting out 4 tags and the centers for my cards, but look at all those other amazing tags you can use for pocket pages, scrapbook pages, mini books, or more cards!!  I used the companion page of Paper House "Dad's Plaid" in the grey tons as the back ground for my cards.  I then used 2 Rub-On Transfers in "Happy Moment" and "Make Today" as the titles on 2 of the blank "Dad Tag" cards.  The Paper House Rub-On Transfers work with so many projects, they are just amazing!!!

http://www.paperhouseproductions.com/

I used the wonderful Die~Namites Die in "Spring Doily' as a backing to the tags on the card.  This die can be used in so many ways, even masculine cards!!  I used the DCWV Stencils Project Stack papers to add to the layers in kraft cardstock, green zig-zag, and orange stripe.  I then used 4 of the card size stencils from the back in "x's", dots, diagonal lines, and horizontal lines. 

http://www.die-namites.com/

http://diecutswithaview.com/


To hold everything together I used the amazing Xyron adhesives - even making my stencils "sticky" using temporary adhesive with the Creative Station so they do not shift and slip when using them on paper.

https://www.xyron.com/en-US/

Below is a video tutorial about how I made one of the cards and how to make the "Sticky Stencils".


Here are some close up pictures of the cards.


Don't forget to thank the men in your life, even if they are not father's!!

Supplies Used
Card Base - Canvas Home Basics
Patterned Papers - Paper House
Paper Pad - DCWV
Stencil - DCWV
Rub-Ons - Paper House
Pen - Copic
Ink - Prima
Die  - Die~Namites Dies
Die Machine - Cuttlebug
Adhesives - Xyron

Thursday, June 4, 2015

School Desk Organizer - Teacher Gift **Paper House & Xyron**


I wanted to create something fun for my son’s teacher for an end of year present.  When she had her open house at the beginning of the year I noticed she had a handmade pencil holder on a filing cabinet that she said she could not use anymore because it was falling apart.  I wanted to make her a new one to help replace the one that has seen a lot of love.  


The Paper House School and Monster papers and stickers were just perfect for this project, full of lots of fun and whimsy for a third grade teacher.  I wanted a lot of bright colors and something that she and her students would think is fun, and also make it her own by having her last name on the front of the box.  I also wanted to give her lots of storage and places to hold items for the kids or for herself that was easy to take in and out, but not make it too big as to take up a huge amount of room on her desk.

http://www.paperhouseproductions.com/


Here is a step by step video of how I made this fun little desk organizer for my son's wonderful teacher.


Here are some close and different angle pictures of the project.


Supplies Used
Paper - Paper House
Stickers - Paper House
Alpha Stickers - Momenta
Paint - Plaid
Medium - Plaid
Adhesive - Xyron
Box - Michaels
Tissue Rolls
School Supplies
 Enjoy!
 

Share This

Related Posts Plugin for WordPress, Blogger...