Thank you for
visiting my submission post for the Tombow Design Team. These are
actual posts I have created for other design teams, showing how I link the
products used in my projects to their sites and my own personal flair for posting. Enjoy!!
Project 1 - Fall Moments Layout
A friend took this picture when
Catherine was 7 weeks old. On a whim since it was the fall season she
brought this cute little basket and hat, it was just magical. She
looked so cute, staring right at the camera with this adorable
expression. It is priceless!!
I used the lovely fall collection of papers from the The Robin's Nest to create this layout.
I used the beautiful Boo Words glitter cardstock
for the background, on the backside of the paper is this distressed
honey colored textured paper, perfect as a background!! I then used the
Glitter leaf paper
and cut out 2 of the orange leaves and layered them under the picture
of the left and right. Here you can see them on the right under the
journal strips. I also used the Brown glitter cardstock as a few of my layers. I also added in the orange and gold Dew Drops to the chipboard swirls under the picture and also to the corner swirl. I added the orange diamond Dew Drop to the chipboard frame just under the picture.
I used the Witch Accessories Glitter Cardstock
which is a dark brown cardstock with orange glitter hats and brooms on
it to create the punched doily around the layout. You cannot see the
shapes of the hats and brooms but it gives this wonderful glittery feel
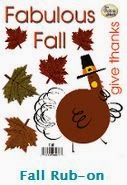
tot he doily. You can also see some of the Fall Rub-On leaves and the word "fall" layered on the backside of the Honeycomb Daisy Glitter Cardstock.
I layered the super cute Pumpkin Glitter Chipboard under the title and the dark brown Dew Drop studded chipboard, you can never have enough glitter!! Here you can also see more Fall Rub-on leaves and the Honeycomb Daisy Glitter Cardstock.
It
has not started to feel like fall yet here in Texas, but playing with
all these fall colors and embellishments makes me wish for those crisp
autumn days!!
Supplies Used
Chipboard - Bo Bunny & Memory Maze & Want2Scrap
Stickers - Paper House Productions
Flowers - Prima
Paint - Martha Stewart & Tattered Angels
Glitter - Art Glitter
Ink - Prima
Trims - May Arts Ribbons
Stamp - Heartfelt Creations
Pen - Sakura
Adhesive - Scotch & Beacon
**************************************
Project 2 - Boo Jars
It seems as though Halloween has
turned into into a holiday almost as big as Christmas for decorating and
gifts which suits me just fine, I love to make fun gifts!! So with
this thought in mind I am making fun little Halloween gifts for my kids
teachers - Boo Jars!!
When I saw the October Birds of a Feather kit and
the fun label stickers, I thought JARS!! I have all of these glass
jars that I hate to throw away left from pickles, jam, spreads, mustard,
and more. They are all great sizes and shapes and I thought how easy
it would be to do my own candy jars for each of the kids' teachers.
I really wanted to match the colors of the jar labels, from top to bottom with the papers, and working with this Oct BOAF kit
made is too easy! For the first jar I used the red side of the damask
paper, lined it with a simple black cardstock, and used a red and black
hue stickers that fit the size of the jar on the lid and the side as it
was tall and skinny. Then I used the wonderful diamond mesh and wrapped
it around the top and bottom of the paper on the jar. To see how I
color the mesh diamonds please see my tutorial here.


For
the second jar I used the purple side of the damask paper and then used
stickers with a purple and green hue on them that also fit the size of
the jar. The lid on this jar was larger so the circle sticker fit
wonderfully!! This time I left the diamond mesh plain as a contrast to
the gems being on the black cardstock.


For
the last jar I could not just wrap the paper around the jar like the
others, so I cut out small rectangles to fit, used a corner rounder to
soften the edges of the papers and again added in single plain diamond
mesh flower to the top and bottom of each of the 5 sections without the
front label sticker. For the stickers I used a red and black color
scheme, and both labels had something to do with cats written or drawn
on them for fun!!


I
did not include them in the pictures above due to the colors, but I
then added in candy corn as the gift to each of the teachers. Not only
do they get a very wickedly special Halloween jar to use on their desk
for odds and ends, but they get some fun candy too!!
Supplies Used
Ink - Prima
Pen - Bic
Jar - other
Adhesive - Tombow
Trimmer - Fiskars
********************************
Project 3 - Family Layout
In November of 2013 at Thanksgiving
we went out to Chappel Hill to eat with my husband's family. We were
all dressed nice, and I asked my Mother in Law to take a family
picture. This was the first family picture we took after my husband got
back from being deployed. I love everything about it, my boys have
smiles, my husband is smiling without his eyes closed, I look great, and
my little Catherine looks so grumpy it is the perfect juxtaposition to
all of our happy faces. We tried everything to get her to smile (she
was just 14 months old at the time), but she did not want to have
anything to do with looking the least bit happy. Either way, it was
great to have my family back together again after being apart for so
long!!
I used the wonderful Fleur Collection from The Robin's Nest to create this layout. Below are some hints and tips about how I created this layout.
Here you can see some of the wonderful paper from The Robin's Nest. I used lots of layers in strips, squares, rectangles, and punched hearts using the Black Daisy Glitter Stripe, Plum Fleur, silver Roses, Tropicana Fleur, and Vanilla Fleur Glitter papers from The Robin's Nest.
The backsides of the Fleur papers have this wonderful striped paper to
them, I used both sides for this layout, as they worked so well
together.
You can also see some of the beautiful diamond shaped Dew Drops in black, I used them as an accent to each of the large hearts on the page, and also
the silver Dew Drops on the tiny hearts in the right corner. Here you
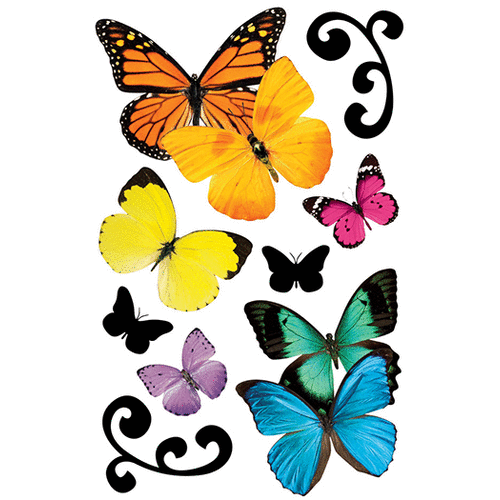
can also see some of the beautiful butterfly stickers from Paper House,
the wonderful lace doily sticker I misted in grey and the graphite paste
from Prima.
 |
| Paper House Butterfly Stickers |
Here I used the backside of the Silver Roses Glitter Cardstock
as it is just plain black for the journaling strips. I took a white
pen and lined the perimeter of the strips and then also wrote in white.
I also used The Robin's Nest Alpha Glitter Stickers in White
(the blue is shown below) and outlined them with a black fine tip
marker and placed them on a black outlined journal strip (FYI Reed is
our last name).
Here you can see the beauty of the Fleur Glitter Cardstock, the wonderful glittered Fleur-de-lis is accented so wonderfully on this paper. I also added in some extra Dew Drops in a pearl along the top left border for some more interest.
I
used to shy away from having myself in the pictures, partially because I
was taking them, but then I never see myself at any of the events I
know I was at. Now I make sure to include myself, and I really enjoy
myself in the pictures!! Never shy away from capturing yourself in the
events!!
Supplies used
Chipboard - Want2Scrap
Paint - Plaid
Glitter - Ranger
Punches - Marvy Uchida
Embellishments - Recollections
Pen - Tombow
Adhesive - Tombow
********************************
Project 4 - U "anchor" me - Card
This is a card for my husband, an anniversary card. It says
u “anchor” me which is just another way to say I love you.
I made this a
masculine card, grungy, with mists, twine, staples, and washi tape …. and no
frills or glitter, my husband hates glitter!! I used the wonderful items from ScrapPlezier
to create this card; the papers, gems, gold paper, anchor die cut,
stickers, washi tape, and twine. Such wonderful items, please go check
out this store!!
They also host a ton of great challenge and prizes!!
Supplies used
Ink - Prima
Mist - Heidi Swapp
Staples
Adhesive - Tombow
Enjoy!!
Thank you for looking at my submission entry.


No comments:
Post a Comment
Thanks so much for leaving a comment, they mean so much to me!!