Tuesday, March 24, 2015

Mr & Mrs **Paper House**

Most of the pictures of my wedding were done by the photographer, and our wedding was just at the beginning of digital cameras so we did not get any digital copies of the pictures.  My mother had just bought a digital camera so the pictures are hit and miss.  This is one of the few pictures of my wedding that is not in a bound book, and my very first wedding layout of MY wedding!!  This is a picture of our first dance as husband and wife.


One thing I love about this Vintage Wedding collection is that is it not your typical wedding colors of black and white.  It has a softness to it, that just brings the romantic feel of a wedding day to life.


 http://www.paperhouseproductions.com/shop/bargain-boxes.html

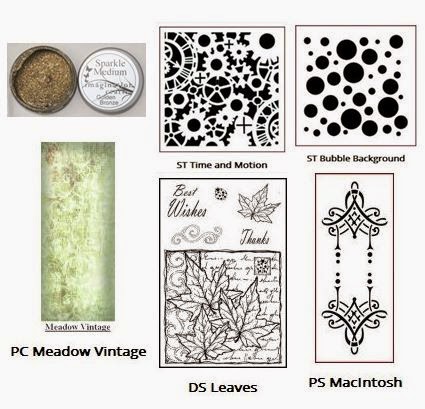
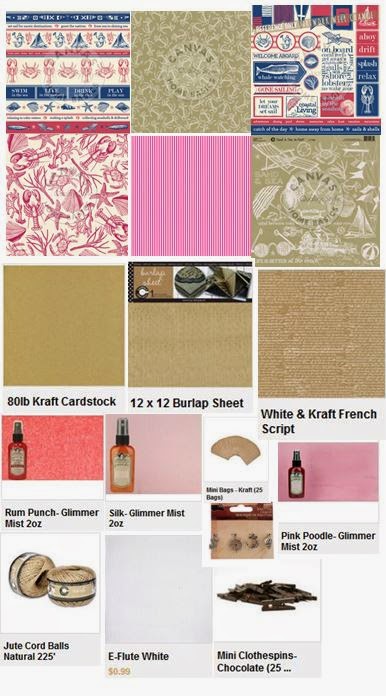
Paper House in having an amazing deal going on right now, everything you see above for $15!!!  The other collections are on sale right now too for the same deal and the entire collection of for $40!!


http://www.paperhouseproductions.com/shop/bargain-boxes.html

As a special treat during Wedding Week, Paper House is giving away a MEGA Wedding Box that includes ALL of our wedding products! That's right; it's over $100 in value! For your chance to win, just enter using the Rafflecopter widget below, and make sure to tell your friends, too!

http://www.paperhouseproductions.com/community/


Supplies Used
Papers - Paper House
Stickers - Paper House
Cork - Paper House
Epoxy - Paper House
Flowers - Petaloo and Prima
Chipboard - Memory Maze
Ink  - Prima
Mica Powder - Imagination Crafts
Lace - Prima
Doily - Recollections
Punch - Martha  Stewart
Adhesive - Xyron & Beacon
Enjoy!!

Thursday, March 19, 2015

Decorative Easter Straws and Holder **Unique Laser Designs & Canvas Home Basics & Die-Namites Dies & Xyron** w. Tutorial

I wanted to create something fun for my kids during Easter as a decoration for the table and also functional as a straw (but it could also be used purely as a centerpiece decoration for a table or the straws on their own as cupcake toppers).  The best part is the slide on the straw is removable once the straw has been used and slid onto another straw to be used again next year!!


Here is a step by step tutorial for how made the fun little holder and cute Easter straws using the wonderful Unique Laser Designs wood shapes, Canvas Home Basics papers and rope, Tattered Angels mists and paints, Die-Namites Dies, and Xyron Adhesive.
Here are some up close pictures of the straws and holders, look how the wood shapes just shine with the mists on them.


Here I used the wonderful Die-Namties Die in Spring Grass to create the effect at the bottom of the jar, it is just too cute!!

http://www.die-namites.com/


The wonderful Unique Laser Designs Easter wood Pieces in Bunnies, Rabbits, and Decorative Eggs were just perfect for this project.

http://www.uniquelaserdesigns.com/


I hope you have a wonderful Easter, and enjoy these fun little ideas for your kids or party this Easter.

Supplies Used
Cardstock - Canvas Home Basics
Rope  - Canvas Home Basics
Wood - Unique Laser Designs
Mists - Tattered Angels
Die Cut - Die-Namites Dies
Die Cut Machine - Cuttlebug
Punches - EK
Ink - Prima
Adhesive - Xyron
Straws - Recollections
Jar
Enjoy!!

Wednesday, March 18, 2015

Easter Candy Jar **Die-Namites Dies & ScrapPlezier**

We are doing a secret sister gift exchange for a Mommy group I belong to; give a fun surprise to a fellow mom each week for a month to brighten her day.  I found out her favorite chocolate (peanut butter Easter eggs), so created a fun little candy jar made from a re-purposed BBQ jar (I always keep my glass jars for fun little projects like these).


I used the wonderful Spring Eggs die cut from Die-Namites Dies,  it is just perfect for those Easter cards, decorations, or gifts.  

http://www.die-namites.com/Spring-Eggs_p_159.html


I used the die 3 times in my Cuttlebug with the A, B, and C plates, 1 in the peach color cardstock, 1 in the hot pink, and 1 in cream for the front of the jar.  I used the cut out sections to fill in the parts of the egg to make it looked more decorated.  I also used a dark brown cardstock and cut it out in the egg shape to back each egg, so there appears to be 4 colors per egg.  I wrapped the entire container in Kaisercraft Pennyroyale collection papers, they have such wonderful patterns that matched the idea of the eggs, and I just matched the cardstock to them.

*******************************************************************
  
THIS MONTH'S DARE IS TO USE A CUT OUT!
  1. Use at least one Die~Namites Die in your creation.
  2. Use the SKETCH! It can be interpreted (loosely or exactly) as a card, layout or altered piece!
  3. Incorporate the DARE into your creation.
  4. Mention the Die~Namites Die you used in your blog post.
  5. Link back to the Die~Namites Die.
  6. You have until the last day of the month to post your creation on your blog and link up to this post.  **PLEASE add a link to your direct post, not your entire blog.*
Each participant will receive one entry into our random drawing
for each entry into the challenge.

 A random winner will be chosen from eligible participants for a
$25 Gift Certificate to Die~Namites Dies.
 ******************************************************************* 

I used the wonderful Die-Namites March Sketch and Dare as my inspiration for the design of the center of the jar.  The Dare is to use a cut out, so I placed some of the cut out sections back inside the die cut eggs.


I used one run of the die cut in the peach and cut out just one egg and filled it in with the cream extra bits so it would fit on the top of the jar.  I used some self adhesive pearls to add a fun little touch, and then wrapped everything with some twine around the lid and the eggs in the middle.


All the wonderful pattered papers, cardstock, twine, pearls, Cuttlebug plates, and inks can be found at the amazing ScrapPlezier store - plus don't forget the great challenges they have!!


http://scrapplezier.blogspot.com/


Supplies Used
Cardstock - Bazzill - ScrapPlezier
Patterned Paper - Kaisercraft - ScrapPlezier
Jute - ScrapPlezier
Cuttlebug Accessories -  ScrapPlezier
Pearls - Kaisercraft -  ScrapPlezier
Ink- Ranger -  ScrapPlezier
Dies - Die-Namites
Adhesive - Xyron

 Enjoy!!

Monday, March 16, 2015

Sweet Journey **Imagination Crafts & ScrapPlezier & Tattered Angels** w. Tutorial

I wanted to play with my black and clear gesso, see what it could do.  Art journals are perfect for trying out new supplies, matching colors, and just playing and having fun with your craft.  I had not plan as to where I was going with this page, I just started layering up the stencils with the gesso, picking colors of mist to go with the paper and had fun getting messy!!


Below is my step by step process of how I created this art journal mixed media page and some tips I learned with the supplies used in this project.


The stencils, glitter, glossy resist paper, and stamps are all from Imagination Crafts.  These products have such wonderful details they make any project shine!! 

Our Challenge Blog Badge
http://www.imaginationcrafts.co.uk/index.php?route=product/category&path=294

I used the wonderful Tattered Angels Glimmer Mist to really make this project shine.  I played with the colors in the resist paper and it crated this wonderful grungy feel.  I just love green and black together, with the pop of gold its is just magic!!

http://shop.canvascorpbrands.com/collections/glimmer-misthttp://shop.canvascorpbrands.com/collections/glimmer-mist

The alphas, die-cut title, and mists can be found at ScrapPlezier store and don't forget they have some wonderful challenges there too!!

http://scrapplezier.blogspot.com/


Supplies Used
Stencils - Imagination Crafts
Paper -  Imagination Crafts
Glitter -  Imagination Crafts
Stamps - Imagination Crafts
Mists - Tattered Angels - ScrapPlezier
Alphas - Kaisercraft - ScrapPlezier 
Diecut - ScrapPlezier
Ink - Prima
Gesso - Prima
Beads - Prima
Pen - Copic
Adhesive - Scotch
 Enjoy!!
 

Thursday, March 12, 2015

Life is Better at the Beach **Canvas Corps & Tattered Angels & 7 Gypsies & Unique Laser Designs**

In June of 2014 we took a little trip to Galveston beach, and this was the first time Catherine has been to any beach before.  She was not sure about the sand, or the waves, or really any of it, but she soon fell in love with anything and everything to do with the beach.  Catching crabs, fish, digging holes, sandcastles, and splashing in the water soon was her favorite pastime with her brothers and cousins.  We went to the beach 2 times that day, and in the evening her aunt Suz brought her camera and snapped this pic, so perfect!!


The Coral/Navy Nautical line of Sails and Shells from Canvas Home Brands is so wonderful.  It is just chock full of these great papers with all these fun little bits you can cut out such as phrases, banners, shapes and more!!  The colors are just perfect too, and I could not resist pairing it up with this picture of my little girl as the colors were a perfect match!!
 
http://shop.canvascorpbrands.com/


I love the texture of the cardboard (misted with Rum Punch), burlap, pearls, and metal charms all put together, reminds me of fishing netting washed up on the beach with little treasures caught inside.  I used some cutouts from the Sails and Shells Sampler paper (circles) and small titles cut up from Sand and Sea on Kraft to finish it off.


I used a ton of cut outs from the Sails and Shells Sampler and Stripe around the picture as the banner below or phrases on the side.  I even used some of the little mini-bags misted in Silk under the picture and added in some fun phrase cutouts and added the Mini Clothespins in Chocolate as the pull tabs.


I used the wonderful wood products from Unique Laser Designs to enhance this project.  The wood just adds to the wonderful dimensions and design of the layout.  I used the "Gulls" and "Corner G" in wood for this project.


I pressed the raw wood into Versamark ink to make it sticky then painted on a medium brown mica powder to make it shimmer but also fit with the layout.  I did not want to too shiny, it would not mesh with the feel of the project.  I did the same technique to the pearl swirl to ti would match the layout.


Supplies Used
Cardstock - Canvas Home Basics
Patterned paper - Canvas Home Basics
Burlap  - Canvas Home Basics
Cardboard -  Canvas Home Basics
Clothespins -  Canvas Home Basics
Mini Bags  - Canvas Home Basics
Jute -  Canvas Home Basics
Metal - 7 Gypsies
Mists - Tattered Angels 
Wood - Unique Laser Designs
Mica - Imagination Crafts
Pearls - Prima
Ink - Prima
Punch - Martha Stewart
Adhesive - Xyron & Beacon

If you would like to purchase any of the above Canvas Corp products used in this project, please feel free to use the link below.  It is bought thought the Canvas Corp Store but from my blog - don't you love technology!!


Enjoy!!

Wednesday, March 11, 2015

March Create Magazine LIVE!

The March issue of Create Magazine from Scrapbook Generations is Live!!  Is it just chock full of some wonderful layouts, cards, tags, off the page projects, sketches, and loads of inspiration!!  Come check it out!!


You can even see some of my projects on the following pages:
Whoo's the Cutest Layout - pg 15
Cub Scout Layout - pg 72
Journey in Miles Card - pg 202
Beautiful Tag - Pg 205
Inspire Box - pg 212
Birthday Layout - Pg 239 
Brother Layout - pg 260

Enjoy!!

Tuesday, March 10, 2015

Cub Scout **Paper House & Unique Laser Designs**

My oldest son Morgan is a cub scout.  This is a picture of him as a wolf cub (second year) holding the spirit flag that his den won that month for having the most kids go to the Report to State.  They got to march down in Austin up to the capital building then get a tour.  So proud of my scout and my wonderful husband for being the den leader!!


I used the wonderful products from Paper House to create the layout.  They have wonderful papers and sticker that are all a Cub Scout theme, which makes making a layout of a little scout so easy!!  I paired these stickers and papers with some of the wonderful diecut stickers and Cork'd stickers, they all just work so wonderfully together!!

http://www.paperhouseproductions.com/shop/scrapbooking/scrapbooking-all-items.html

Direction for making this Layout
  1. I used the Cub Scout blue paper as my background and layered it with a cream cardstock cut to 11 x11.  I then added in another square (9x9) of yellow paper from the PH Garden paper pack and a cardboard paper (8.5 x 8.5).
  2.  I used a second sheet of blue cub paper cut to 7 x 5.
  3. On top of that I did a series of strip papers all measuring 12 in long, but varying in widths blue and yellow (some from the Generations Paper pad).
  4. I then added in some other rectangle shape of papers behind the picture in cream, cardboard, and tan.
  5. I inked every layer in brown ink, and then added a diamond stencil and blotted the same brown ink around the page.
  6. I used a blue and brown misted and lightly misted and splattered around the page.
  7. I attached the picture (4x4) and then cut out the Cub Scout logo from the blue paper and used it as a embellishment.
  8. Above the picture I create a banner of little pennants in all the colors used in the layout (varying lengths and widths all layered on top of each other).
  9. I added in the stickers, journal strips, and embellishments as shown.


I used the wonderful wood stars from Unique Laser Designs to add to the accents of the page. They were just the perfect touch for this page.

http://www.uniquelaserdesigns.com/#!product/prd1/1770439155/stars-%28lg%29


I first treated the stars by inked the edges with a chalk ink in a brown, just to soften the edges and make them look a bit distressed.  


I then treated the stars with one of two centers before placing them on the layout.  For three stars I took the small scout emblem sticker and placed it in the center.  The other three stars I placed a green pearl in the center.


Supplies Used
Wood - Unique Laser Designs
Cardstock - BoBunny
Papers - Paper House Productions & Kaisercraft
Cork – Paper House
Pearls – Doodlebug
Ink – Prima
Stencils – UmWow
Mists – Tattered Angels
Adhesive - Scotch and Beacon
Trimmer & Scissors - Fiskars
Enjoy!!

Share This

Related Posts Plugin for WordPress, Blogger...