Saturday, November 30, 2019

DIY Foiled Christmas Planner

Planning is always the hardest part of the holidays.  With so much going on, parties, food prep, events, parades, recitals, and the list just keeps on going!!  We all need a little help, so planners to the rescue!

This post also contains affiliate links and I will be compensated if you make a purchase after clicking on my links.  Various companies provided me with some product to create this project.  The opinions I share are solely my own.


I made a printable planner for the 2019 holiday season, just printed 2 sided on the short side and you are all set!  


Now I had a little fun on my planner, I glammed it up with the Xyron Glaminator!! The Glaminator is the newest tool from Xyron to make your projects shine and add the perfect touch of glam! The Glaminator is for foiling and also works as a hot and cold laminator! You can add foil accents to your projects in minutes!! To celebrate the launch the team at Xyron is partnering with 12 creators for 12 Days of Glaminator Giveaways!


You can easily glam up projects with the foil application by printing your designs on a laser printer (it’s not inkjet printer compatible) and picking your foil color – the toner reactive foil does the rest. It also allows you to easily preserve projects or memories with the hot or cold lamination option.  I added some fun glam to my planner pages before stapling them all together, it added that little extra special something to each page.


Now for some exciting news!  As part of the 12 Days of  Glaminator Giveaways, I’m giving away a The Glamintor Gift Pack including a Glaminator, Full Set of Xyron Color Transfer Foils, and additional Xyron products, total value of $150.00 or more)  one lucky winner!  
GIVEAWAY

To enter, comment on the video below with the question "What you would Glam-up using the Glaminator!  Only one comment per person allowed.  Winner will be announced tomorrow by 9am CST via, IG, FB, and YouTube!  
Click on the video and leave on comment on my YouTube channel to enter!!!!

I also have a coupon code for the Xyron Shop.  Now through December 16th, use code ErinXyron2019 and get 35% off Glaminator and Glamiantor supplies plus free 3-day shipping sitewide!
Stop by tomorrow to see if you’re the winner of the prize pack!

Giveaway starts at 9:00 a.m. MST on November 27, 2019 and ends at 8:00 am. MST on November 28, 2019.  No purchase necessary to enter or win. A purchase will not improve your chances of winning. This giveaway is open only to members of the 50 United States and District of Columbia age 18 and older as of time of entry. Odds depend on the number of eligible entries received. Void where prohibited. This giveaway is being sponsored solely by Erin Reed. 
All taxes are the winner’s responsibility. By entering into or participating in this giveaway, you hereby release Erin Reed, ACCO Brands USA, LLC, Hudson West LLC, and anyone else associated with this giveaway from any claims, losses, actions, damages or other liability, whether actual, incidental or consequential, arising out of or relating to his/her participation in this giveaway,and from your acceptance, possession, and/or use or misuse of any prize.  Xyron sponsored this giveaway and provided the Xyron, Inc. products featured this post, but the opinions and views expressed are my own.


Tuesday, November 26, 2019

Christmas Fun Fold Cards - Scrapbook.com Holiday Card Parade

I just love fun fold cards, and why not make some that are a little Christmas inspired with some layers and ink blending!! Check below for all the details and also for the amazing giveaway!

This post also contains affiliate links and I will be compensated if you make a purchase after clicking on my links.  Various companies provided me with some product to create this project.  The opinions I share are solely my own.


Today I have the privilege of hopping with Scrapbook.com as a part of the inspiring Handmade Holiday Papercrafting Parade filled with fabulously festive holiday crafting. Join me and many others as we celebrate a week of unbelievable deals on Scrapbook.com's fabulous exclusive products! Be sure to leave a crafty comment at EVERY stop along the way of this amazing parade hop to qualify for an unbelievable GIVEAWAY!


20 of your favorite crafters have used tons of Scrapbook.com Exclusive products to provide you with plenty of holiday cardmaking inspiration! You'll love seeing how we used products like the Exclusive Hybrid Inks, the revolutionary Domed Blending Tool, festive stencils, cheery stamps and so many more! Come join us on this parade of Handmade Holiday Cardmaking Inspiration! 

November 26 - November 30 - Black Friday WEEK
Scrapbook.com Exclusive Products are at their Lowest Prices - 30%, 40% and 50% OFF!
A FREEBIE is offered each day, too!
Nov 26-28: Scrapbook.com Exclusive Doodlebug Pin
Nov 29-30: Scrapbook.com Exclusive Adhesive SAMPLER Pack

I love fun fold cards, they have such a wonderful impact when you open them, and really they are not all that hard to make!

Check out how to make these cards in the video below.


Here are the measurements to make these center step fun fold cards.
Use a 5.5 x 8.5 card and fold in half
Score from 0 - 1 inch from the edge on both sides of the card at 1, 2, and 5.25 inches
Cut long wise from 1 - 5.25 (where you scored) on both side of the card.


Don't forget tot stamp on the inside!!


You'll be so inspired after visiting each of the 20 stops that you'll want to create designs of your own, we just know it! Why not enter to win a Scrapbook.com Gift Certificate for yourself? 
GIVEAWAY INFO
Scrapbook.com is giving away a $100 Gift Certificate to ONE lucky winner! To be eligible, leave a comment letting us know a bit about your holidays at each of the 20 hop stops along with your email. It's that easy! Share a favorite tradition, a cherished memory, or a memorable handmade gift! 
Giveaway closes Tuesday, December 3, 2019, at midnight MST. The winner will be notified and announced no later than Monday, December 9, 2019. The winner will be notified through the email provided and has 72 hours to respond to claim their prize for complete official rules, click here

GOOD LUCK!
HANDMADE HOLIDAY PARADE STOPS
Leave a comment at each of these official stops to enter the Giveaway! 


-- HOP OVER TO YouTube --

Good luck to everyone in the hop, I know all these amazing designers will inspire you in your papercrafting endeavors!!

Supplies Used Interested in the supplies I used in this project? Most are listed below and some are affiliate links, which generates a me little commission (at not extra cost to you at all) when you click on the link and make a purchase. Affiliate and product disclosure can be found here.


Xyron Mega Runner Refil
Shop at:
SB | AZ
Sizzix Big Shot Plus
Shop at:
SB | O
SB.com Double Sided Foam Adhesive
Shop at:
SB
Xyron Mega Runner
Xyron Mega Runner
Shop at:
SB
SB.com Star Nesting Dies
Shop at:
SB
SB.com Stamp Blocks
SB.com Stamp Blocks
Shop at:
SB
SB.com Neenah A2 scored paper
Shop at:
SB
Fiskars Paper Trimmer
Shop at:
SB | AZ
Kraft Cardstock
Kraft Cardstock
Shop at:
SB
Black Cardstock
Black Cardstock
Shop at:
SB
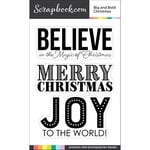
SB.com Big Bold Christmas Stamp Set
Shop at:
SB
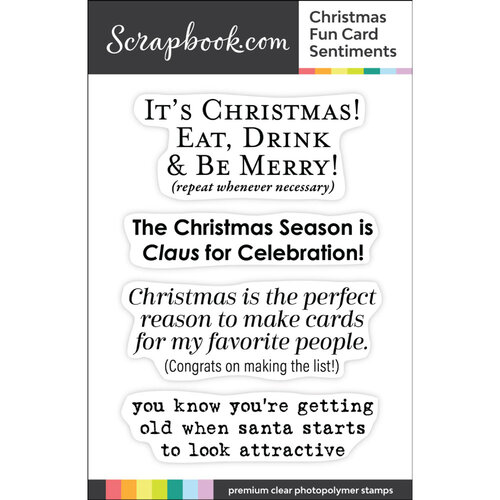
SB.com Christmas Fun Stamp Set
Shop at:
SB
SB.com Neenah 4.25 x 5.5 paper
Shop at:
SB
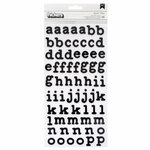
Thickers Alpha Stickers
Shop at:
SB
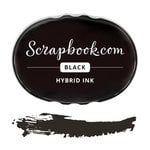
SB.com Hybrid Inks
SB.com Hybrid Inks
Shop at:
SB
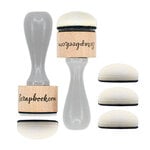
SB.com Ink Blending Dome Tools
Shop at:
SB
SB.com Double Sided Adhesive
Shop at:
SB


Friday, November 22, 2019

Christmas Cookie Decorating Supply Storage & Organization

The kids and I love to make Christmas cookies, but or keep it all organized and tidy, well that is a whole other issue.  I like to be able to keep the supplies organized so they are easy to find, no digging through the drawers to find the items I need, so below is my solution!  Cookie and icing sugar recipe below as well!!!

This post also contains affiliate links and I will be compensated if you make a purchase after clicking on my links.  Various companies provided me with some product to create this project.  The opinions I share are solely my own.


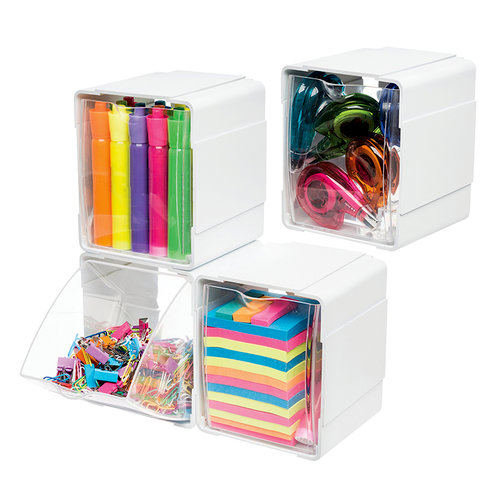
In each of the little cubbies of the Deflecto Interlocking Tilt Bins I placed items I need to help decorate the cookies, such as the food coloring to dye the icing, cookie cutters, sprinkles, and cupcake liners.


I use the muffin cups to help separate the different colors of icing, and a little icing goes a long way.  The icing is so easy to make all I do is mix powered sugar with a little water like the recipe below.

Cookie Icing Sugar

Ingredients
1 Cup Icing Super
2-3 Tsp Water

Directions
  1. Mix the water and icing sugar until nice and smooth in a small bowl.  Start with a little less water and add more as you need it.  
  2. Divide the icing sugar into the cupcake liners and add a couple drops of food coloring or gel to the the color you want.  Use toothpicks to mix the color to make it even.


In another tilt bin I stored the sprinkles, and again a little goes a long way!  I love that these Deflecto tilt bins open and stay open until I close them. It makes getting in a out of the bins so easy!!  I also used some of the cupcake liners to place the sprinkles in for easy use, especially for the larger shapes like the candy canes, gingerbread men, and trees.


We used a plastic knife to apply the icing to the cookies and placed the cookies on top of a sheet of parchment paper for easy clean up.


I do not think there is much of any cookies left, she ate them as she made them - or he brothers came by and quickly decorate and ate one.  Wonderful things now is that all the supplies are super easy to put away as they are already in the tilt bins ready for the next cookie decorating day!

Rolled Sugar Cookie Recipe

Ingredients
3/4 Cup Softened Butter
1 cup white sugar
2 eggs
1/2 teaspoon vanilla extract
2.5 cups all-purpose flour
1 teaspoon baking powder
1/2 teaspoon salt

Directions
  1. Preheat oven to 400 F.
  2. In a large bowl, cream the butter and sugar until smooth.  Add in the egg and vanilla.
  3. Stir in the rest of the ingredients until combined.
  4. Cover and chill dough for at least 1 hour in the fridge, or for a quick cool down 15 minutes in the  freezer (but no longer or it will not be easy to roll out).
  5. Roll out dough to about 1/4 to 1/.2 inch thick and cut with your shapes.
  6. Place on ungreased cookie tray (lined the parchment paper is best).
  7. Bake 6-8 minutes.
  8. Cool completely before decorating.

Supplies Used Interested in the supplies I used in this project? Most are listed below and some are affiliate links, which generates a me little commission (at not extra cost to you at all) when you click on the link and make a purchase. Affiliate and product disclosure can be found here.

Amazon Storefront
Amazon Storefront
Shop at:
AZ
Deflecto Tilt 4 Pack
Shop at:
SB | AZ
Parchment Paper
Parchment Paper
Shop at:
AZ
Wilton Sprinkles
Wilton Sprinkles
Shop at:
AZ
Wilton Food Coloring Gel
Shop at:
AZ
Wilton Cupcake Liners
Shop at:
AZ


Saturday, November 9, 2019

Easy Printable Foiled Christmas Cards

Making glamorous Christmas cards is so easy with a heat foil machine and a laser printer.  Just pick out your favorite printable and you have amazing cards!!  

This post also contains affiliate links and I will be compensated if you make a purchase after clicking on my links.  Various companies provided me with some product to create this project.  The opinions I share are solely my own.


Check out how easy these are to make in the video below


Pick out your favorite printable.  I feel in love with these amazing printables by Taryn Whitetaker, check them out below.  Click HERE to get the full sized versions. 


I took these printable and made them card sized, so click below for the card sized versions!!


Place your cut up sections printed on a laser printer with the foil on top through your Glaminator and let the magic happen!!


Check out coll these cards are when mounted on Adornit papers with the Xyron Mega Runner and a Christmas die cut words on the deer card.


I just love these foil cards, they look so elegant and so are easy!!


What foil card will you make?

Supplies Used
Interested in the supplies I used in this project?  Most are listed below and some are affiliate links, which generates a me little commission (at not extra cost to you at all) when you click on the link and make a purchase.  Affiliate and product disclosure can be found here.

Amazon Storefront
Amazon Storefront
Shop at:
AZ
Xyron Mega Runner Refil
Shop at:
SB | AZ
Xyron Mega Runner
Xyron Mega Runner
Shop at:
SB
Xyron 3
Xyron 3" Sticker Maker
Shop at:
SB | AZ
SB.com Ink
SB.com Ink
Shop at:
SB
Adornit Christmas 12x12 Papers
Shop at:
O
Unity Ann Butler Stamps
Shop at:
O
Xyron Glamintor Machine
Shop at:
AZ
Xyron Glamintor Tansfer Foil Color pack
Shop at:
AZ
Creative Expression Christmas Word Die
Shop at:
SSS


Share This

Related Posts Plugin for WordPress, Blogger...