Showing posts with label brandon. Show all posts

Saturday, September 27, 2014

Spooktactular **The Robin's Nest**

In 2012 my son Brandon was 2 and he fell in love with this spider costume.  We showed him a ton of costumes, they either scared him or he seemed completely uninterested, and the spider was the only one that he did not try and tear off, so the spider it is!!  He was so cute, my little fuzzy purple spider!!


I used the wonderful paper, Dew Drops, Rub-Ons, and glitter cardstock from The Robin's Nest to create this layout.  Please head on over to The Robin's Nest Blog to see more details!!

Supplies Used
Cardstock - The Robin's Nest
Patterned Paper - The Robin's Nest
Glitter Chipboard - The Robin's Nest
Dew Drops - The Robin's Nest
Rub-on - The Robin's Nest

Foil Paper - DCWV
Alpha Stickers - Momenta
Stickers - Paper House Productions
Spiders -Jolee's
Circle Cutter - Kreaxions - Just Imagine
Ink - Prima
Adhesive - Beacon & Scotch
Enjoy!!


http://scraps-of-reflections.blogspot.com/

Thursday, June 12, 2014

Army Brat **Paper House & Just Imagine**

In 2012-2013 my husband deployed to Afghanistan and he was gone for over a year including all the ramping up and down before and after being out of the country.  It was the hardest on my middle son.  He was 2 turning 3 when daddy was gone.  Old enough to know that daddy was gone, but way to young to understand why.  He latched onto any male figure that he was around and pretended to be an "army man" any chance he got.  I got this outfit for him and he loved wearing it, and once daddy came back he gave Brandon his old hat with rank.  
At his pre-school they had a salute to workers in the community, Brandon HAD to be an army man.  He was so proud of his dad, outfit, and of himself in his parade at school.  The little guy has endured a lot with daddy being gone, but he is still super proud of his little outfit (and of course daddy)!!


I used the wonderful Military Life Collection from Paper House Production as the base for the layout.  The colors and stickers are just perfect for this picture of my little man.  So many fun elements and titles for me to use in my grungy masculine page, plus the paper is PERFECT!!

http://www.paperhouseproductions.com/military-life-collection.html

Lots of fun titles and emblems to be used from the Military Life sticker sheet including the grungy "star', "flag", "All-American Family", and "Brat" are just a few seen here mixed into lots of other fun grungy elements.

http://www.paperhouseproductions.com/100-country-paper-pad-9292.html#.U4eH-ijihEk

I used lots of layers of papers below the pictures and embellishments mostly coming from cardstock and the wonderful 100% Country 12x12 paper pad by Paper House.  The colors of these papers worked great for the base of the layout.

In the picture below you can see even more fun Military Life stickers from Paper House.  I used the strip of "camo and burlap" sticker and cut it up to be used as layers throughout the entire page.  I still can't get over how perfect the "dog tags" are, they look so real!!


I used Kreaxion punch 907 from Just Imagine on the borders of every paper layer with the A insert to add texture to the entire page.  I randomly punch some corners without any insert to give it an even rougher look, the grungier the better on this page!!

http://www.justimaginecrafts.com/catalog/

I created the doily below with Kreaxion punch 923, the circle cutter, and the positioning parts for a 6.8 cm circle (larger parts) all from Just Imagine.  The punched doily adds so much dimension and texture to the layout, doilies work on masculine layouts!! 
 

http://www.justimaginecrafts.com/catalog/http://www.justimaginecrafts.com/catalog/http://www.justimaginecrafts.com/catalog/


 Supplies Used
Patterned Paper - Paper House
Stickers - Paper House
Punches - Just Imagine
Cardstock - DCWV
Embellishments - Prima & 7 Gypsies & Tim Holtz & Maya Road
Washi Tape - Prima & American Crafts & 3M
Mediums - Liquitex & Ranger
Paints - Ranger
Stencils - Ranger and TCW
Chipboard - Fabscraps

 Enjoy!!

Friday, March 7, 2014

simple things **Susan K. Weckesser**

I love to create texture and depth in my layouts.  I don't always want them bulky, but I want the illusion of richness and intrigue.  Here I will explain a few tips on how to add texture and depth using clustering and layering on your projects without added in tons of bulk, plus you might think about your supplies you already have in a different light and sue them in a different way.  

This is a layout of my family, it is a simple day fishing at a lake.  I love the picture because it shows my boys in the back ground fishing with my husband and daughter watching them, of course fishing as well.  I used a filter on the picture through Instagram called Walden, it gave the picture a softer feel, more like nature.  I have found that having a great picture to start with when making a layout, versus a picture you kind of like but "need to scrap" makes a world of difference.  The picture gives me the inspiration I need and the page just comes more naturally instead of fighting with the need to "just get this page done".

 
I wanted to have the same feel in my layout, so the first step was to pull items that worked with the color scheme of the picture, the browns, greens, the feel of nature.  I picked out items that had texture to them already like the mesh flowers, the chipboard, the wooden items, cork, and the fibers.  Using items that already have their own texture gives your projects more depth and richness without even having to try.


Here is a list of a few things to the edges of the papers in your projects to add texture and dimension without adding bulk to the layout.

  1. Distress the edges of the paper with a distressing tool like your scissors and ink the edges.  I do this technique to tons of projects.  It adds a softness to the look and takes away all the white lines from the papers you just cut.
  2. Take an edge punch and randomly punched the edges, not really caring that the punches were aligned or even that the paper looks like like the punch.  I did this the tan paper all around the edge of the layout and also to the darker brown paper placed vertically behind the cluster.  Just a pop of each paper is visible, so it adds just a hint but that little touch add so much.  
  3. Add in grainy texture by applying a quick drying glue (like ZipDry) around the edges of the papers and layers and sprinkle on flower soft.  I used a light brown color.
  4. Take some phrase stamps like those from Susan K. Weckesser saying "Create your Day" and "Don't go through life, grow through life" and stamp around the edges of the paper and at corners of strips in the foundation of the cluster.


http://www.susankweckesser.com/welcome


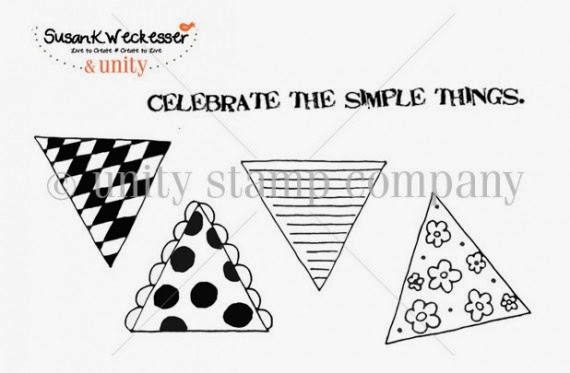
Here I used a wonderful stamp by Susan K. Weckesser that just captures the feelings the day "Celebrate the Simple Things"
http://www.susankweckesser.com/welcome


Here you can see some other texture applications I used in the cluster to add interest.
  1. Paint Splatters
  2. Stamps
  3. Layers of paper
  4. Inked edges of paper
  5. Distressed edges of paper
  6. Metal bits
  7. Crackle paint on chipboard
  8. Flower soft
  9. Rubons
  10. Items with texture already like the flowers and the jute.
  11. Mists
  12. Paint Splatters


Don't be afraid to try out an item in a new way or add things together to create something new.  Layers of papers mixed with other items add such a wonderful depth to your projects.  I have been told before and I fully believe there are no mistakes in scrapbooking just chances to expand your creativity!! 

Supplies Used
Cardstock - Core'dinations
Patterned Paper - Prima
Number Stickers - Glitz
Rubons - BoBunny
Jute - Canvas Corps
Flowers - Petaloo
Wood - Prima
Chipboard - Memory Maze
Metal - Prima
Cork - Fancy Pants
Stamps - Susan K. Weckesser
Ink - Ranger
Punches - EK
Stains and Mediums - Ranger

You can also view this article at Susan K. Weckesser.

Enjoy!!
http://scraps-of-reflections.blogspot.com/

Friday, December 6, 2013

Merry Christmas **Susan K. Weckesser & Flamingo Scraps**

Last December my friend took these wonderful pictures of my boys (plus some of me, my mom, and my daughter) when they were a week away from being 3 and 7 years old.  I just fell in love with the head shots of both boys, but could never find the inspiration to create a layout with them, until now!!


Putting pictures in Polaroid frames is huge right now, so I could not resist playing around with the idea and with the Maya Road frames.  My pictures were not the correct size, so I added a paper border inside and then added their names below.  I also wanted to try out my new Martha Stewart circle punch (it made the doilies behind the pictures).  I then added in my own layers and clusters for lots of dimension and fun.  You can also see Heidi Swapp's file folder tucked in the layers!!


Here you can see some of the May Arts twine looped around to make a fun flourish behind the Prima flowers.  I then added in a fun Tim Holtz charm, which is all stacked up on top of Maya Road chipboard, Basic Grey 25th and Pine die cuts and paper, and some wonderful Susan K. Weckesser Stamps used with various colors of red and brown Ranger Distress Inks.  

I used the following sets of stamps from Susan K. Weckesser all layered on top of each other for lots of dimension:
http://www.susankweckesser.com/welcome


Here you can see some I stamped on the Maya Road Chipboard with one of the Susan K. Weckesser Stamps after painting it with Clearsnap Smooch Paint.   You can see Cosmo Cricket wood stars, Prima lace,  and some of my paint splatters and circle marks I made with Tattered Angels and Heidi Swapp Mists (here is a link to the tutorial on how I make them).

Supplies can be found at Flamingo Scraps - head on over to see them, lots of great sales to be had!!

Supplies used


Share This

Related Posts Plugin for WordPress, Blogger...