Wednesday, May 28, 2014

Thank You **Paper House & Off the Rails Scrapbooking**


The end of the school year is coming up on us and I love to give a handmade card to my kids teachers.  Here is one of cards I am making for this end of school year for my son's pre-school teacher. 


Here I used the wonderful 12x12 Garden Paper Stack and cut out 3 squares, 1 large (4x4) and 2 small (2.5 x 2.5).  I inked the edges and added in faux stiching with a black pen and added them to my 6x6 card already matted with cardboard and orange cardstock.

http://www.paperhouseproductions.com/shop.html/

http://www.paperhouseproductions.com/shop.html/

I then took the gorgeous canvas stickers and placed them around the card for a geometric look and added int he words thank you hugging close to the large pink floral canvas sticker.  You can also see a peak of the glittered paper from the Garden papers here, so pretty!!


http://www.paperhouseproductions.com/http://www.paperhouseproductions.com/

Join me over at Off the Rails Scrapbooking for a fun challenge of "Up, Up and Away" and use anything that flies on your project to enter.  Lots of fun goodies to be had!!

Don't forget to say a huge thanks to ALL the teachers as we are coming up on the end of the school year - they deserve it!!

Supplies Used
Patterned Paper - Paper House
Canvas Stickers - Paper House

Cardstock - DCWV
Cardboard - DCWV
Alpha Stickers - Momenta
Pen - Faber-Castell
Ink - Prima
Mists - Heidi Swapp
Enjoy!!

Monday, May 26, 2014

love **Birds of a Feather & Just Imagine**

We had some pictures taken when Catherine turned one.  During the photo shoot we inevitably had some tears, poor little cranky baby girl.  My journaling states, "Most of the time you are the sweetest little girl, but when you get tired 'miss cranky pants' comes out.  You still look super cute in your barely there pigtails and even through your cranky moments I love you so much."


Here I used the May Tweet Sketch as my inspiration for the fun layout with the May Birds of a Feather Kit.  

 2014 may boaf sketch

Lots of fun with layers and embellishments!!


I used the super easy circle cutter from Just Imagine to create both circles in white and punch 920 with the A insert to punch the paper strips.


Patterned Paper - Simple Stories & American Crafts - Birds of a Feather May Kit
Instaframes - Simple Stories - Birds of a Feather May Kit
Enamel Stickers -  Simple Stories - Birds of a Feather May Kit
Library Cards w/pocket - Maya Road -  Birds of a Feather May Kit
Alpha Stickers - American Crafts - Birds of a Feather May Kit
Cardstock - American Crafts - Birds of a Feather May Kit
Trim - Cheep Trims -  Birds of a Feather May Kit

Flowers - Prima -  Birds of a Feather May Kit
Embellishments - Hampton Art & Jillibean Soup - Birds of a Feather May Kit
Punch - Kreaxions - Just Imagine
Ink -Prima


Enjoy!!

fun times **Birds of a Feather & Just Imagine**

Easter of 2014 we spent at my parent's house and we had our annual egg hunt at the Club.   There were 3 different areas for hunts based on age, and my kids were in two of them.  They all had such a haul of eggs that we will have candy for the next year!!


I made this layout with the super cute and bright May kit from Birds of a Feather.  I did tons of layering with strips of paper, ribbon, and lots of bits and bobs of embellishments from the kit.


I used a variety of punches (905, 907, and 920) from Just Imagine using the A border punch insert.  Some I punched on both sides of the paper strip, some I randomly punched, and some I just punched one side.


Hope you enjoy my atypical Easter layout!!

Supplies used:
Patterned Paper - Simple Stories & American Crafts - Birds of a Feather May Kit
Instaframes - Simple Stories - Birds of a Feather May Kit
Library Cards w/pocket - Maya Road -  Birds of a Feather May Kit
Alpha Stickers - American Crafts - Birds of a Feather May Kit
Cardstock - American Crafts - Birds of a Feather May Kit
Trim - Cheep Trims -  Birds of a Feather May Kit

Flowers - Prima -  Birds of a Feather May Kit
Embellishments - Hampton Art & Jillibean Soup - Birds of a Feather May Kit
Punch - Kreaxions - Just Imagine
Mist - Heidi Swapp
Twine - American Crafts
Ink -Prima
Stamp - Prima


Enjoy!!
                                                                                                                             

Sunday, May 25, 2014

Paper House/Xyron Blog Hop Winner

Thanks for participating in the co-hop and commenting!!

My winner is Sue D


Congrats!!!  

Please e-mail me at erinkreed@gmail.com and send me your address for your prize!!


Friday, May 23, 2014

happy cards **Birds of a Feather Kit**

Everyone needs a little cheering up, something to make them smile, for no reason.  A hug, smile, card, gift, or even just a phone call to say hi.  I made these little cards for some special people in my life that i will see this weekend.  Something to brighten up their day, to help them keep positive though hardships they are going through, and hopefully make them happy.  These are my happy cards.


I used the bright and cheery May kit from Birds of a Feather to crate these fun cards.  When I saw the library cards with pockets from Maya Road and the instaframes from Simple Stories I knew what I needed to make - little ATC cards.  I cut out  4.5 x 3 inch sections of the patterned paper from Simple Stories in the diagonal stripe and placed the library card on top, added in a little instaframe card, wrapped it in twine and added a little title to the top.


On the inside of the library card I wrote a different "happy" quote on them and then signed it.  The quotes are: 
"Be happy and Smile" 
"Life is better when you're laughing"
"Take time to do what makes your soul happy"

Take time to brighten someone's day today!!

Supplies used:
Patterned Paper - Simple Stories - Birds of a Feather May Kit
Instaframes - Simple Stories - Birds of a Feather May Kit
Library Cards w/pocket - Maya Road -  Birds of a Feather May Kit
Twine - American Crafts
Ink -Prima
Pen - Marvy
Stickers - Momenta

Enjoy!!

Thursday, May 22, 2014

Mother's Day Card **Just Imagine & Birds of a Feather**

I know Mother's Day was a few days ago, but in case you forgot to send one or just want to make a fun card for someone special I hope this inspires you.  FYI my mom did get this in time for mother's day :)


I used the bright and cheery May kit from Birds of a Feather to create this card. I used lots layers and color blocking with pink.  I then added in the digi butterflies from the tutorial I gave earlier in the month - DIGI BUTTERFLIES

Supplies Used:
Punch - Just Imgaine - Kreaxions
Ink - Clearsnap
Cardstock - Core'dinations
Digital File butterflies - Personal free file
Gems - Prima
Foam Dots - Scotch 
Enjoy!!

Wednesday, May 21, 2014

Wonderful Vacation **Paper House/Xyron Co-Hop**

Welcome to the first day of a fabulous week long blog hop with the Xyron and Paper House Productions Design Teams!  With Summer upon us and lots of folks scheduling vacations these travel-themed projects are a great way to get ready for the season.  Not only will both companies have some great projects to show you, but you can win some great products EACH DAY from Xyron and Paper House Productions.

My project is of my trip to Germany back in September of 1998 to visit my at the time boyfriend.  We had dated in high school and stayed in touch while he was in the Army and I went to University.  He was station in Darmstadt for 2 years and his parents and I flew over to visit him for a week.  While we were there he took leave and we drove all around seeing the sighs of Germany.  We saw Darmstadt, the Black Forest, Koln, and Rothenburg.  It did not last near long enough, but it was so very nice to see him after a year of being apart - after all I did end up marrying the guy!!


This layout is about a vacation, but it is also about our early life together before marriage and our years apart before we were together again.  With that in mind I went for a romantic/shabby chic feel to the page.  I feel in love with the 12x12 "Sweet Love" paper, I had to use it for something, and this layout was perfect.  

http://www.paperhouseproductions.com/shop.html/
 
Since this layout was about a vacation (and love), I wanted to not use the title on the paper, so I used the white "peeling paint" paper from the 12x12 100% Country Paper Stack and made a doily out of it with the Martha Stewart Circle punch and then inked and sprayed it with pink.

http://www.paperhouseproductions.com/shop.html/

http://www.paperhouseproductions.com/shop.html/

I then added in the wonderful "pink floral" paper from the 12x12 Garden paper pad. and used the same punch to make the doily in a smaller size to layer on top of the white "peeling paint" paper.

http://www.paperhouseproductions.com/shop.html/

http://www.paperhouseproductions.com/shop.html/

I added in my own flair and fun by taking a black pen to the background paper and the "pink floral" paper and doodling along the images and lines of the papers.  I did the same to the "peeling paint" paper but in a white pen.  I even added in some stamped script and my own script around the "Sweet Love" paper in black.  I used the wonderful Xyron glue stick for corners to glue down the doily papers.  The corner applicator was perfect to get in all the edges of the doilies to help it stick down.

http://www.xyron.com/enUS/Home/default.html

Here you can see the beautiful chipboard flowers from the Garden Chalkboard Stickers, a cute little puffy Butterfly sticker in pink (above in purple), and the "Cherished Moments" cardstock sticker all from Paper House.  I use the 1.5 inch Create a Sticker from Xyron to stick my journaling strips down, such an easy way to glue down such little items!!

http://www.paperhouseproductions.com/shop.html/http://www.paperhouseproductions.com/shop.html/http://www.paperhouseproductions.com/shop.html/
http://www.xyron.com/enUS/Home/default.html


If you leave a comment on this post I will give away a RAK to one lucky winner.  I will post the winner on Sunday May 25th, 2014.  Thanks for hopping on by!!

Supplies Used
Patterned Paper - Paper House Productions
Stickers - Paper House Productions
Adhesive - Xyron
Alpha Stickers - Thickers and Basic Grey
Flowers - Prima and Petaloo
Pen - Faber-Castell
Chipboard - Creative Imaginations
Mists - Faber-Castell & Ranger

Sunday, May 18, 2014

Our Baby **Just Imagine**

A very close friend is having a baby boy in a couple of weeks so I had to make a baby book for the little guy and his new parents.


I used Kreaxions punch 923 with no insert from Just Imagine and punched close to the corners to treat the square corners as a kind of frame for the front of the book.  I then took buttons and twine and made a grid like pattern of the front.
http://www.justimaginecrafts.com/catalog/
Supplies used:
Punch - Kreaxions - Just Imagine
Book-  SEI
Pattern Paper - Chatterbox
Buttons - Other
Chipboard - Other
paint - Martha Stewart
Ink - Prima
Twine - American Crafts

Enjoy!!

Wednesday, May 14, 2014

Kaisercraft Design Team 2014 Entry

Here are my entries for the Kaisercraft Design team application.  

Enjoy!!

Thankful Card
Kaisercraft Products - flowers and cardstock


Pretty happy Girl
Kaisercraft Products - Paint and Cardstock


Party Hat
Kaisercraft Products - Gems


Friday, May 9, 2014

Texas Bluebonnets **Paper House & Just Imagine & Off the Rails**

Every year I love to take my kids out to the bluebonnets to take pictures.  It is almost a mandatory thing to do when you live in Texas, stick your kids in the flowers and take a picture.  This year with all the freezing the flower were everywhere and so pretty, best year in a long time.  Since we moved to central Texas I can find patches 5 minutes from my house, so there was no excuse to get pictures this year.  I got tons of pictures and this is one of those beauties.


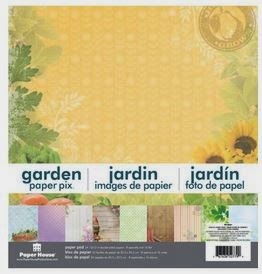
I used tons of papers from Paper House to create this layout, the base of the layout is the Texas Territories 12x12 paper with layers from the 100% Country 12x12 paper stack.  I then added in texture with mediums, pens, Gelatos, and Gelato mists from Faber-Castell.

http://www.paperhouseproductions.com/

http://www.paperhouseproductions.com/

The first step is to create the foundation of the layout.  I start with my background page from Paper House and added in the mediums of Gesso and Whipped Spackle from from Faber-Castell with stencils and let it dry.   I did many layers (with drying time in between) with a couple of different stencils to get the look I wanted - rustic!

I then took the Gelatos and rubbed them directly onto the dried mediums in various colors of browns, yellows, greys, and oranges. 

Then I took the water brush and blended them all in and let it dry.  I took the brown and Blue Gelatos and made them into mists and added paint splatters and sprays all over the base of my layout with the Mist Maker set.


I then took the Big Brush Pen in Blue and the Blueberry Gelato and added in more colors of blue around the page to draw out the colors of the Bluebonnets from the picture.  Here and there I added in some more brown with the Brown Big Brush Pen.  I used the same pen and gelato to color the chipboard swirl behind the picture.  Using the tools from the Gelato tool set I blended the colors on the mediums on the background and the chipboard with the dauber, chisel, and my finger.

 
At this point I added in my other layers of papers, glued down my flowers, added in stickers, and then sprayed and dripped on some more of the gelato mist so the new items did not look so clean next to my grungy background.


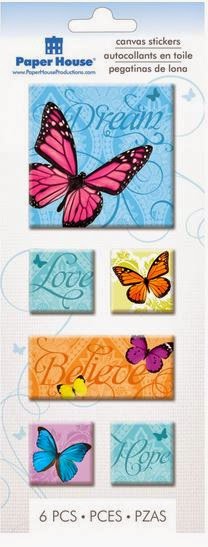
I used the wonderful chalkboard stickers from Paper House as my journaling spot.  I used a silver gel pen to write on it and it worked wonderfully!!  I even added in a little Puffy Sticker Butterfly in green from Paper House as it match just perfectly!!


http://www.paperhouseproductions.com/http://www.paperhouseproductions.com/

I used some of the stickers from the Family Heritage Cardstock sticker pack as a small title and also as background strip for more dimension and layering on top of he wonderful papers.  I also added in another little Puffy Sticker Butterfly in blue as it too matched the Family Heritage Cardstock stickers perfectly!!


http://www.paperhouseproductions.com/
You can see here how I used the wonderful circle cutter from Just Image.  I cut them at 6 inches and 5 inches and used them as texture layers behind the picture.  I also used Kreaxions punch 923 with the corner punch insert B on the burlap texture paper for even more dimension.

http://www.justimaginecrafts.com/catalog/
 http://www.justimaginecrafts.com/catalog/

I added some more grey and silver gelato mist and to the flowers to help them blend into the layout, without the mists and ink they stood out more than the picture.


If you love using chipboard come take a look at Off the Rails Challenge and enter to win a prize!!

Supplies used
Cardstock - DCWV
Patterned Paper - Paper House
Stickers - Paper House
Flowers - Prima and Petaloo
Mist/Paint - Faber-Castell
Ink - Prima
Punch/Circle cutter - Kreaxions - Just Imagine
Stencils - Ranger & TCW
Chipboard - Memory Maze
Trim - Other
Big Brush Pen - Faber-Castell
Mist maker set - Faber-Castell
Pen - Gelly Roll
Molding Paste - Liquitex

Enjoy!!

Share This

Related Posts Plugin for WordPress, Blogger...