Every year for Halloween I am always on the lookout for a cute little gift I can give to my kids friends (school, neighbors, etc). I have seen the ghost pops so many times (take a sucker and wrap a white paper towel the sucker, tie a black ribbon around the bottom, give it eyes, and you have a ghost) that i thought of trying to switch it up a bit. I thought of pumpkins. Invert them, make them orange, and poof pumpkin pops.
You could give these out as kid gifts, teacher gifts, as place cards for a table setting, and as plain pumpkins they work for Thanksgiving too!!
Pumpkin Pop Tutorial
1) Supplies - Some form of a sucker (sphere not flat), paper towel, quick drying craft glue, tape, twine, black pen, green pen, orange mist, black mist, green mist, cardboard, and a flower.
2) Open up the paper towel or napkin to make a large square. Spray the center with orange mist. I used Heidi Swapps color shine in Georgia Peach. Let it dry completely
3) Using a black pen or marker draw in the lines as seen below, make sure you napkin is dry first. This creates the seems or ridges in your pumpkin.
4) Tape down the tops and secure the wrapper of the sucker before you cover it. This helps the pumpkin not have lumps later, plus it gives the kids a bit more fun trying to open them up to eat them, lol.
5) Cover the sucker with the colored napkin and secure the bottom with twine, I used green, but any color you want will work.
6) Cut off the excess paper towel, but be careful not to cut off your twine or it will fall apart.
7) After looking at the "pops" I thought the handle of the sucker acted as the stem of the pumpkin, and those are green. So I colored the stick part with Chartreuse Color Shine and a green marker. You should do this step before you wrap the napkin onto the sucker, so you don't mix your colors.
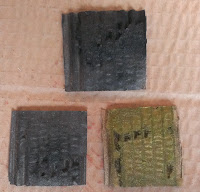
8) These would be cute just like they are at this point, but I thought pumpkins are not held stick "stem" down, but rather with the stem pointing up. Alas suckers can't stand up on their own, so it needs a base! Cut out squares of cardboard from a box, hey why not use the box your flamingo scraps goodies came in!! Tear off the tops of the cardboard to expose some of the ridges. Spray the cardboard in your choice of Mist - black and green were my choices. I then glued down a flower to each of the squares and sprayed the same color again to the flower would match. The flower just acts as a "nest" so the sucker will not topple over when it is glued on to the base.
9) Glue down your pumpkin pop to the center of the flowers, hold the stem for a sec so they will not fall over. Leave your pumpkins "natural" or draw faces on them to make them Jack-o-lanters. I even added a tag to one of the stems to make it a label with washi tape and wrote a name on it.
You can find the paper craft supplies at Flamingo Scraps, so head on over today and get yourself a fun Halloween treat!!
Supplies Used
Twine
Napkin
Pen
Washi Tape
Enjoy!!


No comments:
Post a Comment
Thanks so much for leaving a comment, they mean so much to me!!