Wednesday, June 3, 2015

Butterfly Tag **Paper House & Die~Namites Dies & Xyron**

Who does not love purple?  It has such a presence of softness that works perfectly with black to give it a hard edge.  This is the feeling I wanted creating this tag, soft but hard, a wonderful juxtaposition of feelings and tones.


I added lots of layers here in paper, pearls, rhinestones, mesh, ink, stickers, and die-cuts to create the complexity but simpleness of this fun tag.  This could be used on a present, instead of a card, on a gift bag, or  just something pretty to sit on my work table.


I used the wonderful Die~Namites Die "Swirly Butterfly" cut out of Paper House purple paper and inked the edges in black.  I then ran it through my Xyron 1.5 Create-a-Sticker to make it sticky.
Paper House Purple Paper
 

I cut out a second butterfly in white cardstock and layered the purple butterfly on top of the white one.


I then ran the layered butterfly through the Xyron again to stick it to the tag.


For the background of the tag I used strips from the 12x12 paper from Paper House and layered them on the tag using all the varying color of purple and the fun metallic swirly parts.

Paper House Paper used for base of tag
Here are some close up shots of the tag in various angles, you can just see the wonderful delicateness of the butterfly die.


Die~Namites Dies Sketch Challenge and Dare.
This month's dare is create something "manly"
Here are the rules to play along!
********************************************************************* 
TO ENTER the Die~Namites Dies May Sketch Challenge YOU MUST:
  1. Use at least one Die~Namites Die in your creation.
  2. Use the SKETCH! It can be interpreted (loosely or exactly) as a card, layout, or altered piece!
  3. Incorporate the DARE into your creation.
  4. Mention the Die~Namites Die you used in your blog post.
  5. Link back to the Die~Namites Die.
  6. You have until the last day of the month to post your creation on your blog and link up to this post.  **PLEASE add a link to your direct post, not your entire blog.**
Each participant will receive one entry into our random drawing
for each entry into the challenge.
 A random winner will be chosen from eligible participants for a
$25 Gift Certificate to Die~Namites Dies.
*********************************************************************

Supplies Used
Gems - Prima
Mesh - Other
Twine - American Crafts
Punch/Trimmer - Fiskars
Ink - Prima
 Enjoy!!


Tuesday, June 2, 2015

May Arts Ribbons Submission

Here are my tutorials and projects for my May Arts Ribbon Application

Scraps of Inspiration Mini Book


********************************************
 Mixed media "DAD" Card


Here is a quick video of how I made this mixed media card.


********************************************
Adore Your Smile Layout


*********************************************
Decorative Easter Straws and Holder 


**********************************************
 Sweet Layout - Full Post
My little girl let me put cute pigtails in her hair for a birthday party and while we were at the party I took some pictures of her playing.  These wonderful pictures came out of that impromptu photo shoot with my phone.


I really wanted to capture the sweetness and girlishness of my daughter with this layout.  She is such a girly girl loving to wear her dresses, pretty shoes, and just being a girl!!  I wanted to really try for the shabby chic look with torn section on the paper, so this is how I achieved this look.

Shabby Chic Torn Background Paper Tutorial

1) Tear out some paper of your choice, I choose papers that looked similar to my background paper, but different enough so they stand out.  Make sure their are white edges to your torn section all around it.


2) Apply a good liquid glue to the back of the torn paper.  I used Tombow Aqua Mono Liquid Glue, it allowed me to lay the torn paper onto my background paper and adhere completely as if it is apart of the background and not just stuck on top of it. 

http://tombowusa.com/

3) Layout torn paper onto background paper and press and rub until it lays flat with no air bubbles.  Let it dry completely.


4) After the parts have all dried you can then apply a chalk ink (I used a light brown) and you can add more distressing to the background.  For this layout I applied glitter and beads.


5) The effect is that the paper is torn from the top revealing what is under, but really you just laid it on top!!


To glue all the layers pf papers together I used the wonderful Tombow Glue Tape Stamp Runner, to pop up some of the embellishments I used the Tombow Power Adhesive Tabs, and to hold all the larger embellishments in place I used the Tombow Multi Mono Liquid Glue.

http://tombowusa.com/http://tombowusa.com/http://tombowusa.com/


Tombow had a challenge to use flowers on a project, well I had fun this I used the background paper that had flowers and then added even more flowers as embellishments to the layout.  I just love flowers!!!

Supplies Used
Papers - Kasiercraft
Photoframe - Kasiercraft
Flowers - Prima
Resin- Prima
Buttons - Prima
Heart Doily - ScrapPlezier
Mists - Tattered Angels
Lace - Prima
Pearls - Prima
Ink - Prima
Chipboard - Dutsy Attic
Twine - Canvas Home Basics
Diecut - ScrapPlezier
Glitter/Beads - Prima
Medium - Prima
Stencil - Prima
Wood - BoBunny
Crochet Doily - Recollections
Adhesive - Tombow
 *********************************************
Decorative Gift Bags - Full Blog Post
I wanted to give something special to my kids teachers, not just the present but also the packaging it came it.  I had these 2 red bags from a hair salon that I could cover up their logo (only on the front) and create a fancy decorated bag.  I love the feel of red, black, and white together, it strikes me as so elegant and regal and paired with the Paper House Colorways Noir Collection of papers it was perfect!!
Directions:
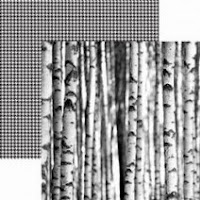
1) Cut out your choice of Colorways Noir background paper (I chose Noir Birchwood and Bokeh - the backsides of each for the zebra and houndstooth prints) and  to 8' x 10' and ink edges in black and adhere using the Xyron Tape Runner to front of the bag.
http://www.paperhouseproductions.com/shop/scrapbooking/colorways-noir.htmlhttp://www.paperhouseproductions.com/shop/scrapbooking/colorways-noir.html
https://www.xyron.com/en-US/Products/Scrapbook-Adhesives/Adhesive-Runners/
2) Cut a large doily in half and glue using the Xyron Tape Runner to the right side of the background paper.

3) Cut out 2 strips in coordinating Colorways Noir papers (I used left overs of the background papers and also a section of Noir Ironworks) of your choice in 2' x 8' and 3' x 8', ink edges in black, and layer on top of each other.  This is the middle section.
http://www.paperhouseproductions.com/shop/scrapbooking/colorways-noir.html
4) Wrap the layered middle section with black and white butchers twine and glue using Xyron Tape Runner to the bag as seen.
5) Using Tattered Angles Glimmer Mist in Crimson spray 2 times under the section where the flower and leaves will be and then pull out the pump applicator and flick drops on to the background.  Let it dry completely.
6) Using Die~Namites Die in "Lilacs" cut 2 dies, one in black cardstock and one in white cardstock.  Using the NEW Xyron Creative Station with the Permanent Adhesive Cartridge to apply adhesive to the back of the intricate die-cut adhere to the bag as seen.
http://www.die-namites.com/
https://www.xyron.com/en-US/Products/Scrapbook-Adhesives/Adhesive-Runners/
 
7) Glue a large red flower to the bag using a good wet glue.
 

The bag your gift your gift in can be just as much of a present as the gift it self, plus this bag can be reused over and over again!!
Supplies Used
Twine - Maya Road
Flower - Prima
Doily - Recollections
Bag

********************************************
Here are a few projects without tutorials


Thank you for viewing my application and good luck in the selection process.


Saturday, May 30, 2015

Personalized Water Bottle **Xyron and CCB**

My husband recently got a metal water bottle for a course he is taking, and so did 80 other people who take this class.  He wanted to specialize his bottle so he would not pick up the wrong one in future classes, but he also wanted it simple.  He is in the Signal Corps of the Army so the color is orange and a symbol is the fist of lightning, his very specific requests along with his name.


Here is the step by step instructions to create a personalized bottle:
1) Create a simple fist with lightning and add his name at the bottom as a JPeg file.

2) Print of image onto Canvas Home Basics orange cardstock and clean surface of the bottle.


3) Cut out design into a smaller size and run it though the Xyron Creative Station with the 5" Laminate refill.  Now it will be water resistant with the plastic coating on the paper.


4) Fussy cut out the design with good scissors.


5) Use a good tacky or strong glue of choice to stick the image to the bottle and clean up excess glue.


6) Enjoy your personalized water bottle!!  This cannot go into the dishwasher as the glue will not last, but it can get a bit wet when refilling or washing it out lightly. 

Supplies Used
Glue - Beacon
Metal Water Bottle
Scissors


Share This

Related Posts Plugin for WordPress, Blogger...