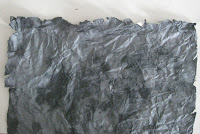
I wanted a way to really grunge up my paper, more than just distressing it.
1. Supplies you need. Paper, scissors, water, paint (I used black acrylic), and a sponge.
2. Using your scissors distress the edges of the paper, it is okay if it rips or is uneven, this gives it more of a grunge look.
3. Create a paint and water mixture (50/50) and dab your sponge in it, but do not soak it. Lightly go around the edges of the paper, make sure to get any white showing or the back of the paper if it ripped open. Also lightly brush your sponge on the rest of the paper just to get it damp (if you do not want the rest of the paper to have the color of the paint just use plain water for this part).
4. Crumple up your paper into a ball, this gives it its crumpled look. The open it back up, be careful as it can tear because it is wet.
5. Using your finger pull down parts or make folds in the paper. As it is wet it will stay this way, and dry this way. Let your paper air dry or use your heat dryer or embossing heat tool to speed things up if you wish. Your paper might fold up at the sides, but once you glue to down to your project it will flatten down, if any parts stick up to much, just use a glue dot to hold that part down.
The finished project can look like this LO.
Grunge it up, have fun!!


Thanks! Great grunge trick! I will try it!
ReplyDelete