Showing posts with label catherine. Show all posts

Sunday, April 13, 2014

so you **Just Imagine Blog Hop**


Come join me in a fantastic blog hop!!


Blog hop order is

Ginni Wooster Rowland Gass http://ginniscrappyworld.blogspot.com/
Karen Kelly Zabuska http://calmcreations.blogspot.ca/
**YOU ARE HERE - Erin Reed http://scraps-of-reflections.blogspot.com/
**NEXT - Jackie Plank http://jackiepstuff.blogspot.ca/

Finish here at to confirm you completed the hop:

Here is my creation.  One day my daughter was just sitting in the playground waiting for her older brother to get out of school wearing her super cute little sweater and I could not resist taking pictures of her, these gems came from that photo shoot.


I used punch 923 with the C insert in the corner of the dark pink paper and also in the corner of the peach paper.
In the dark pink paper I used insert C of punch 923 but only showed the extra filigree portion of the corner, for the peach corner I used the same insert and I showed the entire punched section.  For a tutorial on how I made the little card pictured below click on this link.

http://scraps-of-reflections.blogspot.com/2014/04/so-you.html

Supplies Used
Flowers - Prima and Websters
Mist/ink/paint - Ranger, Tattered Angels, Heidi Swapp
Pearls - Prima
Puffy paint - Polymark

Enjoy the Hop!!

Friday, March 7, 2014

simple things **Susan K. Weckesser**

I love to create texture and depth in my layouts.  I don't always want them bulky, but I want the illusion of richness and intrigue.  Here I will explain a few tips on how to add texture and depth using clustering and layering on your projects without added in tons of bulk, plus you might think about your supplies you already have in a different light and sue them in a different way.  

This is a layout of my family, it is a simple day fishing at a lake.  I love the picture because it shows my boys in the back ground fishing with my husband and daughter watching them, of course fishing as well.  I used a filter on the picture through Instagram called Walden, it gave the picture a softer feel, more like nature.  I have found that having a great picture to start with when making a layout, versus a picture you kind of like but "need to scrap" makes a world of difference.  The picture gives me the inspiration I need and the page just comes more naturally instead of fighting with the need to "just get this page done".

 
I wanted to have the same feel in my layout, so the first step was to pull items that worked with the color scheme of the picture, the browns, greens, the feel of nature.  I picked out items that had texture to them already like the mesh flowers, the chipboard, the wooden items, cork, and the fibers.  Using items that already have their own texture gives your projects more depth and richness without even having to try.


Here is a list of a few things to the edges of the papers in your projects to add texture and dimension without adding bulk to the layout.

  1. Distress the edges of the paper with a distressing tool like your scissors and ink the edges.  I do this technique to tons of projects.  It adds a softness to the look and takes away all the white lines from the papers you just cut.
  2. Take an edge punch and randomly punched the edges, not really caring that the punches were aligned or even that the paper looks like like the punch.  I did this the tan paper all around the edge of the layout and also to the darker brown paper placed vertically behind the cluster.  Just a pop of each paper is visible, so it adds just a hint but that little touch add so much.  
  3. Add in grainy texture by applying a quick drying glue (like ZipDry) around the edges of the papers and layers and sprinkle on flower soft.  I used a light brown color.
  4. Take some phrase stamps like those from Susan K. Weckesser saying "Create your Day" and "Don't go through life, grow through life" and stamp around the edges of the paper and at corners of strips in the foundation of the cluster.


http://www.susankweckesser.com/welcome


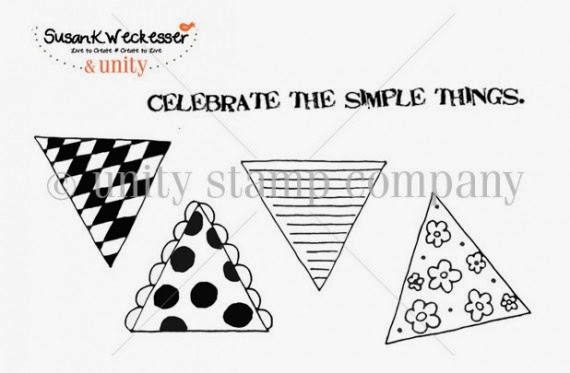
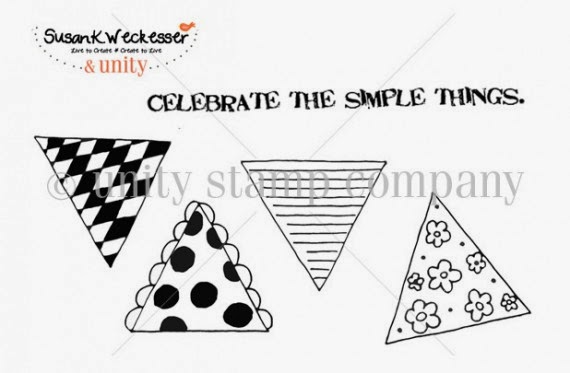
Here I used a wonderful stamp by Susan K. Weckesser that just captures the feelings the day "Celebrate the Simple Things"
http://www.susankweckesser.com/welcome


Here you can see some other texture applications I used in the cluster to add interest.
  1. Paint Splatters
  2. Stamps
  3. Layers of paper
  4. Inked edges of paper
  5. Distressed edges of paper
  6. Metal bits
  7. Crackle paint on chipboard
  8. Flower soft
  9. Rubons
  10. Items with texture already like the flowers and the jute.
  11. Mists
  12. Paint Splatters


Don't be afraid to try out an item in a new way or add things together to create something new.  Layers of papers mixed with other items add such a wonderful depth to your projects.  I have been told before and I fully believe there are no mistakes in scrapbooking just chances to expand your creativity!! 

Supplies Used
Cardstock - Core'dinations
Patterned Paper - Prima
Number Stickers - Glitz
Rubons - BoBunny
Jute - Canvas Corps
Flowers - Petaloo
Wood - Prima
Chipboard - Memory Maze
Metal - Prima
Cork - Fancy Pants
Stamps - Susan K. Weckesser
Ink - Ranger
Punches - EK
Stains and Mediums - Ranger

You can also view this article at Susan K. Weckesser.

Enjoy!!
http://scraps-of-reflections.blogspot.com/

Thursday, January 23, 2014

my sweet girl **Susan K. Weckesser**

 For Catherine's first birthday we had a few pictures taken by a friend, and they turned out wonderfully.  This is one of the beauties that came out of that shoot.
 

I love the look of mixed media, playing with your embellishments, creating texture, looking around the page at all the fun different items, but never taking away from the picture itself.  That is part of the art, not letting the page "eat" the picture, but letting the page enhance the picture. 

You can also view my tutorial on how to create the paint splatters as seen in the left corner of the picture in white paint.

Below is my methodology of how I build a page - a peak into my head so to speak.  Sorry for the lighting on some of the pictures, I did not always have the best light available as I was building my page.

How to Build a Mixed Media Page

 1) I start with the papers.  I look for papers that correspond to my picture, I want to complement it, not fight with it.  I used my daughter's hair bow (since the rest of the picture is brown, flesh, or white I used those colors (pink, teal, white, etc).  The papers from Susan K. Weckesser were a perfect match, they just begged to go with this picture.

http://www.susankweckesser.com/welcomehttp://www.susankweckesser.com/welcome
 The "color burst" paper was perfect for the background, and then I added in the "bouquet" and "beautiful days" as layers.

2) I this point I have a sketch in my head of the design of the layout, I know I wanted the picture in the middle right, with elements going above and to the left of the picture.  I start pulling items that I think will work on my page, not caring about color, just the shapes.  Not all the items will make the cut and be used, but this gives my an idea if I like where I am headed.  Nothing is glued down, it is just my rough idea at this point.


3) I apply gesso to all the embellishments that need a change of color (except for the top lace it was white so it took color no problem).  The spray them with spray mist.  I used Tattered Angels mist in a couple of different shades of light pink. I mist them each 2-3 times to give them a good coat.  I also let them dry before each coat so they absorb the mist better.  I do this off the page so I do not apply to much mist to the background papers.


4) Now I add texture to the page.  I used stencils by Prima with gesso, added in my papers (distressing each layer of paper with scissors and edging them with ink) and trims, and for fun I added in layers of Snowtex.  I gives this wonderful bumpy texture.  I even took a couple of Susan K. Weckesser stamps and stamped in gesso below the picture and in the top left corner below the lace and stencil area.  I used two small phrases found on the stamps sets below "Celebrate the simple things" and "Don't go through life, grow through life"

http://www.susankweckesser.com/welcomehttp://www.susankweckesser.com/welcome


5) Now I start to add my embellishments back on.  I do not have the picture glued down yet, as I might still spray and I don't want to damage my picture.


6) I start to glue down items as I like to way the looks in that location.  I sometimes take pictures and step away for the page to see how it looks a hour later (especially if I am waiting for something to dry).


7) If I feel there are dead or blank areas, I will either add in another embellishment (or two) or add in more texture.  I did this just above the picture, it felt it was missing something so I added another bit of stenciled gesso.  I also sometimes move things around or change the item completely.  I just let the page go with the flow.  I don't fight to make it work, because I find it never looks good if I do that.


 8) One of the last steps is to go over the gessoed embellishments one more time with paint or chalk ink, sometimes both.  This help them pop out of the page a bit.  I might even add a bit more gesso to the items so they don't look to pink. it adds contrast.  I also leave some items plain, or without gesso like bling and such.  On this page I also added on some glitter via Stickles from Ranger in Crystal for a bit of sparkle.


 9) You can see some of the texture and the Susan K. Weckesser Stamp


Supplies Used:
Cardstock - Core'dinations
Patterned Paper - Susan K. Weckesser 
Flowers - Prima and Petaloo
Media - DecoArt, O'Leary paint, Liquitex,
Paint, Mist, Sprays, glitter - Ranger, Tattered Angels, Martha Stewart
Metals - Prima, Momenta,  and Other
Chipboard - Memory Maze
Stamps - Susan K. Weckesser
Mask - Prima
Trims and Lace - Other
Found Objects - Other

 Enjoy!!

Monday, September 23, 2013

Happy Birthday Cat **Flamingo Scraps**

There were tears, laughter, cake smashing, and good times for all at Catherine's first birthday Party.  We held her party a couple of weeks early so grandparents could come, unfortunately with daddy working away from home now, there was not good weekend for him to be able to be there, so we had a second party for her with just daddy, Cat, Morgan, and me.  

The journaling reads "Laughing, crying, messy frosting face.....all the joys of delving in face first getting frosting everywhere as you devour your smash cake for your first birthday. Grandma Elaine went all out decorating and preparing for your party.  Grandma Marty, Erin, Madison, and your brothers were all there.  Aug 2013".  Grandpa Ray and Mommy were there too :)   She defiantly had she series of emotions going on that day.


I used lots of bits and pieces of old collections you can find in the grab boxes at Flamingo Scraps right now.  Parts of Pink Paislee, Prima, Heidi Swapp, and more!!  So head on over to Flamingo Scraps and get some great items!!

Supplies Used
Cardstock - Bazzil
Patterned Paper - Pink Pasilee and Heidi Swapp
Journal Cards and Strips - Pink Pasilee
Flowers and Bling - Prima
Mist - Heidi Swapp
Ink - Prima
Pen - Recollections
Filter Paper - Pink Pasilee


Share This

Related Posts Plugin for WordPress, Blogger...