Showing posts with label ranger. Show all posts

Wednesday, December 17, 2014

Princess Card **Paper House**

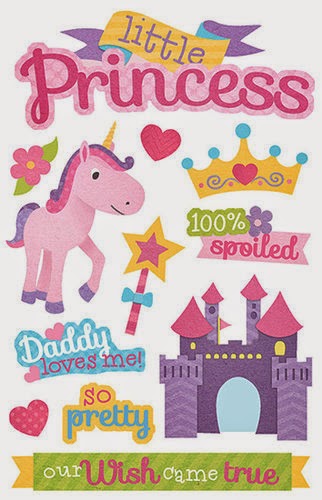
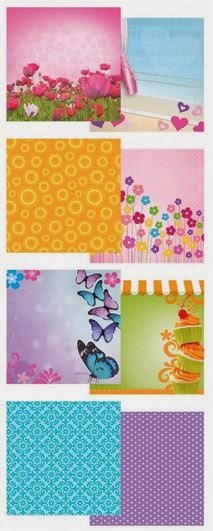
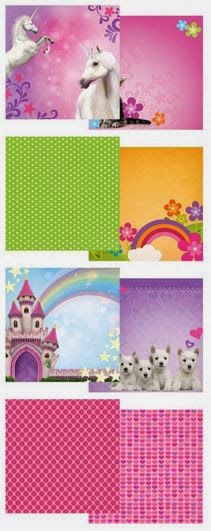
I made this card using the wonderful Little Girl Paper pad and Little Princess 3D Stickers from Paper House.  My 2 year old daughter just loved this paper pad calling it her “pretty book”.  She would sit down with it in my scrap room and “read” it telling me she sees castles, cupcakes, kitties, horse, and so on.  It was just too cute that I know I had to do something super cute with the paper pad.  The pages the book measure 6x6, so it is just perfect for cards!!  We have a little girl birthday coming up, and so we made a special card for the birthday girl.


 I used several sheets from the Little Girl Pad to create the front, inside, and back of the card - 6 sheets total.

http://www.paperhouseproductions.com/
 

I had made the card, front, back, and insides when my daughter came up to me and asked “where is pretty?” – translation where is the sparkle!?!?!  So with my daughter in mind and to make it “pretty” I added lots of sparkle!


Here are the directions for creating this card
1) I used white cardstock for the base – the front of the card measuring 6.5 x 5 inches.

2) Cut out 4 sections from the paper pad measuring 6.5 x 5 inches to cover all 4 sides of the card – I used all the non pictures papers for this from the pack (teal, pink, purple, etc).

http://www.paperhouseproductions.com/http://www.paperhouseproductions.com/

3) I then picked out 2 large graphic images (the castle and unicorn) for the front and back of the card measuring 6 x 4.5 inches.


4) Ink all the edges in pink.


5) Glue down to the card.
6) Add liquid glitter (stickles) to make is shine.


7) Add sparkly princess sticker to the front and Happy Birthday alpha stickers inside.


There is nothing like a little girl with a happy smile because she loves something pretty, and it so fun to see her face light up because you gave it to her.

Supplies Used
Cardstock - Recollections
Patterned paper - Paper House
Stickers - Paper House
Alpha Stickers - Momenta
Glitter  - Ranger
Adhesive - Scotch
Trimmer - Fiskars
 Enjoy!!

Saturday, August 23, 2014

Pure Joy **Robin's Nest**


On this past 4th of July we went to see some fireworks at a friend house.  This was the fist time that Catherine would be able to see them without being a tiny baby.  She loved watching them whiz up and go "bang", but most of all she loved playing with all the kids.  I got this picture just before the night fell upon us as she was sitting in Daddy's lap looking as happy as can be, some of the best moments you could ask for!!


Here I used some of the wonderful papers and Dew drops from The Robin's Nest. For more info about how I used the Robin's Nest products on this layout please see the Robin's Nest blog.

I used two different types of Core'dinations cardstock for this layout.  The first type I used was the 12x12 Jillian Dot Spotted Cardstock Paper Pack in dark brown.  I did two different techniques to this paper to show is versatility.  

http://www.coredinations.com/http://www.coredinations.com/

The first was to sand it down with the Core'dinations Sand It Gadget shown above to show the lighter brown on the dots.  I used this as my "frame" to the layout.  


I took the same dark brown Jillian dot paper and used Brushed Corduroy Ranger Ink along the top of the paper to make the dots darker.  The ink gives the cardstock just another added bit of texture and interest. I also distressed the edges of the paper and inked them the the same ink.


Below you can see both Jillian Dot Spotted Cardstock pieces sanded and inked for a added bit of difference to an already wonderful paper.


http://www.coredinations.com/

Here is the two pieces I used in my layout layered between the patterned paper, cardboard, and embellishments.  I used the same Sand It Gadget from above to make random sanded sections of the paper, the portions that would show in the layers below the picture.  I then used the same Brushed Corduroy Ranger Ink along the edges of the cardstock after I distress them with a distressing tool.

 
Below you can see a section of this sanded cardstock below.  The sanding of the cardstock just make it pop off the page!!


I love these cute little moments caught off guard of my family enjoying the day with friends watching beautiful fireworks fill the sky.  Life really can be filled with Pure Joy!!

Supplies Used
Ink- Ranger
Flowers/leaves - Prima
Metal - Prima & Momenta
Chipboard - Memory Maze & BoBunny
Photo insert - Kaisercraft
Burlap/lace - May Arts Ribbons
Cardboard - Other
phrase Stickers - Heidi Swapp
Mists - Clearsnap & Ranger
Doily - Recollections
Pen - Recollections
"Love" - Recollections
Enjoy!!
http://scraps-of-reflections.blogspot.com/

Tuesday, February 4, 2014

It's a Boy **Susan K. Weckesser**

 I have a baby shower that I am going to this weekend, and it is for a boy!!  I love to make handmade items for people on special occasions such as this, so here is my special card for such a special baby.
 

I just love the colors of teal, turquoise, tan, and white - it looks so clean and fresh, just what I think of new babies.  I had fun with all the layers and textures here, from die cuts to ribbon, flowers, chipboard, and Susan K. Weckesser Stamps.

http://www.susankweckesser.com/welcome

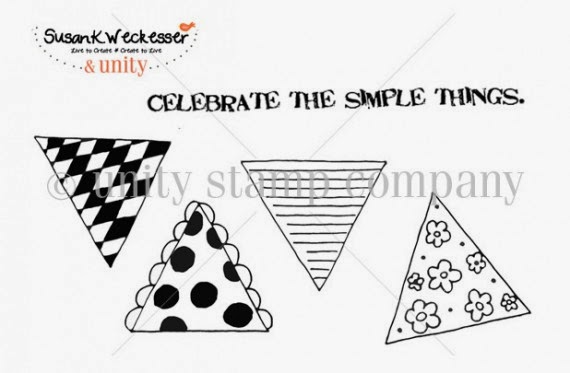
I used the horizontal line triangle stamp from the "Celebrate the simple things" stamp set by Susan K. Weckesser, stamped it in light brown ink on tan Core'dinations paper and then cut it out and place it in the background of the card.  I added a bit of twine from May Arts Ribbon across the top of the triangle banner and added little knots to the end.


I then took the "Create your Day" stamp from the below stamp collection by Susan K. Weckesser and stamped just the "your day" portion of the phrase around the card in random places, as it is the baby's day for he is about to be born (and also for his parents).

http://www.susankweckesser.com/welcome


Supplies Used
Cardstock - Core'dinations
Patterned Paper - Simple Stories
Punch - Martha Stewart
Die Cuts - Spellbinders
Inks/pearls/glitter - Ranger
Ribbon/Fibers - May Arts Ribbon
Chipboard - Memory Maze and Other
Stickers - Momenta
Flowers - Prima
Brad - Recollections
Stamps - Susan K. Weckesser

Enjoy!!

http://scraps-of-reflections.blogspot.com/

Friday, January 24, 2014

foxy **Flamingo Scraps & Off the Rails** with splatter stain tutorial

  I used some fun pictures of myself that I took for a new head shot for postings, these were my favorite.


Sadly this is our last F4 as the Flamingo Scraps store is closing, so with that in mind I had a bit of fun with my items.  We got vintage buttons in mint, purple, and black, a chipboard wheelbarrow, a little range bird, and a wooden heart.  I used the little bird on a nest of burlap fibers, ribbons, and flowers and anchored it in the paint splatters from Ranger Distress stain applicators and the title (tutorial below) - because I am such a fox, hehe.


In my cluster next to the picture I used many of the buttons from the pack (one of each), the wooden heart, and the chipboard wheelbarrow tucked in under the flower and ribbons.


Paint Splatter Tutorial with Distress Stains by Ranger

1) Supplies Paper and Distress stains by Ranger - I am sure this works for other dauber type products I have just not tried them yet.  I figure this out by happy accident on this layout.


2) When you press the dauber bottle stain comes up to the top of the bottle, if you stop pressing an just turn the dauber over and touch the paper you get a circle as seen below.


3) If you ink up the top of the dauber just as in step 2, but this time tap the paper with the dauber you get splatter as seen below.  The harder the tap the more splatter effect.


4) If you hold the dauber tip to the paper and press the container to release the ink you get a puddle of ink on your paper - this could be good for drip effects if you lift your paper up vertically to let the puddle drip down.


5) If you press the bottle and tap you paper at the same time you are releasing ink and causing the splatter effect for a even more intense splatter effect.  Below are various intensities and pressure applied to the bottle of splatters I achieved.  


These splatters are super easy and super fun - I would just suggest to practice on scratch paper before doing it to your projects until you get the hang of it.


Supplies Used:
Papers - BoBunny and American Crafts
Ribbon -Really Reasonable Ribbon
Flowers - Prima and Petaloo
Buttons - Prima
Chipboard - Fabscraps and Other
Stickers - Momenta
Paint/Ink/Glitter - Ranger
Punch - EK
Found Items - Flamingo Scraps


Enjoy!!
 
Challenges:
http://creativeembellishments.com/blog/?p=1281

Thursday, January 23, 2014

my sweet girl **Susan K. Weckesser**

 For Catherine's first birthday we had a few pictures taken by a friend, and they turned out wonderfully.  This is one of the beauties that came out of that shoot.
 

I love the look of mixed media, playing with your embellishments, creating texture, looking around the page at all the fun different items, but never taking away from the picture itself.  That is part of the art, not letting the page "eat" the picture, but letting the page enhance the picture. 

You can also view my tutorial on how to create the paint splatters as seen in the left corner of the picture in white paint.

Below is my methodology of how I build a page - a peak into my head so to speak.  Sorry for the lighting on some of the pictures, I did not always have the best light available as I was building my page.

How to Build a Mixed Media Page

 1) I start with the papers.  I look for papers that correspond to my picture, I want to complement it, not fight with it.  I used my daughter's hair bow (since the rest of the picture is brown, flesh, or white I used those colors (pink, teal, white, etc).  The papers from Susan K. Weckesser were a perfect match, they just begged to go with this picture.

http://www.susankweckesser.com/welcomehttp://www.susankweckesser.com/welcome
 The "color burst" paper was perfect for the background, and then I added in the "bouquet" and "beautiful days" as layers.

2) I this point I have a sketch in my head of the design of the layout, I know I wanted the picture in the middle right, with elements going above and to the left of the picture.  I start pulling items that I think will work on my page, not caring about color, just the shapes.  Not all the items will make the cut and be used, but this gives my an idea if I like where I am headed.  Nothing is glued down, it is just my rough idea at this point.


3) I apply gesso to all the embellishments that need a change of color (except for the top lace it was white so it took color no problem).  The spray them with spray mist.  I used Tattered Angels mist in a couple of different shades of light pink. I mist them each 2-3 times to give them a good coat.  I also let them dry before each coat so they absorb the mist better.  I do this off the page so I do not apply to much mist to the background papers.


4) Now I add texture to the page.  I used stencils by Prima with gesso, added in my papers (distressing each layer of paper with scissors and edging them with ink) and trims, and for fun I added in layers of Snowtex.  I gives this wonderful bumpy texture.  I even took a couple of Susan K. Weckesser stamps and stamped in gesso below the picture and in the top left corner below the lace and stencil area.  I used two small phrases found on the stamps sets below "Celebrate the simple things" and "Don't go through life, grow through life"

http://www.susankweckesser.com/welcomehttp://www.susankweckesser.com/welcome


5) Now I start to add my embellishments back on.  I do not have the picture glued down yet, as I might still spray and I don't want to damage my picture.


6) I start to glue down items as I like to way the looks in that location.  I sometimes take pictures and step away for the page to see how it looks a hour later (especially if I am waiting for something to dry).


7) If I feel there are dead or blank areas, I will either add in another embellishment (or two) or add in more texture.  I did this just above the picture, it felt it was missing something so I added another bit of stenciled gesso.  I also sometimes move things around or change the item completely.  I just let the page go with the flow.  I don't fight to make it work, because I find it never looks good if I do that.


 8) One of the last steps is to go over the gessoed embellishments one more time with paint or chalk ink, sometimes both.  This help them pop out of the page a bit.  I might even add a bit more gesso to the items so they don't look to pink. it adds contrast.  I also leave some items plain, or without gesso like bling and such.  On this page I also added on some glitter via Stickles from Ranger in Crystal for a bit of sparkle.


 9) You can see some of the texture and the Susan K. Weckesser Stamp


Supplies Used:
Cardstock - Core'dinations
Patterned Paper - Susan K. Weckesser 
Flowers - Prima and Petaloo
Media - DecoArt, O'Leary paint, Liquitex,
Paint, Mist, Sprays, glitter - Ranger, Tattered Angels, Martha Stewart
Metals - Prima, Momenta,  and Other
Chipboard - Memory Maze
Stamps - Susan K. Weckesser
Mask - Prima
Trims and Lace - Other
Found Objects - Other

 Enjoy!!

Share This

Related Posts Plugin for WordPress, Blogger...