Showing posts with label tutoiral. Show all posts

Saturday, March 5, 2016

Green "Dream" Card **Creative Embellishments & Eyelet Outlet & Canavs Corp & Tattered Angels & 7 Gypsies**

I just love playing with monotone colors on cards, and then having a stash of "blank" card ready to go when I need them.  Here is my next in the series of shabby chic cards, Green!  
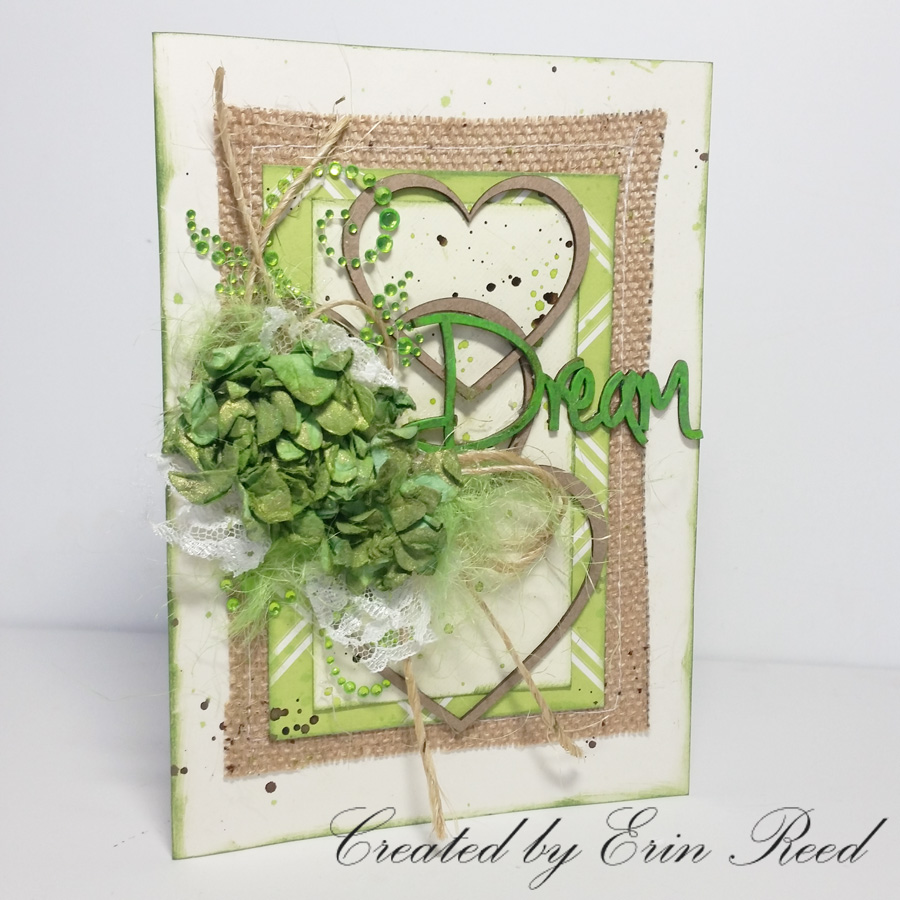

I made these beautiful flowers from flat paper flowers from Eyelet Outlet.  They are already beautiful, I just wanted something fuller for the card.  Below is my video tutorial on how I made these super easy and beautiful flowers.


Here are the Green Glowers and 1/16 Green round brads I used for the flowers and how amazing they look on the card!
http://www.eyeletoutlet.com/


I then added to the card some awesome Green stickyback bling from the Eyelet Outlet store.  It was just perfect for my super green card!! 

http://www.eyeletoutlet.com/


I just love the feel of march and the color green, and the color pallet from Creative Embellishments march Challenge fits perfectly!!


Come join in on the CE Monthly challenge.  You have until the last day of each month 11:55 pm eastern time to enter.  It is required that you mention in your blog post that you are playing along at Creative Embellishments together with a link back to our blog. Please make sure to reference our challenge. Please no back linking.  Combining with other challenges is permitted.  PLEASE USE AT LEAST 1 OF  CE products on your projects.  WINNERS will have 2 weeks to claim their prize. The winners are announced the day after the challenge ends and on the same month’s challenge post. 
https://creativeembellishments.com/chipboard

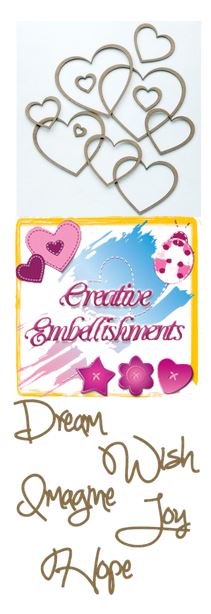
I used the Creative Embellishments Chipboard Nesting Hearts and Dream Words.  I picked out 3 hearts and layered them on top of each there, but left them raw.  I then use the "dream" word and painted it lime green to match the papers and flowers, and then misted it with Tattered Angels Key Lime Pie Glimmer Mist to make it sparkle!


I used the wonderful Canvas Corp Brands products for the base of the card.  From the papers, to the card base, rope, lace, paints, and mists.
http://shop.canvascorpbrands.com/

Now what color card should I make next?

Supplies Used
Flower Mist - Clearsnap
Ink - Clearsnap
Stamp - Clearsnap
Sticker Maker/Tape Runner - Xyron
Glue  - Beacon
Enjoy!

Sunday, June 28, 2015

Beat the Heat **ScrapPlezier & May Arts Ribbon**

There is nothing better than watching your child playing in the water, except when he always squirts you with water guns...this is my son Brandon.  It never fails he finds the closest water gun and poses for the camera (and then squirts me just after or even during) for the past 3 years, basically since he could hold and squirt a gun.  So here is to my boisterous, fun, loud, loving Brandon and his love for squirt guns!!
 

I really wanted to capture the fun feeling these pictures give me when looking at them, or more should I say the feeling of being squirted with water.  I used stencils and mists in various ways to give the feeling of squirting water in this layout.
 

https://www.mayarts.com/ribbons/


I played around with twines in the layout.  I loved the look of wrapped twine around paper, and adding in staples to the ends just adds to the masculine feeling of this layout.  I used the wonderful 2mm baker's twine in red from May Arts Ribbon to achieve this look.  I also create fun stapled swirls with the Twisted Burlap in Ivory from May Arts Ribbon with a tutorial below!!

Twisted Burlap Stapled Swirls
 
 1) Supplies - Twisted Burlap Ivory (May Arts Ribbon) abound 3 inches, Stapler


2)  Roll twine around in a spiral shape and hold with your fingers.


3) Staple spiral in at least 3 locations to hold it together like a flat coin.


4) Enjoy your fun new embellishment.  You can make these as big or as small as you want in a variety of different twines.


I tucked these fun little spirals under my pictures in 3 locations (since odd numbers of embellishments always look better) to ass a fun feeling to the layout.


Supplies Used
Cardstock - Bazzil & Core'dinations
Patterned paper - DCWV
Twine - May Arts Ribbon
Staples
Chipboard - Memory Maze
Paint & Mists - Tattered Angels
Pen - Tombow
Stencil - Imagination Designs
Gems  - Kaisercraft
Ink - Prima
Adhesive - Xyron
Enjoy!!

Thursday, February 19, 2015

Scraps of Inspiration Alterd Book **Canvas Home Brands** with Video Tutorial!!

I took one look at these fantastic papers from the Gypsy Moments line from 7 Gypsies and feel in love.  They are so romantic and inspirational I had to create a book around all the wonderful phrases and quotes on the papers.


This book is is chalk full of all the wonderful Gypsy Moments papers, cards, charms, and lots of other bits and bobs from Tattered Angels and Canvas Home Brands as seen below.


Below is a video tutorial I created showing the creation of this wonderful shabby chic altered Gypsy Moments book loaded with tips and techniques featuring all the Canvas Corp Brands.


Here are some close up shots of the altered book.


I hope this book has inspired you to make something pretty and fun, there is nothing like getting creative to soothe the soul!!

Supplies Used
Other Flowers - Prima
Crystals/Bling - Prima & Recollections
Buttons - Other
Alphas - Other
Ribbons - Other
Adhesive - Beacon & Scotch

 If you would like to purchase any of the above Canvas Corp products used in this project, please feel free to use the link below.  You are buying though the Canvas Corp Store using Paypal but from my blog - don't you love technology!!  Just select the products you wish to purchase and select next and it will automatically go to the checkout at Canvas Corp and ship from them.


Enjoy!!

Friday, March 7, 2014

simple things **Susan K. Weckesser**

I love to create texture and depth in my layouts.  I don't always want them bulky, but I want the illusion of richness and intrigue.  Here I will explain a few tips on how to add texture and depth using clustering and layering on your projects without added in tons of bulk, plus you might think about your supplies you already have in a different light and sue them in a different way.  

This is a layout of my family, it is a simple day fishing at a lake.  I love the picture because it shows my boys in the back ground fishing with my husband and daughter watching them, of course fishing as well.  I used a filter on the picture through Instagram called Walden, it gave the picture a softer feel, more like nature.  I have found that having a great picture to start with when making a layout, versus a picture you kind of like but "need to scrap" makes a world of difference.  The picture gives me the inspiration I need and the page just comes more naturally instead of fighting with the need to "just get this page done".

 
I wanted to have the same feel in my layout, so the first step was to pull items that worked with the color scheme of the picture, the browns, greens, the feel of nature.  I picked out items that had texture to them already like the mesh flowers, the chipboard, the wooden items, cork, and the fibers.  Using items that already have their own texture gives your projects more depth and richness without even having to try.


Here is a list of a few things to the edges of the papers in your projects to add texture and dimension without adding bulk to the layout.

  1. Distress the edges of the paper with a distressing tool like your scissors and ink the edges.  I do this technique to tons of projects.  It adds a softness to the look and takes away all the white lines from the papers you just cut.
  2. Take an edge punch and randomly punched the edges, not really caring that the punches were aligned or even that the paper looks like like the punch.  I did this the tan paper all around the edge of the layout and also to the darker brown paper placed vertically behind the cluster.  Just a pop of each paper is visible, so it adds just a hint but that little touch add so much.  
  3. Add in grainy texture by applying a quick drying glue (like ZipDry) around the edges of the papers and layers and sprinkle on flower soft.  I used a light brown color.
  4. Take some phrase stamps like those from Susan K. Weckesser saying "Create your Day" and "Don't go through life, grow through life" and stamp around the edges of the paper and at corners of strips in the foundation of the cluster.


http://www.susankweckesser.com/welcome


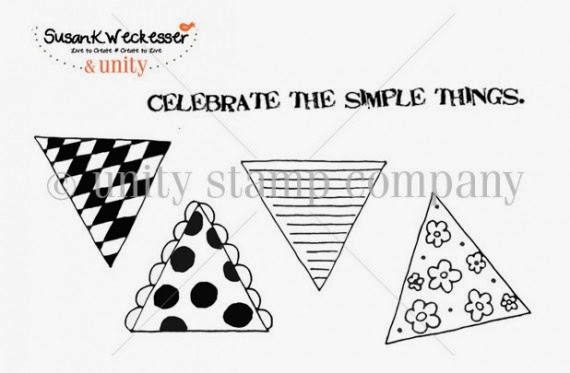
Here I used a wonderful stamp by Susan K. Weckesser that just captures the feelings the day "Celebrate the Simple Things"
http://www.susankweckesser.com/welcome


Here you can see some other texture applications I used in the cluster to add interest.
  1. Paint Splatters
  2. Stamps
  3. Layers of paper
  4. Inked edges of paper
  5. Distressed edges of paper
  6. Metal bits
  7. Crackle paint on chipboard
  8. Flower soft
  9. Rubons
  10. Items with texture already like the flowers and the jute.
  11. Mists
  12. Paint Splatters


Don't be afraid to try out an item in a new way or add things together to create something new.  Layers of papers mixed with other items add such a wonderful depth to your projects.  I have been told before and I fully believe there are no mistakes in scrapbooking just chances to expand your creativity!! 

Supplies Used
Cardstock - Core'dinations
Patterned Paper - Prima
Number Stickers - Glitz
Rubons - BoBunny
Jute - Canvas Corps
Flowers - Petaloo
Wood - Prima
Chipboard - Memory Maze
Metal - Prima
Cork - Fancy Pants
Stamps - Susan K. Weckesser
Ink - Ranger
Punches - EK
Stains and Mediums - Ranger

You can also view this article at Susan K. Weckesser.

Enjoy!!
http://scraps-of-reflections.blogspot.com/

Share This

Related Posts Plugin for WordPress, Blogger...