Sunday, December 14, 2014

Snow **The Robin's Nest & Imagination Crafts**

A friend of mine asked me to make a page for her about her daughter's first time in the snow.  She loved being int he snow, but hated wearing all the warm clothing.  Below is a picture of her family all bundled up in the snow outside watching the snowflakes come down.


I used the wonderful papers, dew drops, and rub-ons from The Robin's Nest to and mediums from Imagination Crafts to make it sparkle.


I first laid out most of the base of the page of papers from The Robin's Nest and then wanted to use the Imagination crafts Flourish stencil and Spatula with Snowtex to give it that snowy feeling.  I also added the Snowtex randomly around the page to give it a even snowier feeling.
http://www.shop.robinsnest-scrap.net/

IC Flourish Stencil
Spatula


Once it dried it had this wonderful texture in white that the Mica Powders from Imagination Crafts stuck to wonderfully.

To some sections I blended white, brown, green, and blue to make a teal color that matched the papers and brushed it over the flourishes on the bronze papers.  See the beautiful Snow rub-ons from The Robin's Nest, I used the word snow and some of the snowflakes.

IC Mica Powder
http://www.shop.robinsnest-scrap.net/


Here is some of the beautiful papers from The Robin's Nest that I then added silver Detail Sparkle Glitter in Silver from Imagination Crafts to the swirls to give them even more sparkle!!

http://www.shop.robinsnest-scrap.net/
IC Detail Sparkle


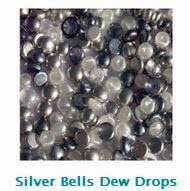
Here you can see some of the trim I used around the edge of the picture.  I had this wire covered glitter with a few acrylic drops on it in my stash forever, I then added in a ton of extra Dew Drops from The Robin's Nest in silver, light blue, clear, pearl, and white to enhance it.  I also added in some the wonderful chipboard snowflakes to the corners.
http://www.shop.robinsnest-scrap.net/
http://www.shop.robinsnest-scrap.net/http://www.shop.robinsnest-scrap.net/


Throughout the layout I created snowflakes from the diamond dew drops in Pearl and Aquamarine.  

Diamond Dew Drop Tutorial

1) Supplies - Dew Drops, 6 petal flower punch (tiny), cardstock, and clear drying glue

http://www.shop.robinsnest-scrap.net/http://www.shop.robinsnest-scrap.net/

2) Punch a flower in paper matching the color of the dew drops and count out 6 diamond dew drops per snowflake.

 3) Apply glue to the petals of the flower and glue down dew drops.


4) Enjoy to completely snowflakes and apply to your projects!!  The fun part about the clear colored dew drops is you can see the flower punch below so it creates a more 3D snowflake!


Supplies Used
Patterned Paper - The Robin's Nest
Cardstock - The Robin's Nest
Metallic paper - DCWV
Rub-ons - The Robin's Nest
Glitter Chipbaord - The Robin's Nest
Dew Drops - The Robin's Nest
Snow Tex - Decoart
Mediums/Glitter/Mica - Imgaination Crafts
Stencil - Imagination Crafts
Spatula - Imagination Crafts
Glittered Wire - Recolletions
Adhesive - Beacon & Tombow
Punch - EK
Circle Cutter - Kreaxions
Trimmer - Fiskars
 Enjoy!

Saturday, December 6, 2014

Winter Wonderland **Paper House & Plaid**

I love to make Christmas ornaments around late Nov and Dec for my tree or to giveaway to friends and family.  Here is one pretty snowy filled ornament for this year!


I had this wooden snowflake for about 3 years, waiting in my stash to use it.  I got it in clearance at Michales  for about 10 cents, and after seeing these beautiful Winter Wonderland 3D stickers from Paper House I finally found it use!!
https://www.paperhouseproductions.com/


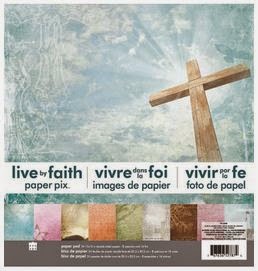
For the backside I took the wonderful Live by Faith paper pad from Paper House and used the green paper as seen below.  I used one corner of it and used a die cut from Spellbinders with my Cuttlebug to make the shape. which I thought complemented the look of the snowflake.  I then inked it in brown ink.

https://www.paperhouseproductions.com/
 
I used the Wicker White FolkArt Paint from Plaid with the foam brush to give the wood a base coat on both sides of the snowflake.  I only had to give it one coat and I could not see any any hint of the wood under it!!

http://www.plaidonline.com/

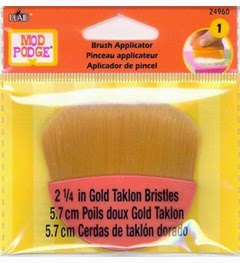
After the paint had dried I applied the first coat of Extreme Glitter Mod Podge by Plaid with their brush applicator (it clean up so easily and to application was awesome).


http://www.plaidonline.com/http://www.plaidonline.com/

I then applied the die cut green paper and number stickers to the back and applied even more Extreme glitter medium to stick the paper to the wood and give the paper a wonderful glitter shine like snow!!


To the front I added in the wonderful Winter Wonderland Sticker from Paper House and around it on the wood I added in dots of the Extreme Glitter to make it even more extreme!!


And now that we have you dying to get your hands on them.... just enter below to win yourself a set! Plaid was awesome enough to send us some extra goodies to share with our fans! So just fill out the widge below and you could win!

Home made ornaments do not have to be super complicated to be pretty - just from the heart!!

Supplies Used
Paper - Paper House
Sticker - Paper House
Medium/Paint - Plaid
Brushes - Plaid
Number stickers - Momenta
Ink - Prima
Wood - Recollections
String/Twine - May Arts
Die Cut - Spellbinders
Tools - Provo & Fiskars
Enjoy!!

Thursday, December 4, 2014

Christmas Tags Part 3 **Paper House & Plaid & ScrapPlezier**

Here is the last installment of my Christmas tags that I made for my mother, got to love that vintage rustic feel of these lovelies!!


I used the wonderful "Winter Wonderland" stickers from Paper House to create these three tags.  They just fit so wonderfully with the themes of the tags!  I also paired these products with the Plaid paints and mediums, they just make everything sparkle!!


Here you can see some of the wonderful dimension of the stickers and the shine of the Mod Podge Extreme Glitter medium on the chipboard over the Look At Me Blue FolkArt paint by Plaid applied by the foam brush from Plaid.
 

I used the same Mod Podge Extreme Glitter medium on the chipboard but this time over Wicker White FolkArt paint by Plaid.  The sparkle just enhanced the skate sticker from Paper House.


This last tag I paired the epoxy Sleigh Rides sticker from Paper House with a mix of Bark Brown and Cardinal Red FolkArt paint from Plaid on the chipboard swirl.
 
I also used the wonderful washi tape, pearls, papers, and gems from ScrapPlezier to complete these very special tags.  Don't forget to check out ScrapPlezier for their latest challenge!!


http://scrapplezier.blogspot.com/


Supplies
Cardstock - Bazzil - ScrapPlezier
Pattern paper - Kaisercraft - ScrapPlezier
Pearls/Gems - Kasiercraft - ScrapPlezier
Alpha Stickers - Kaisercraft - ScrapPlezier 
Washi tape - ScrapPlezier
Stickers - Paper House
Paint - Plaid
Medium - Plaid
Brushes - Plaid 

Ink - Prima
Ribbon - May Arts
Chipboard - Memory Maze
Adhesive -  Tombow
Trimmer - Fiskars
Enjoy!


Monday, December 1, 2014

Frosty **The Robin's Nest & ULD & Imagination Crafts**

This is a picture of my friend's daughter at her first winter in the snow skiing.  She loved skiing and being the in the snow, but hated getting all bundled up and the first thing she did when she got back to the house was to take snow gear off.


I created this page using the wonderful Robin's Nest Papers and Dew Drops, ULD snowflakes, and Imagination Crafts mediums.


http://www.uniquelaserdesigns.com/#!christmas/cbte

I started out painting all the chipboard snowflakes from ULD in white acrylic paint, the ones that were clear or already a white plastic I left alone.  I then let the paint dry.


I then took some of the painted snowflakes and added in some Mica Powder from Imagination Crafts in white or a blend of white, brown, and blue to create a blue to match the papers.  I used a dry paint brush to apply the Mica Powder to the snowflakes that were pressed into Ranger perfect medium to the powder would stick to the snowflake.  This gave them a nice shimmer and shine.

http://imaginationcrafts.co.uk/shop/index.php?main_page=index

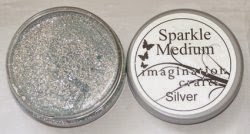
For some of the other snowflakes including the white plastic ones I used the Sparkle Medium in Winter Snow, Canadian Blue, and Silver from Imagination Crafts.  I just used my finger to dab a bit of the glitter medium to the snowflakes in the various color to make then all pretty and sparkly!

http://imaginationcrafts.co.uk/shop/index.php?main_page=index

 
I used the wonderful papers from The Robin's Nest to make this wonderful snowy layout.  The Winter Collection is just perfect for these snowy layouts.  I layered all the below papers as they go together so wonderfully!
http://www.shop.robinsnest-scrap.net/Winter-Collection_c37.htmhttp://www.shop.robinsnest-scrap.net/Winter-Collection_c37.htm

http://www.shop.robinsnest-scrap.net/Winter-Collection_c37.htmhttp://www.shop.robinsnest-scrap.net/Winter-Collection_c37.htm


The winter words are just a wonderful for any title and the Winter Snowflake Chipboard is just the perfect touch to this snow filled project.  I just used the silver snowflakes, but the pack comes with different colors.

http://www.shop.robinsnest-scrap.net/Winter-Collection_c37.htmhttp://www.shop.robinsnest-scrap.net/Winter-Collection_c37.htm
 

I added in the Pearl colored Dew Drops on top of some of the snowflakes to add in a fun dimension, it almost made it look like dew resting on the snowflakes.  So pretty!

http://www.shop.robinsnest-scrap.net/Winter-Collection_c37.htm

Time to get out those snow pictures, dusty them off, and make some beautiful snowy pages!!
 
Supplies Used
Cardstock - The Robin's Nest
Pattern Paper - The Robin's Nest
Vellum - The Robin's Nest
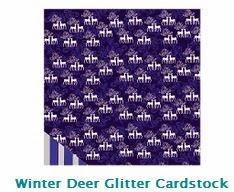
Glitter Cardstock - The Robin's Nest
Dew Drops  - The Robin's Nest
Flowers - Recollections
Glitter & Mica Medium - Imagination Crafts
Chipboard & MDF - ULD
Paint - Plaid
Adhesive - Tombow
Medium - Ranger
Beads - Recollections
Pen - Sharpie
Trimmer - Fiskars
Enjoy!
http://scraps-of-reflections.blogspot.com/

Share This

Related Posts Plugin for WordPress, Blogger...