Showing posts with label core'dinations. Show all posts

Sunday, November 9, 2014

Time Card **Birds of a Feather**

I always like to have cards on hand for a just any occasion.  I picture this being used for a thinking of you, thank you, best wishes, masculine birthday, sympathy, etc.
 

Doily - Recollections
Punch - EK
Adhesive - Tombow
Cutter - Fiskars
 Enjoy!

Friday, October 3, 2014

Best Ever **Birds of a Feather & Susan K. Weckesser with Core'dinations & TCW**

This is a picture of my son Morgan during his spring photo shoot at school in 2nd Grade.  He had a lot go on during this school year.  He moved schools, houses, cities, moving away from all his friends and other family, and for Morgan change is hard.  He handled it, not the best way, but things got better as time went on.  He is defiantly stronger now, but we have a long way to go.  I always want the best for him, he is such a sweet kid, his his smile melts my heart.


I used the wonderful items from the September Birds of a Feather Kit to create this layout along with Susan K. Weckesser stamps and stencil.  I went for a masculine feel with a dark edge to it.  The pops of gold represent the light at the end of the tunnel, where there is dark there come light!!  I used a ton of the elements from the kit in unusual ways.  I used the twine on my strips as accent pieces along with the cork geo tags, and added a few other fun embellishments from my stash too.  I did add some journaling here and there on the strips too, but mostly they are part of the design.

September 2014 Kit-september kit teresa collins prima winthrop geo tagspaste gold words stickers pebble special
September Birds of a Feather Kit
 

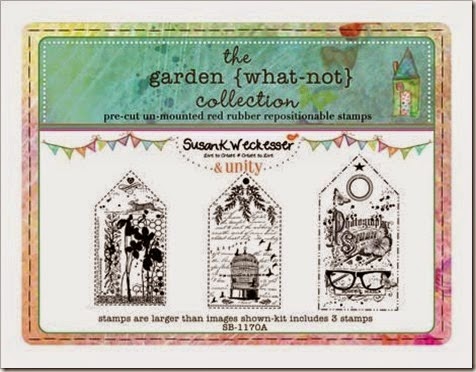
Here you can see a hint of Susan K. Weckesser's "Beautiful Daydreams" cardstock and the Tags stamps I used from Susan K. Weckesser.  I used her brand new tag stamps "the Garden {what-not} collection" in gold and black ink on cardstock.  I cut out the shapes and layered them under the papers under the pictures.  Here you can also see one of the wonderful TCW stencils and some of the Core'dinations cardstock - companies we are partnering with!!
 
http://www.susankweckesser.com/welcome

http://www.susankweckesser.com/welcome
http://www.thecraftersworkshop.com/The_Crafters_Workshop/Home.htmlhttp://www.coredinations.com/


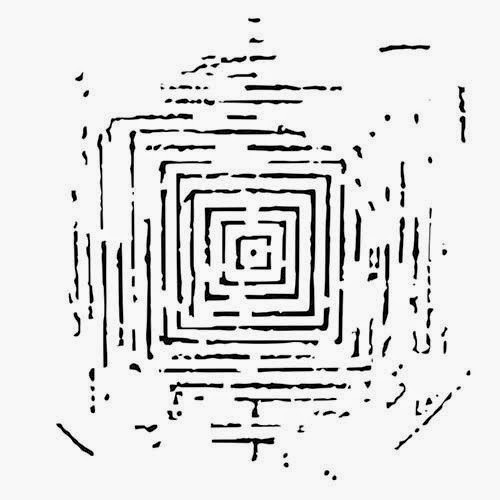
Above you can see some of the beautiful Gold Glitter Paste from Bo Bunny we got in our Sept kit used on a stencil from Susan K. Weckesser to create the dashed lines around the layout.  The gold glitter paste really pops here with all the dark elements I used.

http://www.susankweckesser.com/welcome
Life may throw you curve balls, it may be hard, and it may seem that it is hard to get out of a funk, but I always try and remember there is light at the end; and it shines like gold glitter!!

Supplies used
Cardstock - Bazzill - Sept Birds of a Feather Kit
Patterned Paper - Teresa Collins - Sept Birds of a Feather Kit
Wood - Teressa Collins - Sept Birds of a Feather Kit
Glitter Paste - Bo Bunny - Sept Birds of a Feather Kit
Stickers - Heidi Swapp - Sept Birds of a Feather Kit
Cork - Studio Calico - Sept Birds of a Feather Kit
Twine - Maya Road - Sept Birds of a Feather Kit
Alpha Stickers - American Crafts - Sept Birds of a Feather Kit
Glitter Paper - Pebbles - Sept Birds of a Feather Kit
Papers - Susan K. Weckesser
Stamps - Susan K. Weckesser
Stencil - Susan K. Weckesser
12x12 Stencil - TCW
Cardstock - Core'dinations
Washi Tape - Prima
Texture paste - Prima
Ink - Prima
Metal - Prima
Pen - Recollections
Mists - Heidi Swapp & Tattered Angels
Adhesive - Scotch & Beacon

Enjoy!!
http://scraps-of-reflections.blogspot.com/

Friday, September 5, 2014

Be your Own **Birds of a Feather & Susan K. Weckesser**

My Brandon is a feisty, hardheaded, loving, energetic, wonderful child.  He has these looks that make you wonder what he is thinking, what is he ready to tackle, what is he scheming?  It never fails he makes some of the best pictures, you just get lost in the possibility of what he is thinking.  He is really is my sweet Brandon!!


He is yet another layout made from the wonderful August Kit from Birds of a Feather.  It is just jam packed with so many goodies, papers, and embellishments I still have some left!!  I did lots of layers here, layering in all the different patterned papers from the kit, chalkboard cards, and a few fun embellishments.

August 2014 Kit-August Kaisercraft sparkle bling glitter rhinestones Marion Smith Hazel sequins dots mesh chalk pencil
Birds of a Feather Aug Kit
Aug-14 Extra Patterned Paper-kaisercraft Kaleidoscope paper august extra
Birds of a Feather Aug kit Extra PP
Aug-14 Extra Embellishments 1-crystal bling august prima chalkboard mesh glitter ribbon
Birds of a Feather Aug Kit Extra Emb 1


Here I took strips of papers from the end of the 12x12 sheets it the kit (the end with the bar code on them) and layered them on the left side of the layout in various lengths and added in bits of the sparkly trim, burlap from July's Kit, some stamps from Susan K. Weckesser saying "Celebrate the Simple Things" and "Don't go through life, Grow though life", sequins, grey enamel dots and the little camera sticker from the May Kit.

http://www.susankweckesser.com/susan_k_weckesser_incproducts

http://www.susankweckesser.com/susan_k_weckesser_incproducts
 

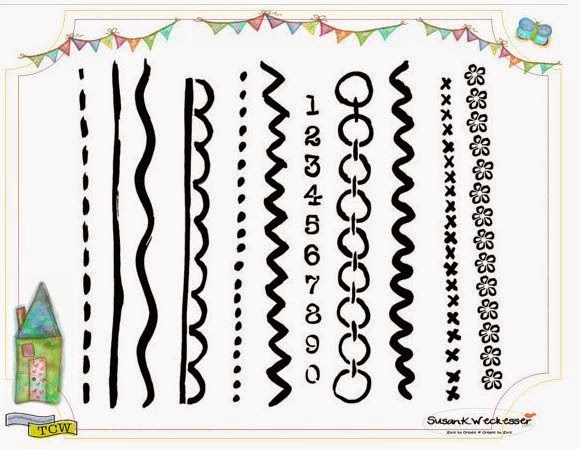
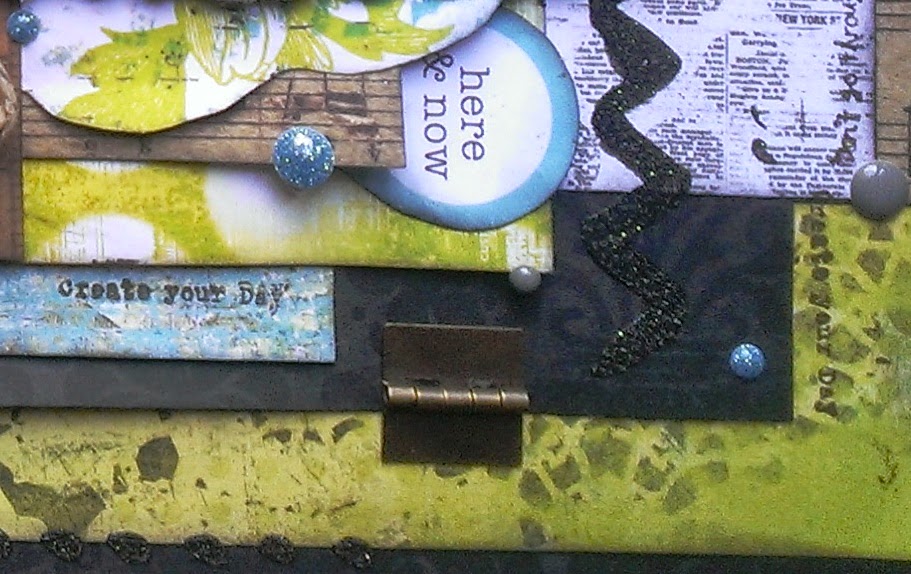
You can see more of the Susan K. Weckesser stamps saying "Create your day" and "Don't go through life, Grow though life" from the stamp set above along with her stencil.  I used some new Graphite paste from Prima with Susan K. Weckesser zigzag stencil going vertically and also the dots along the bottom edge of the layout.  You can also see a little cutout from the May kit, the colors matched perfectly!!

http://www.susankweckesser.com/susan_k_weckesser_incproducts


Here you can also see some more Susan K. Weckesser Stamps and stencils in the zigzag and now in the line of "x" in the same graphite paste.  Here you can also see another little cutout from the May kit along with some more torn paper just below the picture.  To learn how to tear paper, please see my tutorial on the Art of Tearing Paper.

Supplies Used
Cardstock - Core'dinations - Birds of a Feather Aug Kit
Patterned Paper -  Kaisercraft & Marion Smith- Birds of a Feather Aug Kit
Chalkboard Tags - My Mine's Eye -  Birds of a Feather Aug Kit
Glitter Dots - KI Memories -  Birds of a Feather Aug Kit
Sequins - Hazel & Ruby -  Birds of a Feather Aug Kit
Grey Alpha Stickers - American Crafts -  Birds of a Feather Aug Kit
Trim - Mon Ami Gabby -  Birds of a Feather Aug Kit
Burlap Trim - May Arts -  Birds of a Feather July Kit
Enamel Dots - Simple Stories -  Birds of a Feather May Kit
Instaframes - Simple Stories -  Birds of a Feather May Kit
Camera Sticker - KI Memories -  Birds of a Feather May Kit
Metal - Prima & Tim Holtz
Twine - May Arts Ribbon
White Alpha Stickers - Momenta
Ink - Prima & Tsukineko
Paste - Prima
Stencil - Susan K. Weckesser
Stamps - Susan K. Weckesser
Adhesive - Scotch & Beacon
 Enjoy!!

Thursday, August 28, 2014

Follow your Dreams **Birds of a Feather & Off the Rails**

My boys are so full of life, energy and are so much fun!!  They are almost to the day 4 years apart, and her they are at ages 8 and 4.  They love to play together and be rough and tumble boys through and through.

 
I used the beautiful Birds of a Feather August kit for this layout.  I love this paper, it has such grunge and  texture without having to do a thing to it, it already looks like I applied a ton of mixed media to the page.  I then layered a ton of items behind the pictures, more papers, cards, fibers, jewels, stickers, cardboard, and more.  I even took ones of the cards from the extra papers and cut up the sentiment and layered it along the cardboard section of the paper as my title.  This paper just screams BOY GRUNGE!!

August 2014 Kit-August Kaisercraft sparkle bling glitter rhinestones Marion Smith Hazel sequins dots mesh chalk pencil
Birds of a Feather Aug Kit
Aug-14 Extra Patterned Paper-kaisercraft Kaleidoscope paper august extra
Birds of a Feather Aug kit Extra PP
Aug-14 Extra Embellishments 1-crystal bling august prima chalkboard mesh glitter ribbon
Birds of a Feather Aug Kit Extra Emb 1
I added in a ton of grungy items to this page like torn papers (learn the Art of Paper Tearing here), wires pulled from the trim rolled up and glued, cork date sticker (from the April Kit), photo frames (from the March Kit), metals, rub-ons, burlap fibers (from the July Kit), and more.


Here you can see some of the wonderful jewels, bling stickers, blue trim, and chalkboard cards all layered up behind my picture.  I added in my own alpha stickers and roman numeral metals for the boys named and ages. 

The colors of the kit go perfectly with the September Off the Rails Challenge Mood Board.  Come play along with the challenge today!!
http://offtherailsscrapbooking.blogspot.com.au/2014/09/colours-of-gold-and-blue.html


Supplies Used
Cardstock - Core'dinations - Birds of a Feather Aug Kit
Patterned Paper -  Kaisercraft - Birds of a Feather Aug Kit
Chalkboard Tags - My Mine's Eye -  Birds of a Feather Aug Kit
Glitter Dots - KI Memories -  Birds of a Feather Aug Kit
Jewels - Mon Ami Gabby -  Birds of a Feather Aug Kit
Blue Trim - Mon Ami Gabby -  Birds of a Feather Aug Kit
Burlap Trim - May Arts -  Birds of a Feather July Kit
Cork Stickers - Freckled Fawn -  Birds of a Feather April Kit
Photo Frames - Basic Grey -  Birds of a Feather March Kit
Metal - Prima
Alpha Stickers - Glitz
Rub-On - Scenic Route
Acrylic - Other
Sticker - Authentique
Ink - Prima
Adhesive - Scotch
Enjoy!!

Tuesday, August 26, 2014

Art of Tearing Paper - A Tutorial **Birds of a Feather**


Did you ever know there were different ways to tear paper, depending on which hand you tear with (or side of the paper) gave you a different look?  Now you can learn!!  We were given all these beautiful Core'dinations papers that are just begging to be torn due tho the different cores they have, plus the torn papers just go with the style of the August Kit from Birds of a Feather.
 

Above you can see the the difference in the look of the paper after tearing, I do not use any special tools or anything, just the side I tore the paper on.  On the left you see torn edges but you do not see the core.  On the right side you see the core.  Both look great, it really all depends on what kind of look you want.

Method 1 - Core visible after tearing


The portion I tear is the part I throw away, so what I left is the part of the paper I want to use.  So I am throwing the paper on the right and keeping the one on the left.  Another way of thinking about it is to make sure the side of the paper I want to use is facing me and tear along the right side only. 


If I want to tear along all the edges of the paper, I keep turning the paper so I tear only on the right side throwing away the right side of the paper keeping the left.

 
Method 2 - Core NOT visible after tearing


This time you tear on the left side, so you are tearing the paper towards you same as above but this time the paper you are tearing down is the one you want to keep, not the one you are throwing away.  So keep the right throw away the left.  Another way of thinking about it is to make sure the side of the paper I want to use is facing me and tear along the right side only.


If I want to tear along all the edges of the paper, I keep turning the paper so I tear only on the left side throwing away the left side of the paper keeping the right.


Here you can see the difference between tearing on the right or the left side of the paper.  It is the same tear, just one way the core is on the top so you can see it and the other the core is on the bottom so it hides.


Here is a peak of one of my layouts using the tearing method 1 - having the core visible.  This gave me the ability to ink the edges giving even more texture to the page.

August 2014 Kit-August Kaisercraft sparkle bling glitter rhinestones Marion Smith Hazel sequins dots mesh chalk pencil
August Birds of Feather Kit


Enjoy!!
http://scraps-of-reflections.blogspot.com/

Monday, August 25, 2014

Happy Birthday **Just Imagine**

Here is pretty card I made for my mother.  Her birthday is this month and I wanted to create something special just for her.  A special card for a very special lady!!


I primarily used the 4.5in Pastel Cardstock in various colors, almost everyone one!! 

http://www.coredinations.com/

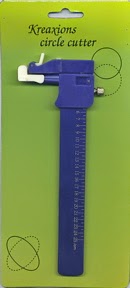
I used my wonderful Kreaxions Circle Cutter from Just Imagine to create all the circles.  I just opened up the dimensions little bit, by about 1-2 mm, to create the larger dimension of a circle so they nested nicely into each other into groups of 3 and then ran them through my Cuttlebug with embossing folders or with circle enhancing elements to create dimension and texture to the cardstock.   

http://www.justimaginecrafts.com/catalog/product_info.php?products_id=285

I even ran the purple background paper through the embossing machine 2 different times with two different
embossing folders to add even more dimension and texture.


After all the papers were embossed with various designs I then used the Sand It Gadget to sand the tops of the papers to allow the beautiful undertones of the paper to show through and then inked the edges in a light brown chalk ink.


http://www.coredinations.com/

The background paper of the card is in the beautiful Aquarium cardstock.  I needed something a bit bigger as a background to the card so I used a 12x12 sheet cut to size and the colors matched perfectly!!  I then used the same Sand It Gadget and sanded down the cardstock to let the colors come through.

http://www.coredinations.com/


Supplies Used
Embossing - ProvoCraft & Spellbinders
Flower - Prima
Ink - Clearsnap
Twine - American Crafts
Stickers - Kaisercraft


Share This

Related Posts Plugin for WordPress, Blogger...