Saturday, August 23, 2014

Pure Joy **Robin's Nest**


On this past 4th of July we went to see some fireworks at a friend house.  This was the fist time that Catherine would be able to see them without being a tiny baby.  She loved watching them whiz up and go "bang", but most of all she loved playing with all the kids.  I got this picture just before the night fell upon us as she was sitting in Daddy's lap looking as happy as can be, some of the best moments you could ask for!!


Here I used some of the wonderful papers and Dew drops from The Robin's Nest. For more info about how I used the Robin's Nest products on this layout please see the Robin's Nest blog.

I used two different types of Core'dinations cardstock for this layout.  The first type I used was the 12x12 Jillian Dot Spotted Cardstock Paper Pack in dark brown.  I did two different techniques to this paper to show is versatility.  

http://www.coredinations.com/http://www.coredinations.com/

The first was to sand it down with the Core'dinations Sand It Gadget shown above to show the lighter brown on the dots.  I used this as my "frame" to the layout.  


I took the same dark brown Jillian dot paper and used Brushed Corduroy Ranger Ink along the top of the paper to make the dots darker.  The ink gives the cardstock just another added bit of texture and interest. I also distressed the edges of the paper and inked them the the same ink.


Below you can see both Jillian Dot Spotted Cardstock pieces sanded and inked for a added bit of difference to an already wonderful paper.


http://www.coredinations.com/

Here is the two pieces I used in my layout layered between the patterned paper, cardboard, and embellishments.  I used the same Sand It Gadget from above to make random sanded sections of the paper, the portions that would show in the layers below the picture.  I then used the same Brushed Corduroy Ranger Ink along the edges of the cardstock after I distress them with a distressing tool.

 
Below you can see a section of this sanded cardstock below.  The sanding of the cardstock just make it pop off the page!!


I love these cute little moments caught off guard of my family enjoying the day with friends watching beautiful fireworks fill the sky.  Life really can be filled with Pure Joy!!

Supplies Used
Ink- Ranger
Flowers/leaves - Prima
Metal - Prima & Momenta
Chipboard - Memory Maze & BoBunny
Photo insert - Kaisercraft
Burlap/lace - May Arts Ribbons
Cardboard - Other
phrase Stickers - Heidi Swapp
Mists - Clearsnap & Ranger
Doily - Recollections
Pen - Recollections
"Love" - Recollections
Enjoy!!
http://scraps-of-reflections.blogspot.com/

Wednesday, August 20, 2014

Core’dinations Design Team Call

Pure Joy

On this past 4th of July we went to see some fireworks at a friend house.  This was the fist time that Catherine would be able to see them without being a tiny baby.  She loved watching the whizzed up and go "bang", but most of all she loved playing with all the kids.  I got this picture just before the night fell upon us as she was sitting in Daddy's lap looking as happy as can be, some of the best moments you could ask for!!


I used two different types of Core'dinations cardstock for this layout.  The first type I used was the 12x12 Jillian Dot Spotted Cardstock Paper Pack in dark brown.  I did two different techniques to this paper to show is versatility.  

http://www.coredinations.com/http://www.coredinations.com/

The first was to sand it down with the Core'dinations Sand It Gadget shown above to show the lighter brown on the dots.  I used this as my "frame" to the layout.  


I took the same dark brown Jillian dot paper and used Brushed Corduroy Ranger Ink along the top of the paper to make the dots darker.  The ink gives the cardstock just another added bit of texture and interest. I also distressed the edges of the paper and inked them the the same ink.


Below you can see both Jillian Dot Spotted Cardstock pieces sanded and inked for a added bit of difference to an already wonderful paper.


http://www.coredinations.com/

Here is the two pieces I used in my layout layered between the patterned paper, cardboard, and embellishments.  I used the same Sand It Gadget from above to make random sanded sections of the paper, the portions that would show in the layers below the picture.  I then used the same Brushed Corduroy Ranger Ink along the edges of the cardstock after I distress them with a distressing tool.

 
Below you can see a section of this sanded cardstock below.  The sanding of the cardstock just make it pop off the page!!


Supplies Used
Patterned Paper - Robin's Nest
Ink- Ranger
Flowers/leaves - Prima
Metal - Prima & Momenta
Chipboard - Memory Maze & BoBunny
Dew Drops - Robin's Nest
Photo insert - Kaisercraft
Burlap/lace - May Arts Ribbons
Cardboard - Other
Alpha Stickers - Robin's Nest
phrase Stickers - Heidi Swapp
Mists - Clearsnap & Ranger
Doily - Recollections
Pen - Recollections
"Love" - Recollections
******************************************************************************

Happy Birthday

Here is pretty card I made for my mother.  Her birthday is this month and I wanted to create something special just for her.  A special card for a very special lady!!


I primarily used the 4.5in Pastel Cardstock in various colors, almost everyone one!!  I cut the colors into circles of various sizes to be layered into groups of 3 and then ran them through my Cuttlebug with embossing folders or with Spellbinders Circle Enhancing Elements to create dimension and texture to the cardstock.   

http://www.coredinations.com/

I even ran the purple background paper through the embossing machine 2 different times with two different
embossing folders to add even more dimension and texture.


After all the papers were embossed with various designs I then used the Sand It Gadget to sand the tops of the papers to allow the beautiful undertones of the paper to show through and then inked the edges in a light brown chalk ink.


http://www.coredinations.com/

The background paper of the card is in the beautiful Aquarium cardstock.  I needed something a bit bigger as a background to the card so I used a 12x12 sheet cut to size and the colors matched perfectly!!  I then used the same Sand It Gadget and sanded down the cardstock to let the colors come through.

http://www.coredinations.com/


Supplies Used
Embossing - ProvoCraft & Spellbinders
Circle Cutter - Just Imagine
Flower - Prima
Ink - Clearsnap
Twine - American Crafts
Stickers - Kaisercraft

 ****************************************************************************

Paper Cone Tree

I wanted to create something that would stand out, something that could be a center piece, rest on a mantle, or a hall table, and not just another ornament.   So I searched around and found this cute idea of rolling paper into cones and making a tree out of them.
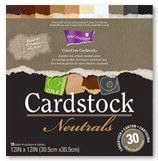
I used a paper towel roll as the center of the tree, it is about 11 inches long, but you could create taller ones with wrapping paper tubes, cutting them down to any length you want.  I then took the Black Magic and Brights cardstock from Core’dinaions in 6x6 Paper Packs along with their Sand It Gadget and Dust Buddy to collect the fine dust created from sanding down the Cardstock to create the cones for the “leaves” of the tree.  
http://www.coredinations.com/http://www.coredinations.com/

I used both adhesive and tape to hold the cones together.  First you use a square size paper (the bottom row is a 6x6 size, then 2 layers of 5x5, then one layer each of 4x4, 3x3, then lastly 2x2), then roll them into each other to create the cone seen above.  You then tape each cone to the paper towel roll (start about 2 inches up from the bottom of the roll).  Start taping all the way around the tube (took me about 8-11 cones per row – smaller cones take more), to create layers for your tree.
After the entire tree was covered with cones I sprayed some Tattered Angels Chalkboard mist in Ferrari Red to cover up the insides of the cones that were not red or green and to give it more of a shabby chic look.  I used a Susan K. Weckesser Stamp to create the little balls hanging from the tree.  I stamped on green paper, punched out the circles with ornament shaped punch, inked the edges with black ink, and attached them to the edged of the tree with little jingle bell brads.
 For the tree topper I created a pom-pom by winding the fibers in red and green (from Canvas Corps and May Arts Ribbons) around a U shaped tool (seen below) many times around, about 100. 

You then tie it around the center in a knot to hold it together, and then cut the loops at the end to create a pom-pom.  I tied a bow on the front for a bit more fun!!
 I hope you enjoyed my little tree - now to decided who is getting it :)
Supplies Used
Cardstock - Core'dinations
Patterned paper -  Fancy Pants and Canvas Corps
Sanding Tool and Dust Collector - Core'dinations
Ribbons - May Arts and Canvas Corps
Mist - Tattered Angels
Stamp - Susan K. Weckesser
Ink - Ranger
Brads - Recollections 
Enjoy!!

Lady in the Summer **Susan K. Weckeser**

Tags are a fun way to try something new, step out of your comfort zone, and just play.  Why not play a little with the last bit of summer left!!  Can you not just imagine being the lady walking through these bright gardens on a beautiful summer day?!?


Susan K. Weckesser's papers just scream summer, bright and cheery and perfect for putting a smile on your face.  I played with the layers of her "Beautiful Daydreams" paper, placing a full 12x12 paper into the size of an A4 tag.  I took bits from each element (sun, could, kite, and flowers) and layered and used foam dots to create dimension of a lady walking through a garden on a summer day.  I then back it with Susan K. Weckesser's "Live in color" green side paper and used lots of ink and Ranger Stickles to make things pop!!

http://www.susankweckesser.com/susan_k_weckesser_incproducts

I did a ton of fussy cutting, some layering on top, and some behind the main section of the tag and the lady.


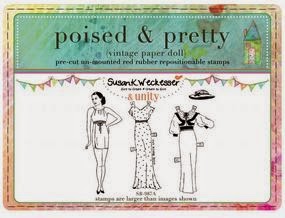
I used the stunning lady stamp called "Poised and Pretty" from Susan K. Weckesser.  I used the cute little hat and jumper outfit and stamped it with Clearsnap Mixed Media Inks in yellow then used Tattered Angels mist in pink.  The ink resisted the mist so it created a wonderful contrast.  I stamped everything in Core'dinations cardstock in beige.  Lastly I took Pitt Pastel pencil from Faber-Castell in orange, yellow, red, and mustard and drew in contrasting colors on the hat and dress.

http://www.susankweckesser.com/susan_k_weckesser_incproducts
 

Don't forget to stop every now and then and smell the flowers, take a day to just enjoy the garden, and the warm sunshine before it is gone!!

Supplies Used
Cardstock - Core'dinations
Patterned paper - Susan K. Weckesser
Stamps - Susan K. Weckesser
Ink - Clearsnap
Stickles - Ranger
Pencils - Faber-Castell
Adhesive - 3M

Enjoy!!
http://scraps-of-reflections.blogspot.com/

Tuesday, August 19, 2014

Sugar **Paper House**


Here is a fun card to use for a thank you, a birthday, or just to say hi.  It is feminine but also very country chic.  I used it as a birthday card for my mother-in-law as she lives in the country and is super sweet!!  Happy Birthday Marty!!


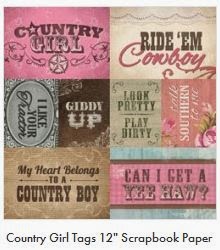
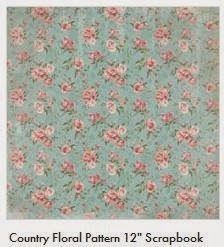
I used tons of layers from all three sheets of the Country Girl Collection from Paper House Productions.  I fussy cut out the flowers, used strips and sections from the Country Girl tags paper (like the strip of lace) and layered them all with the "Country Floral" and "Giddy Up" papers. 

http://www.paperhouseproductions.com/catalogsearch/result/?q=countryhttp://www.paperhouseproductions.com/catalogsearch/result/?q=country
 
http://www.paperhouseproductions.com/catalogsearch/result/?q=countryhttp://www.paperhouseproductions.com/catalogsearch/result/?q=country
 

I topped the card off with the wonderful Garden Chalkboard sticker embellished using a chalk pencil and enhanced the green lines on the chalkboard with white lines and then placed a cute Country Girl Cardstock sticker into the middle.

 http://www.paperhouseproductions.com/catalogsearch/result/?q=countryhttp://www.paperhouseproductions.com/catalogsearch/result/?q=country

Supplies Used
Patterned Paper - Paper House Productions
Stickers - Paper House Productions
Chalkboard Chipboard - Paper House Productions
Chalk Pencil - General's Pencils
Ink - Prima
Adhesive - 3M

Enjoy!!

Share This

Related Posts Plugin for WordPress, Blogger...