Showing posts with label off the rails. Show all posts

Thursday, August 6, 2015

Grow up Sweet **Paper House & Die~Namites Dies & Off the Rails & Xyron**

In the spring of 2015 we tried our hand at planting some snap peas, and they grew wonderfully.  When the Grandparents came to visit Catherine was so proud of her garden she had to show it off.  Grandma had her phone in hand taking pictures of all our plants when Catherine stuck her head through the peas and we got these super cute pictures of her.


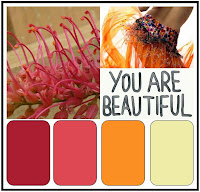
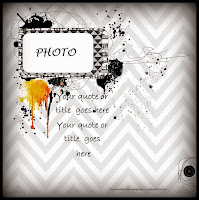
I used the Off the Rails August Mood Board and Sketch as seen below as the starting point for my layout.  The blue colors just did not quite fit into feel of the layout, so I left the out.  That is the beauty of using a mood board or a sketch, they are just launching points to get your creative juices flowing!!  So hop on over for the August challenge and play along at Off the Rails.

http://offtherailsscrapbooking.blogspot.com/
 
I used the wonderful Paper House papers, stickers, cork, and accents to create this project.  They were just the perfect match for colors and theme to go with the pictures of Catherine in the garden, plus no matter what set of papers you work with they all color match so wonderfully!!

http://www.paperhouseproductions.com/


To add that touch of elegance and whimsey I used two Die~Namites Dies in "Elegant Holly" and "Butterfly Frame" behind the photos cut from white cardstock.

http://www.die-namites.com/http://www.die-namites.com/

I cut each die in half and tucked it behind the pictures to frame the photos from underneath, giving it a sort of base for the other elements to build from.


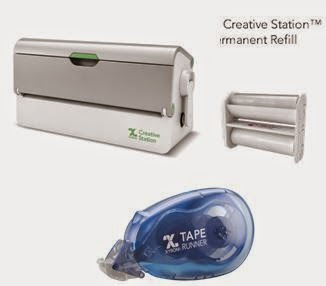
Once the dies were cut I ran the dies and other small Paper House Emerald Accents through my Xyron 3" Sticker Maker to turn all these items into stickers!!

https://www.xyron.com/en-US/


I added some extra elements of glitter, paint, and mists from Tattered Angels to give everything a bit of a pop.


I love catching my kids on these moments, for it really represents their true nature and not just a posed smile.  To me this is one of the best things about having your camera with you at all times; you can catch these amazing quick moments at any time!

Supplies Used
Cardstock - Canvas Home Basics
Paint/Mist/Glitter - Tattered Angels
Ink - Prima
Gems - Prima
Alpha Sticker - Momenta
Cheese Cloth
Ribbon/Trim - May Arts Ribbon
Sewing Machine - Singer
Trimmer/Scissors - Fiskars
 Enjoy!!

Friday, May 29, 2015

"Dad" Mixed Media Card **Canvas Corp Brands & Die~Namites & Xyron & Off the Rails**

I wanted to create a fun funky card for my husband this Father's Day.  I went for rich color in blue, red, and rust, and blended them with kraft and white cardstock and trims to really let the rustic, grungy, and masculine feel of the card show.


I really love how the textures of it all came together, the hard and soft make a wonderful mix-match feel for a great masculine card.  Pairing products from Canvas Home Basics papers and trims to the mixed media of Tattered Angels you cannot go wrong!!

Here is a quick video of how I made this mixed media card.


I used the wonderful products from Canvas Corp Brands, Die~namites Dies, Craftwell, and Xyron to create this wonderful card.

http://shop.canvascorpbrands.com/

http://www.die-namitesblog.com/https://www.xyron.com/en-US/

I also used this wonderful mood board from Off the Rails Scrapbooking as my jumping off point for this card, come join in on their wonderful June Challenge!!

http://offtherailsscrapbooking.blogspot.com/

Here are some up close shots of the wonderful texture from the embossing folders with all the amazing layers of colors from mists and mediums.


Don't forget your wonderful Dad's this Father's Day!!

Supplies Used
Card - Canvas Home Basics
Fringe - Canvas Home Basics
Cardstock - Canvas Home Basics
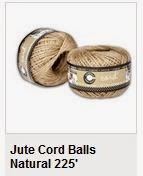
Jute - Canvas Home Basics
Paper Tape -  Canvas Home Basics
Fabric -  Canvas Home Basics
Mists/Paints - Tattered Angels
Mediums - Prima
Dies - Die~Namites
Embossing - Craftwell

Scissors/trimmer - Fiskars
Adhesive - Xyron
Enjoy!!

Thursday, February 5, 2015

I Adore You **Tattered Angels & Canavs Corp & Off the Rails**

I wanted to make a Valentine's Day card for my backyard neighbor.  She has been so sweet to me since we moved in by having my kids over to play, bringing me a bottle of wine, inviting us to parties, being my ballet instructor, and just being sweet.  I could not ask for a better neighbor!!  So why not give her something unexpected with a sweet card, Valentine's Day is not just for your partner/spouse/lover it is also for those you care about!!


Inspiration for this card is the mood board below from Off the Rails.  I just loved the feel of it, it seemed romantic and flirty, so it made me think of Valentine's Day.  You can join the challenge using this mood board until the end of the month!!

Latest Mood Palette

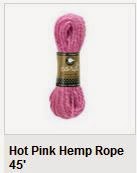
In the center of the card are two little envelopes from Canvas Corp, I wrapped them up in Pink twine from Canvas Corp and cut out a heart from canvas and sprayed it with Tattered Angels Black Cherry Glimmer Mist, wrapped it in natural twine, added a strip of hearts paper,  and then topped it off with the super cute little cork sticker from Paper House.


http://shop.canvascorpbrands.com/pages/canvas-home-basicshttp://shop.canvascorpbrands.com/pages/canvas-home-basics
 
http://shop.canvascorpbrands.com/pages/canvas-home-basicshttp://shop.canvascorpbrands.com/pages/canvas-home-basics
 
 
Inside each of the envelopes I added a little card for each of the little girls in my neighbor's house, they need Valentine's too!!  I simple cut out paper to fit in the envelopes (2.25 x 3.5 inches), added a little square of kraft paper, and a punched heart from a hot pink paper.  On the back I simply wrote Happy Valentine's Day to each of the girls.

http://shop.canvascorpbrands.com/pages/canvas-home-basicshttp://shop.canvascorpbrands.com/pages/canvas-home-basics
http://shop.canvascorpbrands.com/pages/canvas-home-basics
 
 
Behind the enveloped I used the Valentine's Paper form Canvas Corp and backed it with kraft paper all inked in a red chalk ink (Rose Bud) from Prima.  In the end I spattered the entire card with the same mist as above by unscrewing the applicator and tapping the end of it around the card to make splatters.


Come play and win over at Canvas Corp!!Click below to see info.

http://blog.canvascorpbrands.com/crew-challenge-valentine-cards/


My challenge to you is to create a fun Valentine for someone unexpected - it is always nice to see someone smile :)

Supplies used
Ink - Prima
Punch - EK
Trimmer/Scissors - Fiskars
Adhesive -  Beacon & Scotch
Enjoy!!
 

Tuesday, August 5, 2014

Hello **Off the Rails & Just Imagein & Birds of a Feather**

Here is yet another one of the beautiful pictures of my daughter that was taken when she turned one.  I just loved this little dress and bonnet, I am so bummed when she grew out of it.  We took the pictures in our backyard and I am so glad we took them there because we moved a month later.  We worked so hard to make the back yard beautiful, adding in planters, landscaping, it was just perfect for pictures.


I used the wonderful sketch and color pallet from the August off the Rails Challenge with Lawn Fawn.  So come join along and play in the fun.

http://offtherailsscrapbooking.blogspot.com/http://offtherailsscrapbooking.blogspot.com/

 Here is also a really fun event to join in on this Saturday!!

 http://offtherailsscrapbooking.blogspot.com/

I wanted to add texture to all the layers I added into the layout behind the picture.  I so punched every corner with Kreaxions punch 907 from Just Imagine.  The texture of the stamp matched the edges of the tags I used on the layout perfectly!!


http://www.justimaginecrafts.com/catalog/product_info.php?cPath=26_50&products_id=205

Supplies used
Patterned paper - Pink Paislee
Flowers - Prima
Embellishments - Fancy pants, Pink Pasilee, Recollections, Other
Mists - Ranger, Heidi Swapp, Tattered Angles
Ink - Ranger, Prima
Enjoy!!

http://scraps-of-reflections.blogspot.com/

Friday, May 9, 2014

Texas Bluebonnets **Paper House & Just Imagine & Off the Rails**

Every year I love to take my kids out to the bluebonnets to take pictures.  It is almost a mandatory thing to do when you live in Texas, stick your kids in the flowers and take a picture.  This year with all the freezing the flower were everywhere and so pretty, best year in a long time.  Since we moved to central Texas I can find patches 5 minutes from my house, so there was no excuse to get pictures this year.  I got tons of pictures and this is one of those beauties.


I used tons of papers from Paper House to create this layout, the base of the layout is the Texas Territories 12x12 paper with layers from the 100% Country 12x12 paper stack.  I then added in texture with mediums, pens, Gelatos, and Gelato mists from Faber-Castell.

http://www.paperhouseproductions.com/

http://www.paperhouseproductions.com/

The first step is to create the foundation of the layout.  I start with my background page from Paper House and added in the mediums of Gesso and Whipped Spackle from from Faber-Castell with stencils and let it dry.   I did many layers (with drying time in between) with a couple of different stencils to get the look I wanted - rustic!

I then took the Gelatos and rubbed them directly onto the dried mediums in various colors of browns, yellows, greys, and oranges. 

Then I took the water brush and blended them all in and let it dry.  I took the brown and Blue Gelatos and made them into mists and added paint splatters and sprays all over the base of my layout with the Mist Maker set.


I then took the Big Brush Pen in Blue and the Blueberry Gelato and added in more colors of blue around the page to draw out the colors of the Bluebonnets from the picture.  Here and there I added in some more brown with the Brown Big Brush Pen.  I used the same pen and gelato to color the chipboard swirl behind the picture.  Using the tools from the Gelato tool set I blended the colors on the mediums on the background and the chipboard with the dauber, chisel, and my finger.

 
At this point I added in my other layers of papers, glued down my flowers, added in stickers, and then sprayed and dripped on some more of the gelato mist so the new items did not look so clean next to my grungy background.


I used the wonderful chalkboard stickers from Paper House as my journaling spot.  I used a silver gel pen to write on it and it worked wonderfully!!  I even added in a little Puffy Sticker Butterfly in green from Paper House as it match just perfectly!!


http://www.paperhouseproductions.com/http://www.paperhouseproductions.com/

I used some of the stickers from the Family Heritage Cardstock sticker pack as a small title and also as background strip for more dimension and layering on top of he wonderful papers.  I also added in another little Puffy Sticker Butterfly in blue as it too matched the Family Heritage Cardstock stickers perfectly!!


http://www.paperhouseproductions.com/
You can see here how I used the wonderful circle cutter from Just Image.  I cut them at 6 inches and 5 inches and used them as texture layers behind the picture.  I also used Kreaxions punch 923 with the corner punch insert B on the burlap texture paper for even more dimension.

http://www.justimaginecrafts.com/catalog/
 http://www.justimaginecrafts.com/catalog/

I added some more grey and silver gelato mist and to the flowers to help them blend into the layout, without the mists and ink they stood out more than the picture.


If you love using chipboard come take a look at Off the Rails Challenge and enter to win a prize!!

Supplies used
Cardstock - DCWV
Patterned Paper - Paper House
Stickers - Paper House
Flowers - Prima and Petaloo
Mist/Paint - Faber-Castell
Ink - Prima
Punch/Circle cutter - Kreaxions - Just Imagine
Stencils - Ranger & TCW
Chipboard - Memory Maze
Trim - Other
Big Brush Pen - Faber-Castell
Mist maker set - Faber-Castell
Pen - Gelly Roll
Molding Paste - Liquitex

Enjoy!!

Share This

Related Posts Plugin for WordPress, Blogger...