Showing posts with label DIY. Show all posts

Friday, May 24, 2019

DIY Beach Themed Memory Game Using Scrapbook Paper

Such a fun idea to make your own games for the summer - not only do you get the fun of making the game, but then you also get the fun in playing the game.  My daughter loves to play memory, so we took some scrapbook paper and had a blast making our own game with a beach theme.

This post also contains affiliate links and I will be compensated if you make a purchase after clicking on my links.  Various companies provided me with some product to create this project.  The opinions I share are solely my own.


Check out the video to see how to make your own memory game!!


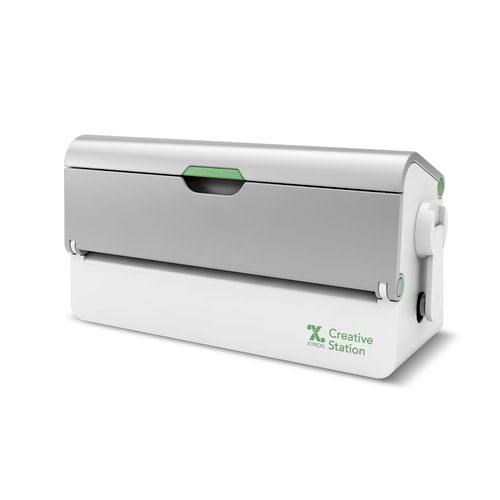
My daughter and I started out picking out fun papers.  Scrapbook paper is easy, especially the ones that are already segmented into 3x4 sections.  We found a fun summer beach pack from Paper House and cut out the paper we wanted, the best part was the paper pack had multiple sheets of the exact same paper with a white background - perfect for memory.  We then placed the cut cards, we made 24 cards total, so 12 pairs and ran them through the Xyron Creative Station with the laminate refill.


We decided to laminate all the papers to they would last longer and be water proof!!


They are super easy to cut out, scissors glide through the laminate paper like butter!


Then it is just a matter of playing a game, or 10!!  Fun way to use up your scrapbook paper and make a great game for the kids!!

Supplies Used
Interested in the supplies I used in this project?  Most are listed below and some are affiliate links, which generates a me little commission (at not extra cost to you at all) when you click on the link and make a purchase.  Affiliate and product disclosure can be found here.


Brightech - Lightview Magnifer Lamp - Video Set Up
Shop at:
O
Amazon Storefront
Amazon Storefront
Shop at:
AZ
Favecrafts
Favecrafts
Shop at:
O
Logitech Camera
Logitech Camera
Shop at:
AZ
Xyron Creative Station
Shop at:
SB | AZ
Fiskars Scissors 8
Fiskars Scissors 8"
Shop at:
AZ
Fiskars Paper Trimmer
Shop at:
SB | AZ
Xyron 9
Xyron 9" Laminate
Shop at:
AZ
PHP Beach Stickers
PHP Beach Stickers
Shop at:
PHP
PHP Beach Paper Pad
PHP Beach Paper Pad
Shop at:
PHP
Black Craft Mat
Black Craft Mat
Shop at:
AZ


Saturday, March 16, 2019

DIY Candles using Paprika for Dye & Fresh Flowers in an Etched Votive

I love making gifts for people, and creating something that gives a feeling of warmth, caring, and it smells great is always a plus.  So with this in mind I tried my hand at candle making.  It is so easy and really fun to make! 

This post also contains affiliate links and I will be compensated if you make a purchase after clicking on my links.  Various companies provided me with some product to create this project.  The opinions I share are solely my own.


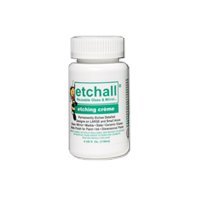
I started by etching the votives that the candles are going into.  I used Etchall creme with vinyl as a mask to give sections of the glasses an etched or frosted look and then leaving part of the glass plain.


Check out this video tutorial to see how to etch the glass and also make the candles.


I then gathered all my supplies to make the candles.  Watch the video to see how each was used and how to make the candles!


They look really cool when filled and you can see the flowers popping out of the dyed wax in the etched votive.  You can really see the etching in these votives, and each votive is a bit different!


They look so pretty when lit, and the smell from the orange essence is amazing!!  It is also a great way to preserve the flowers in my garden at the peak of spring.


These burn wonderfully and smell great!!  I am going to keep this batch for myself, but I will be making more to give for gifts :)

Interested in the supplies I used in this project?  Most are listed below and some are affiliate links, which generates a me little commission (at not extra cost to you at all) when you click on the link and make a purchase.  Affiliate and product disclosure can be found here.


Amazon Storefront
Amazon Storefront
Shop at:
AZ
Logitech Camera
Logitech Camera
Shop at:
AZ
Etchall Creme
Etchall Creme
Shop at:
AZ | O
Etchall Squeegee
Etchall Squeegee
Shop at:
AZ | O
Paprika
Paprika
Shop at:
AZ
Etchall Vinyl
Etchall Vinyl
Shop at:
AZ | O
Black Craft Mat
Black Craft Mat
Shop at:
AZ
Glass Votives
Glass Votives
Shop at:
AZ
Parafin Wax
Parafin Wax
Shop at:
AZ


Wednesday, January 10, 2018

How to Make Inspirational Sticky Notes

I love being able to use up my scraps of papers in my stash but also make something useful.  I found some old sheets of papers (and I mean old, like over 10 years old for some) of scrapbook paper that I thought would be fun to make into DIY sticky notes with my Xyron Creative Station.  I did not want to just make plain old sticky notes, I wanted something that had an inspiration note on it each day, so stamps to the rescue!!


Here is a video tutorial on how to make these fun sticky notes with a little heart.


I started with some papers that have been in my stash for ages, and I wanted them thin, more like stick note thicknesses of paper, not a thick cardstock.  I love being able to use up supplies in my stash and I have had some of these papers for ages!!  I started by cutting the scrapbook sheets down to a 4x4 size.  I then stamped each page with a fun sentiment from various stamps sets I had in my stash that all had positive emotions tied in with it.


I then added the stamped papers in to my Xyron Creative Station to make the tops of each paper sticky like a sticky note with the 9in CS Repo Adhesive Refill.  This is super simple and such a cheap way to make sticky notes, and the best part is you can make them any color you want!!  I then attached the set of sticky notes all layered on top of each other onto a mini sign holder as a stand.


Now I can tear off sheets as I want and each one has a inspirational message on it to give me all the warm fuzzies.


You can keep this fun sticky notes set for yourself, or give it as a fun gift to someone special.  It is great as teacher gift, mother's day gift, grandparents gift, or Valentine's Day gift!  Even the kids can get into it and help make sets!!

Supplies Used
Interested in the supplies I used in this project?  Most are listed below and some are affiliate links, which generates a me little commission (at not extra cost to you at all) when you click on the link and make a purchase.  Affiliate and product disclosure can be found here.


Rita Barakat Products
Shop at:
O
Large Acrylic Block – Brutus Monroe
Shop at:
SB
Detail Ink Raven
Detail Ink Raven
Shop at:
SB
Xyron Creative Station
Shop at:
SB | AZ
Brutus Monroe Stamps
Shop at:
SB | O
Fiskars Paper Trimmer
Shop at:
SB | AZ
Tombow Twintone Pens
Shop at:
AZ
Xyron Reprositiionble Adhesive Refill
Shop at:
SB | AZ
Deflecto Mini Sign Holder
Shop at:
AZ


Friday, May 8, 2015

Reward Chart **Xyron & Paper House**

I did something a bit different this time, an award chart for my kids. I have made so many paper ones (printed, made by hand, or just throwing stickers on a paper) for earning things to try and eliminate bad behaviors (hitting, acting up at school, not getting along with siblings) or try and instill good behavior (potty training, good days at school, etc) and I hate to create a new one each time.  So now I have created one that all I do is change up the name, goal and prize to reaching the goal.  For my boys it is getting along at home.  They earn a magnet on the chart for time they spend together and do not fight!!!


https://www.xyron.com/en-US/

This machine is so cool it fits both the 9" and the 5" refills for any of the cartridges!!

https://www.xyron.com/en-US/
https://www.paperhouseproductions.com/

Paper House Snapshot Stickers in Dogs, Cats, Football, Baseball, and Soccer.


Pull off the foam sticker on the back of each Paper House Snapshot sticker and run it through the machine. 
   

Cut each image out with scissors and boom a magnet!!  


I had a ton of left over magnetic pieces left from cutting out the Paper House Snapshots and I did not want to waste it so I cut them up and fit them on the back of the various puffy stickers, letting the sticker be the adhesive to the magnetic laminate front, and viola more magnets!!

https://www.paperhouseproductions.com/

Various Paper House Puffy Stickers Used - Frogs, Dino, Polar, Trucks, Owls, Foxes, Sports, and Baby Girl.

Scraps left!


Cut out sections of cardstock in pink and red and using the Xyron® Tape Runner glued them to the inside top and sides.

https://www.xyron.com/en-US/

I then created little boxes out of colored cardstock (yellow, green, and pink) to act as holders for the extra magnets, below is the diagram.


Create the little boxes to the size of the large box you are using.  My dimensions were 8.5 " long, 6" wide, and 2" squares for the corners.


I then laminated them with the Xyron® CreativeStation 9” Creative Station Laminate Refillso they would be sturdier.


Cut off the excess plastic and re-cut the section at the corners.


Hot glue the edges to hold the laminated box together and then glued the little laminated boxes inside the larger box at the bottom.


Use the black alpha stickers to spell out "Child", "Goal", and "Prize" at the top of each of the boxes.  Write the words the name of the child(ren) doing the reward, the reward, and the prize on red cardstock and attached them to the front of the boxes with a spiral clip.  These cards can be changed out each time there is a new reward, new prize, or new child earning something so this reward chart can be used over and over again!!!


I glued the bought blue magnetic board inside the large box (up-cycled from a paper kit I received as a present years ago), popped a sticker title at the top with the orange washi tape as my underline, and added some fun washi tape around the edges of everything!
 
  
Add the magnets to the board as the kids earn their rewards and store the extra in the boxes at the bottom!!

 
Use any size leftover box (pizza box, top of a paper box, etc) as the base of your project.  Have the kids tell you there favorite colors and help them pick out the stickers for the reward chart lets them be part of the project!  If you have older kids they can also help you make the magnets and cut them out, they love the turn the handle on the Xyron® Creative Station.
 

Supplies

Alpha Stickers - Kaisercraft & American Crafts
Washi Tape - Recollections
Spiral clips - recollections
Dollar Store blue magnetic board
upcycled box from a craft kit
Marker - Sharpie
Enjoy!!

Share This

Related Posts Plugin for WordPress, Blogger...